Queen Alexandra Panelized Deep Retrofit
This home was one of North America’s first three single-family homes to get a panelized deep retrofit. The project transformed the 70-year-old house into a high-performance building.
| Building Type | Single-Family Bungalow | Location | Edmonton, AB |
| Year Built | 1954 | Foundation Type | Concrete (Full Basement) |
| Structure Type | Wood-Framed | Post-Retrofit Total Floor Area | 201.7m2 |
| Climate Zone | 7a | Heating Degree Days | 5120 |
| Retrofit Status | Complete | Year Completed | 2023 |
| Retrofit Phasing | No | Geometry Changed | No |
| Annual Energy Savings | 66.54% | Operational Carbon Savings | 3.79 tCO2eq/y |
| Retrofit Type | Envelope and Mechanical | Performance Level | Net-Zero Ready |
Project Team
- Butterwick Projects ( Builder )
Project Priorities
- Reduce Energy Consumption
- Achieve Net Zero or Net Zero Ready
- Increase Thermal Comfort
- Improve Indoor Air Quality
- Reduce GHG Emissions
- Repair and/or Renew Exterior
- Improve Home Value
Upgrades
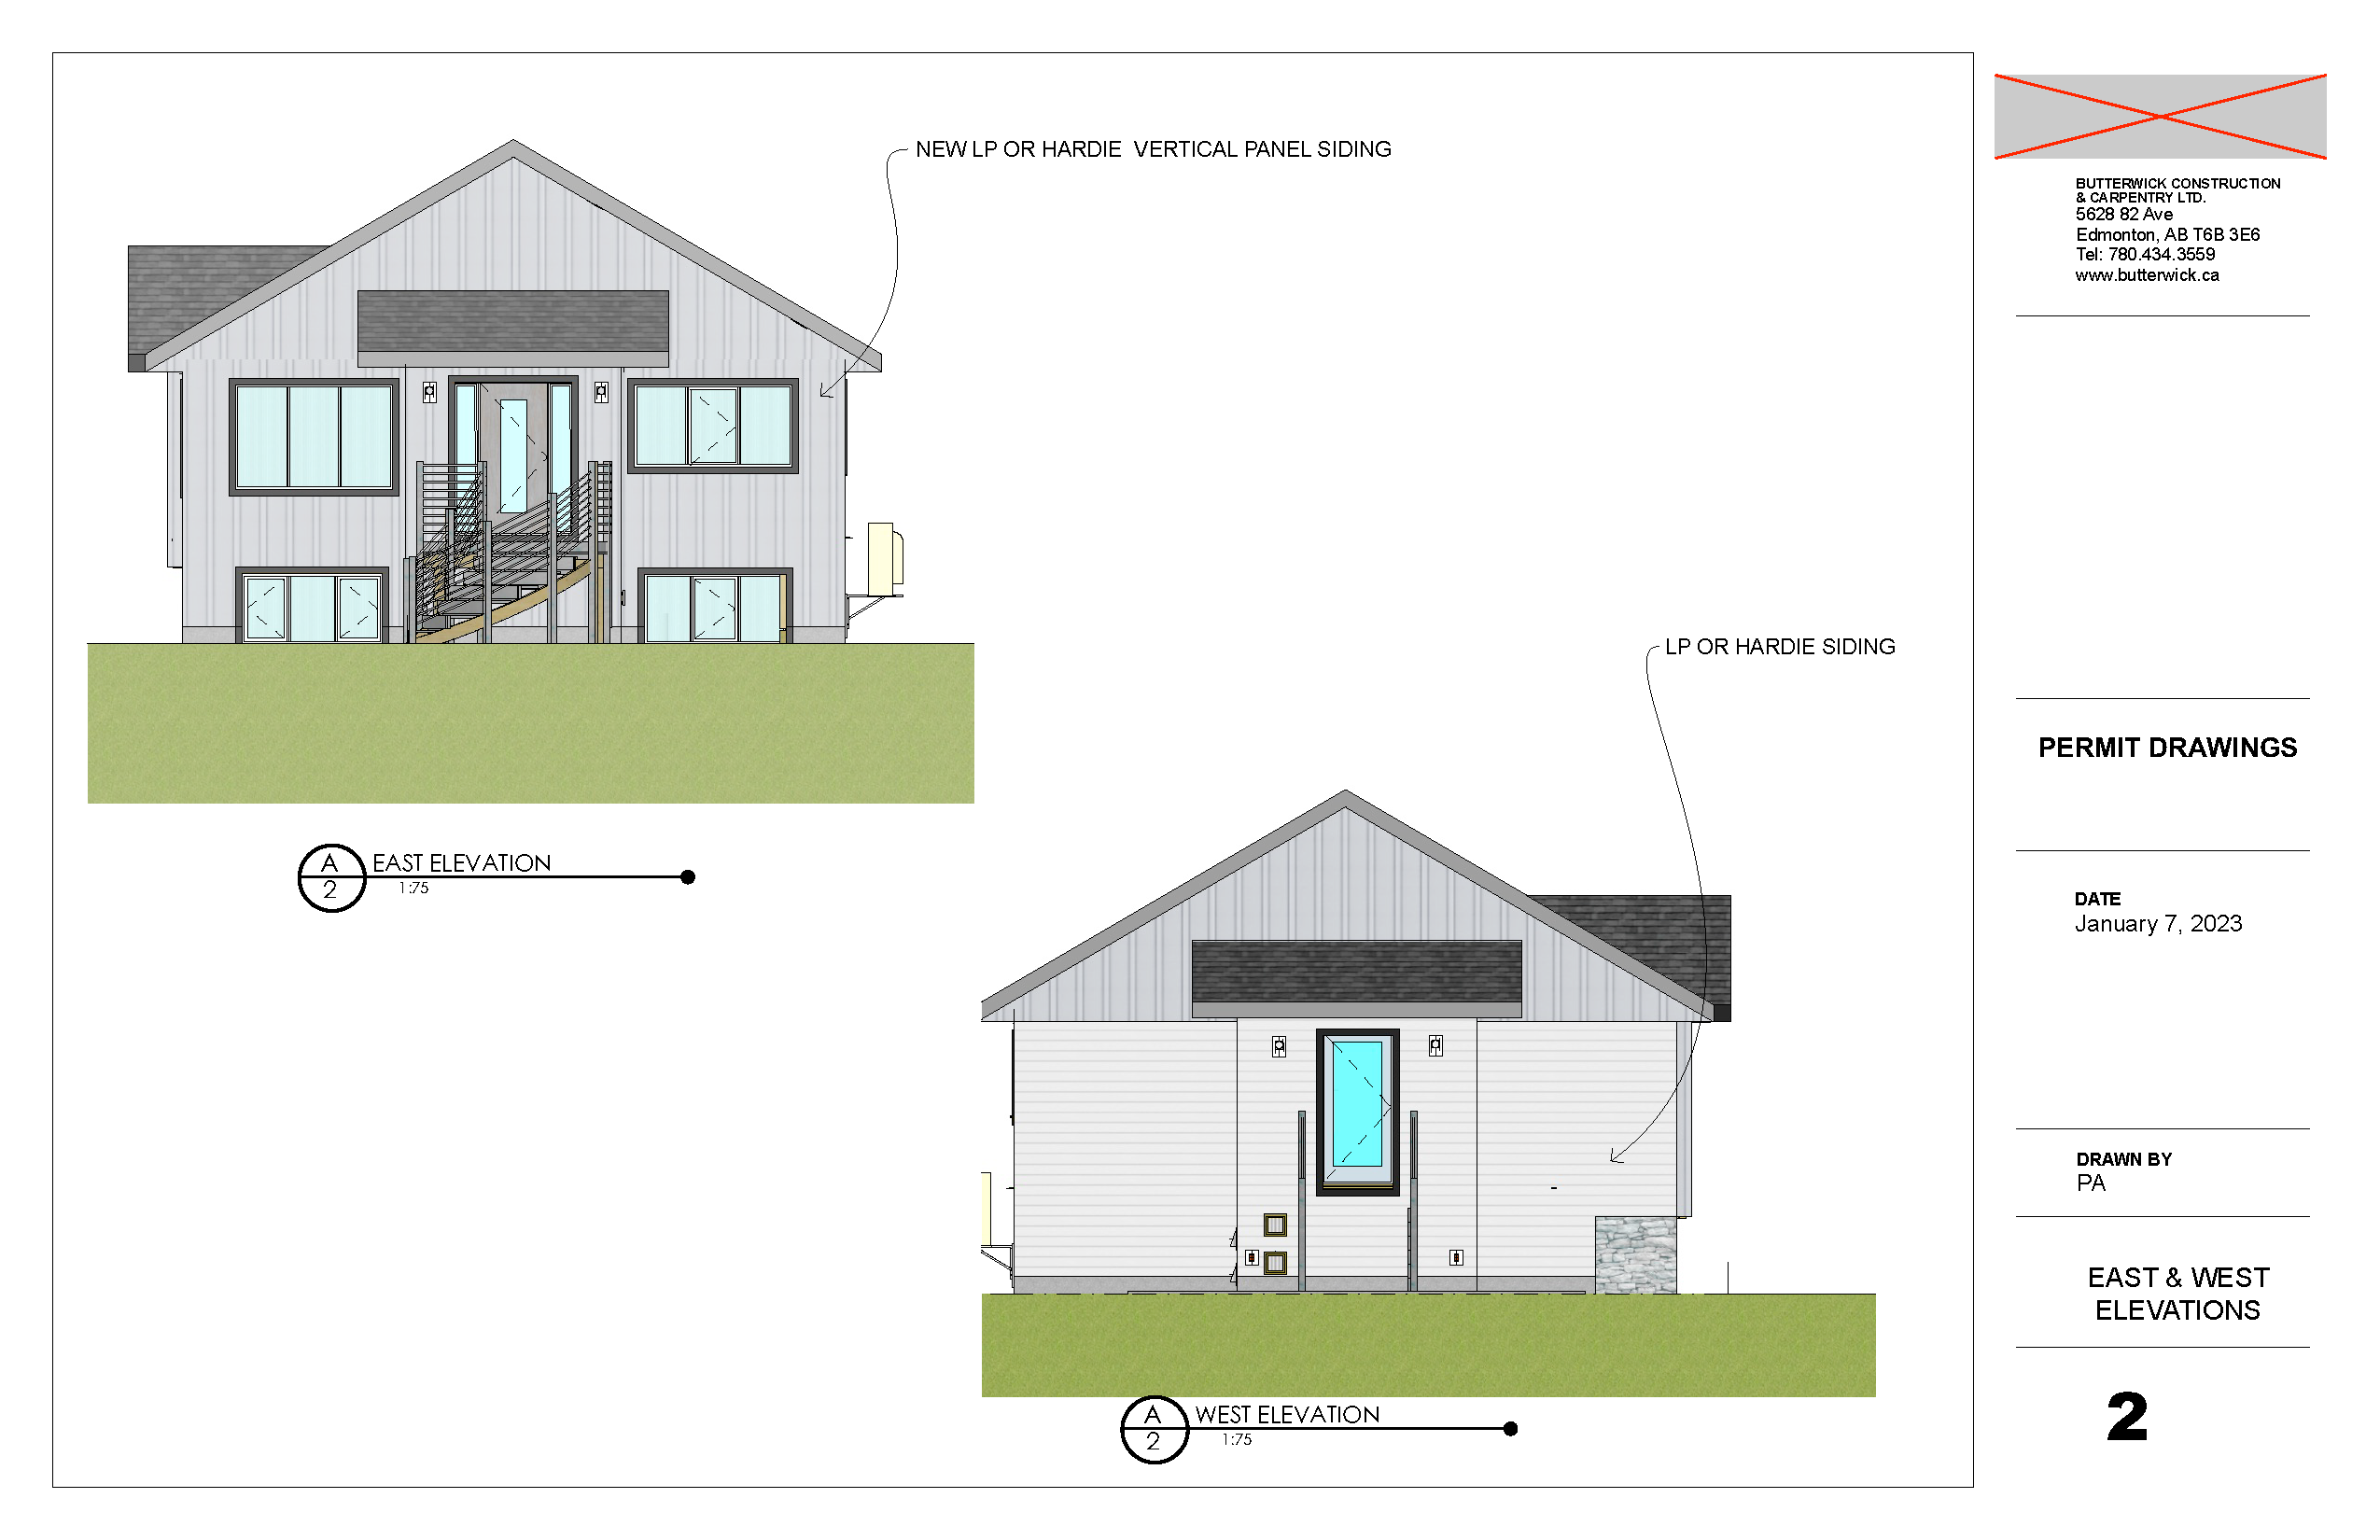
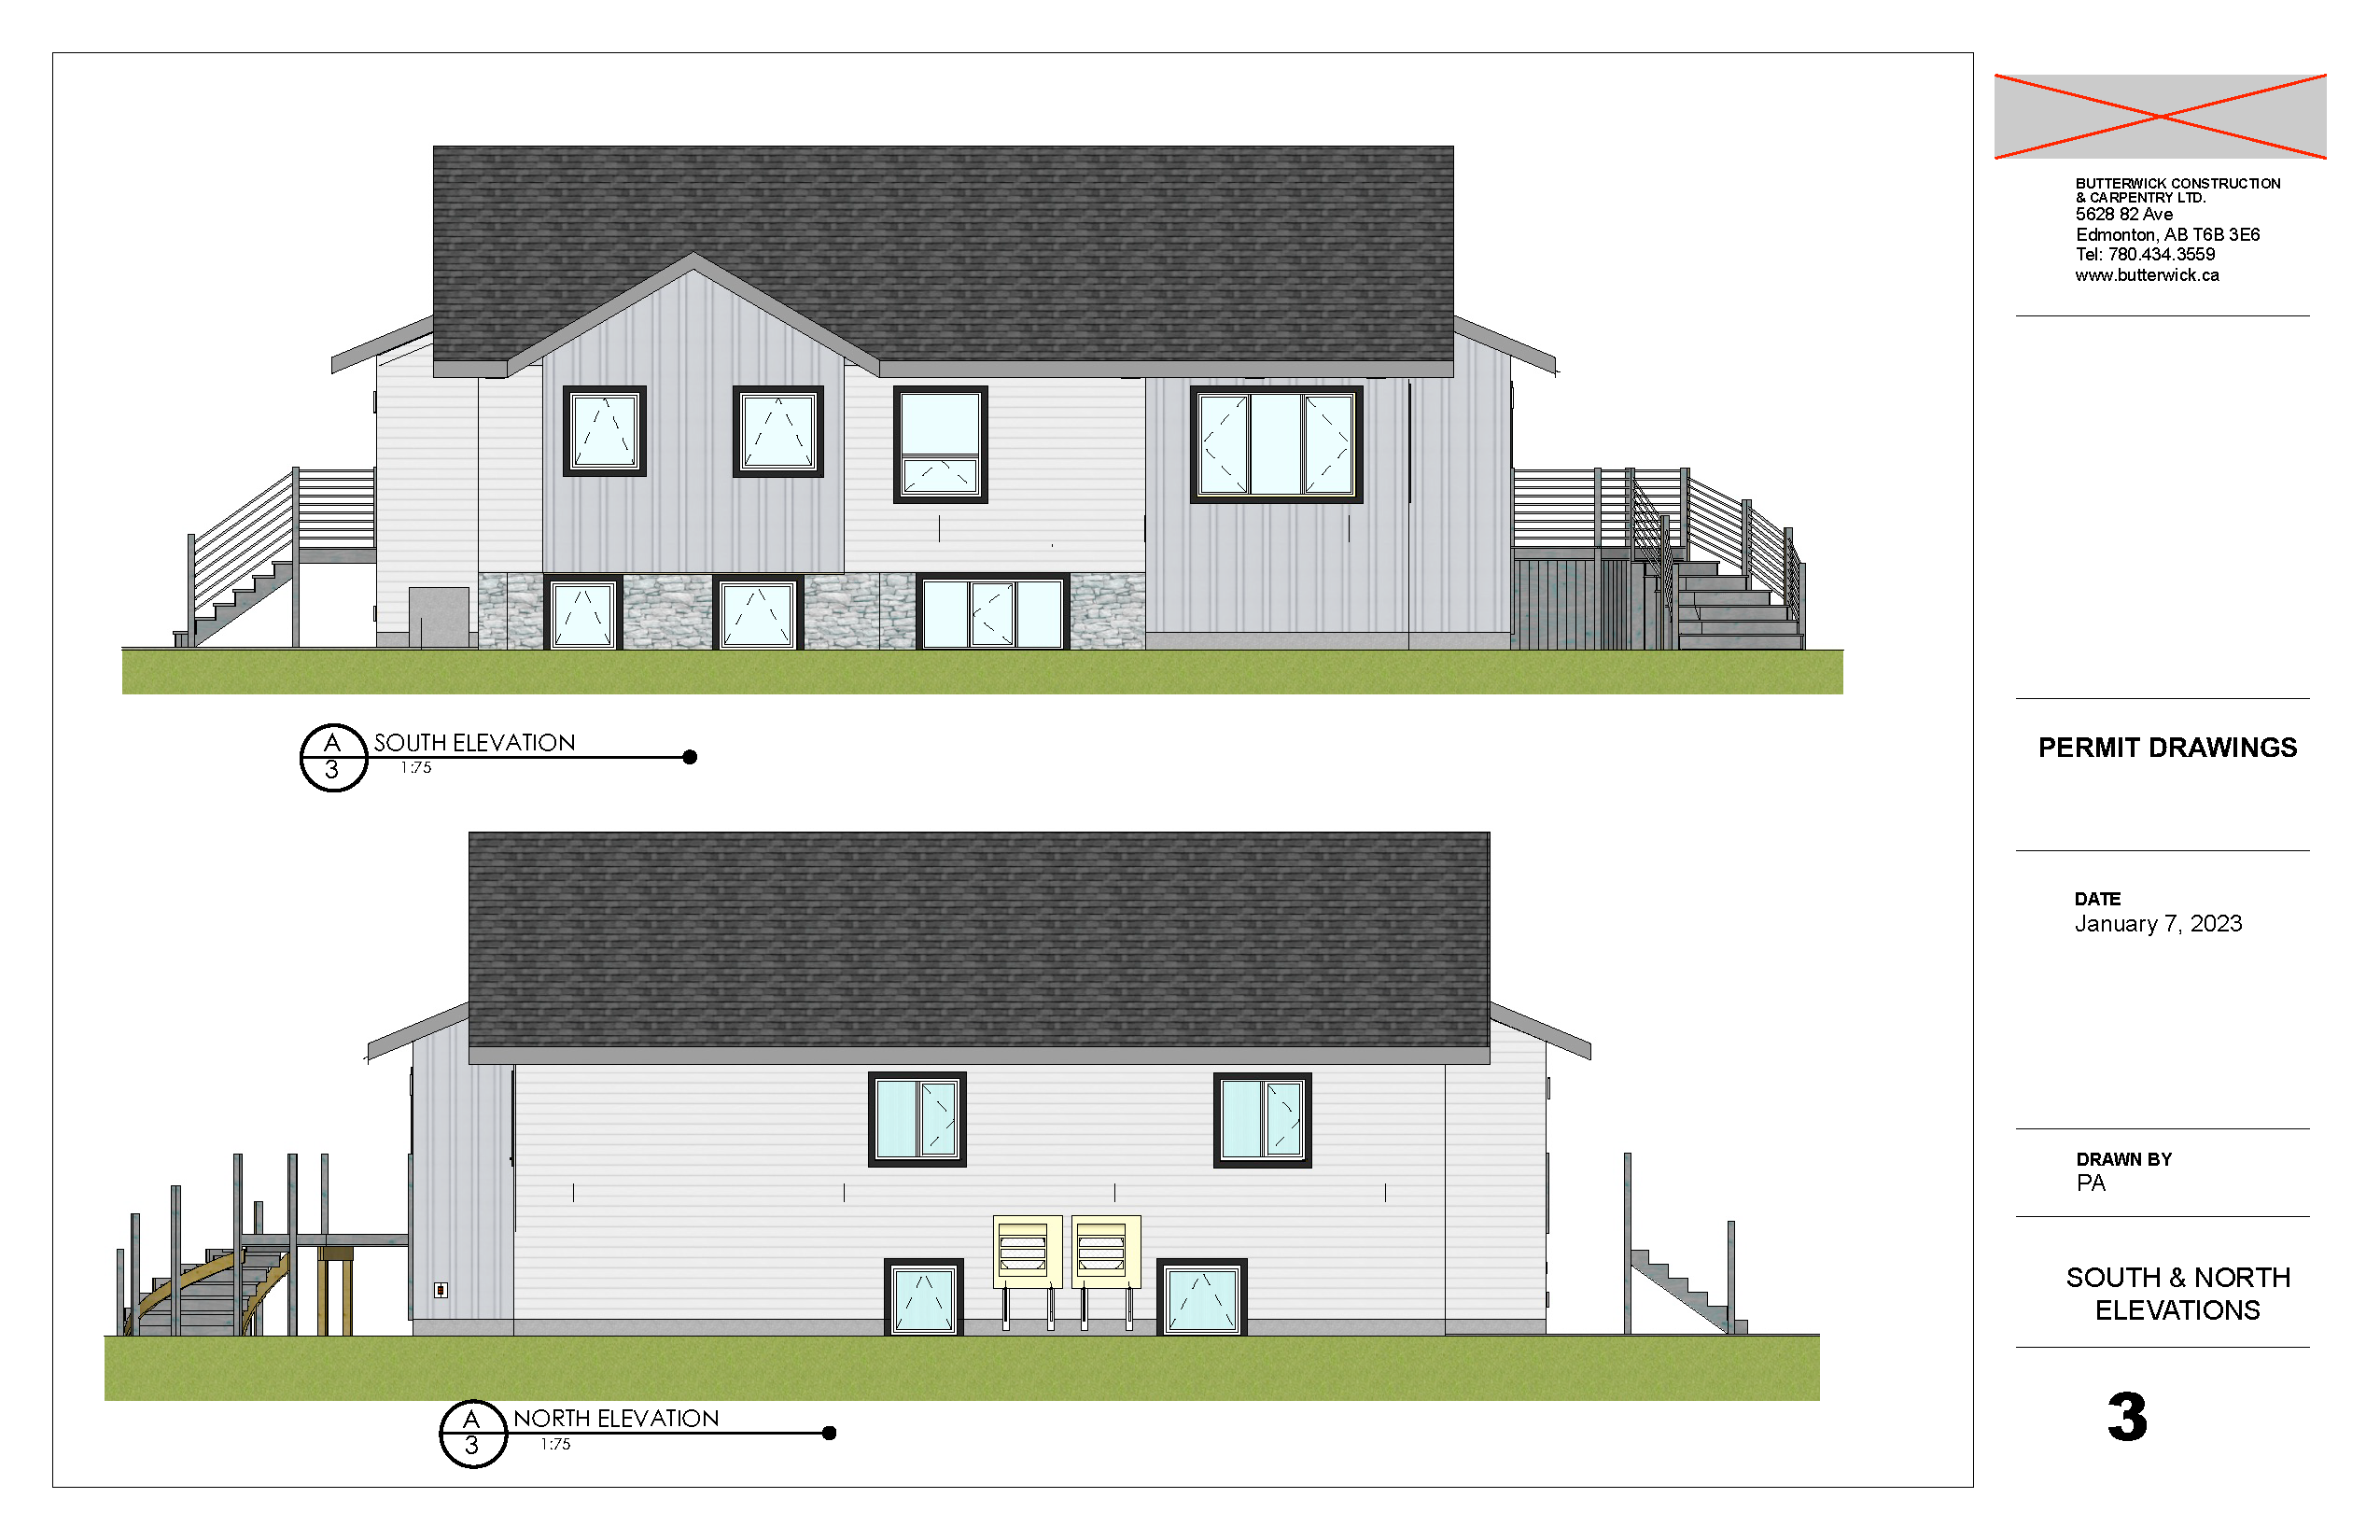
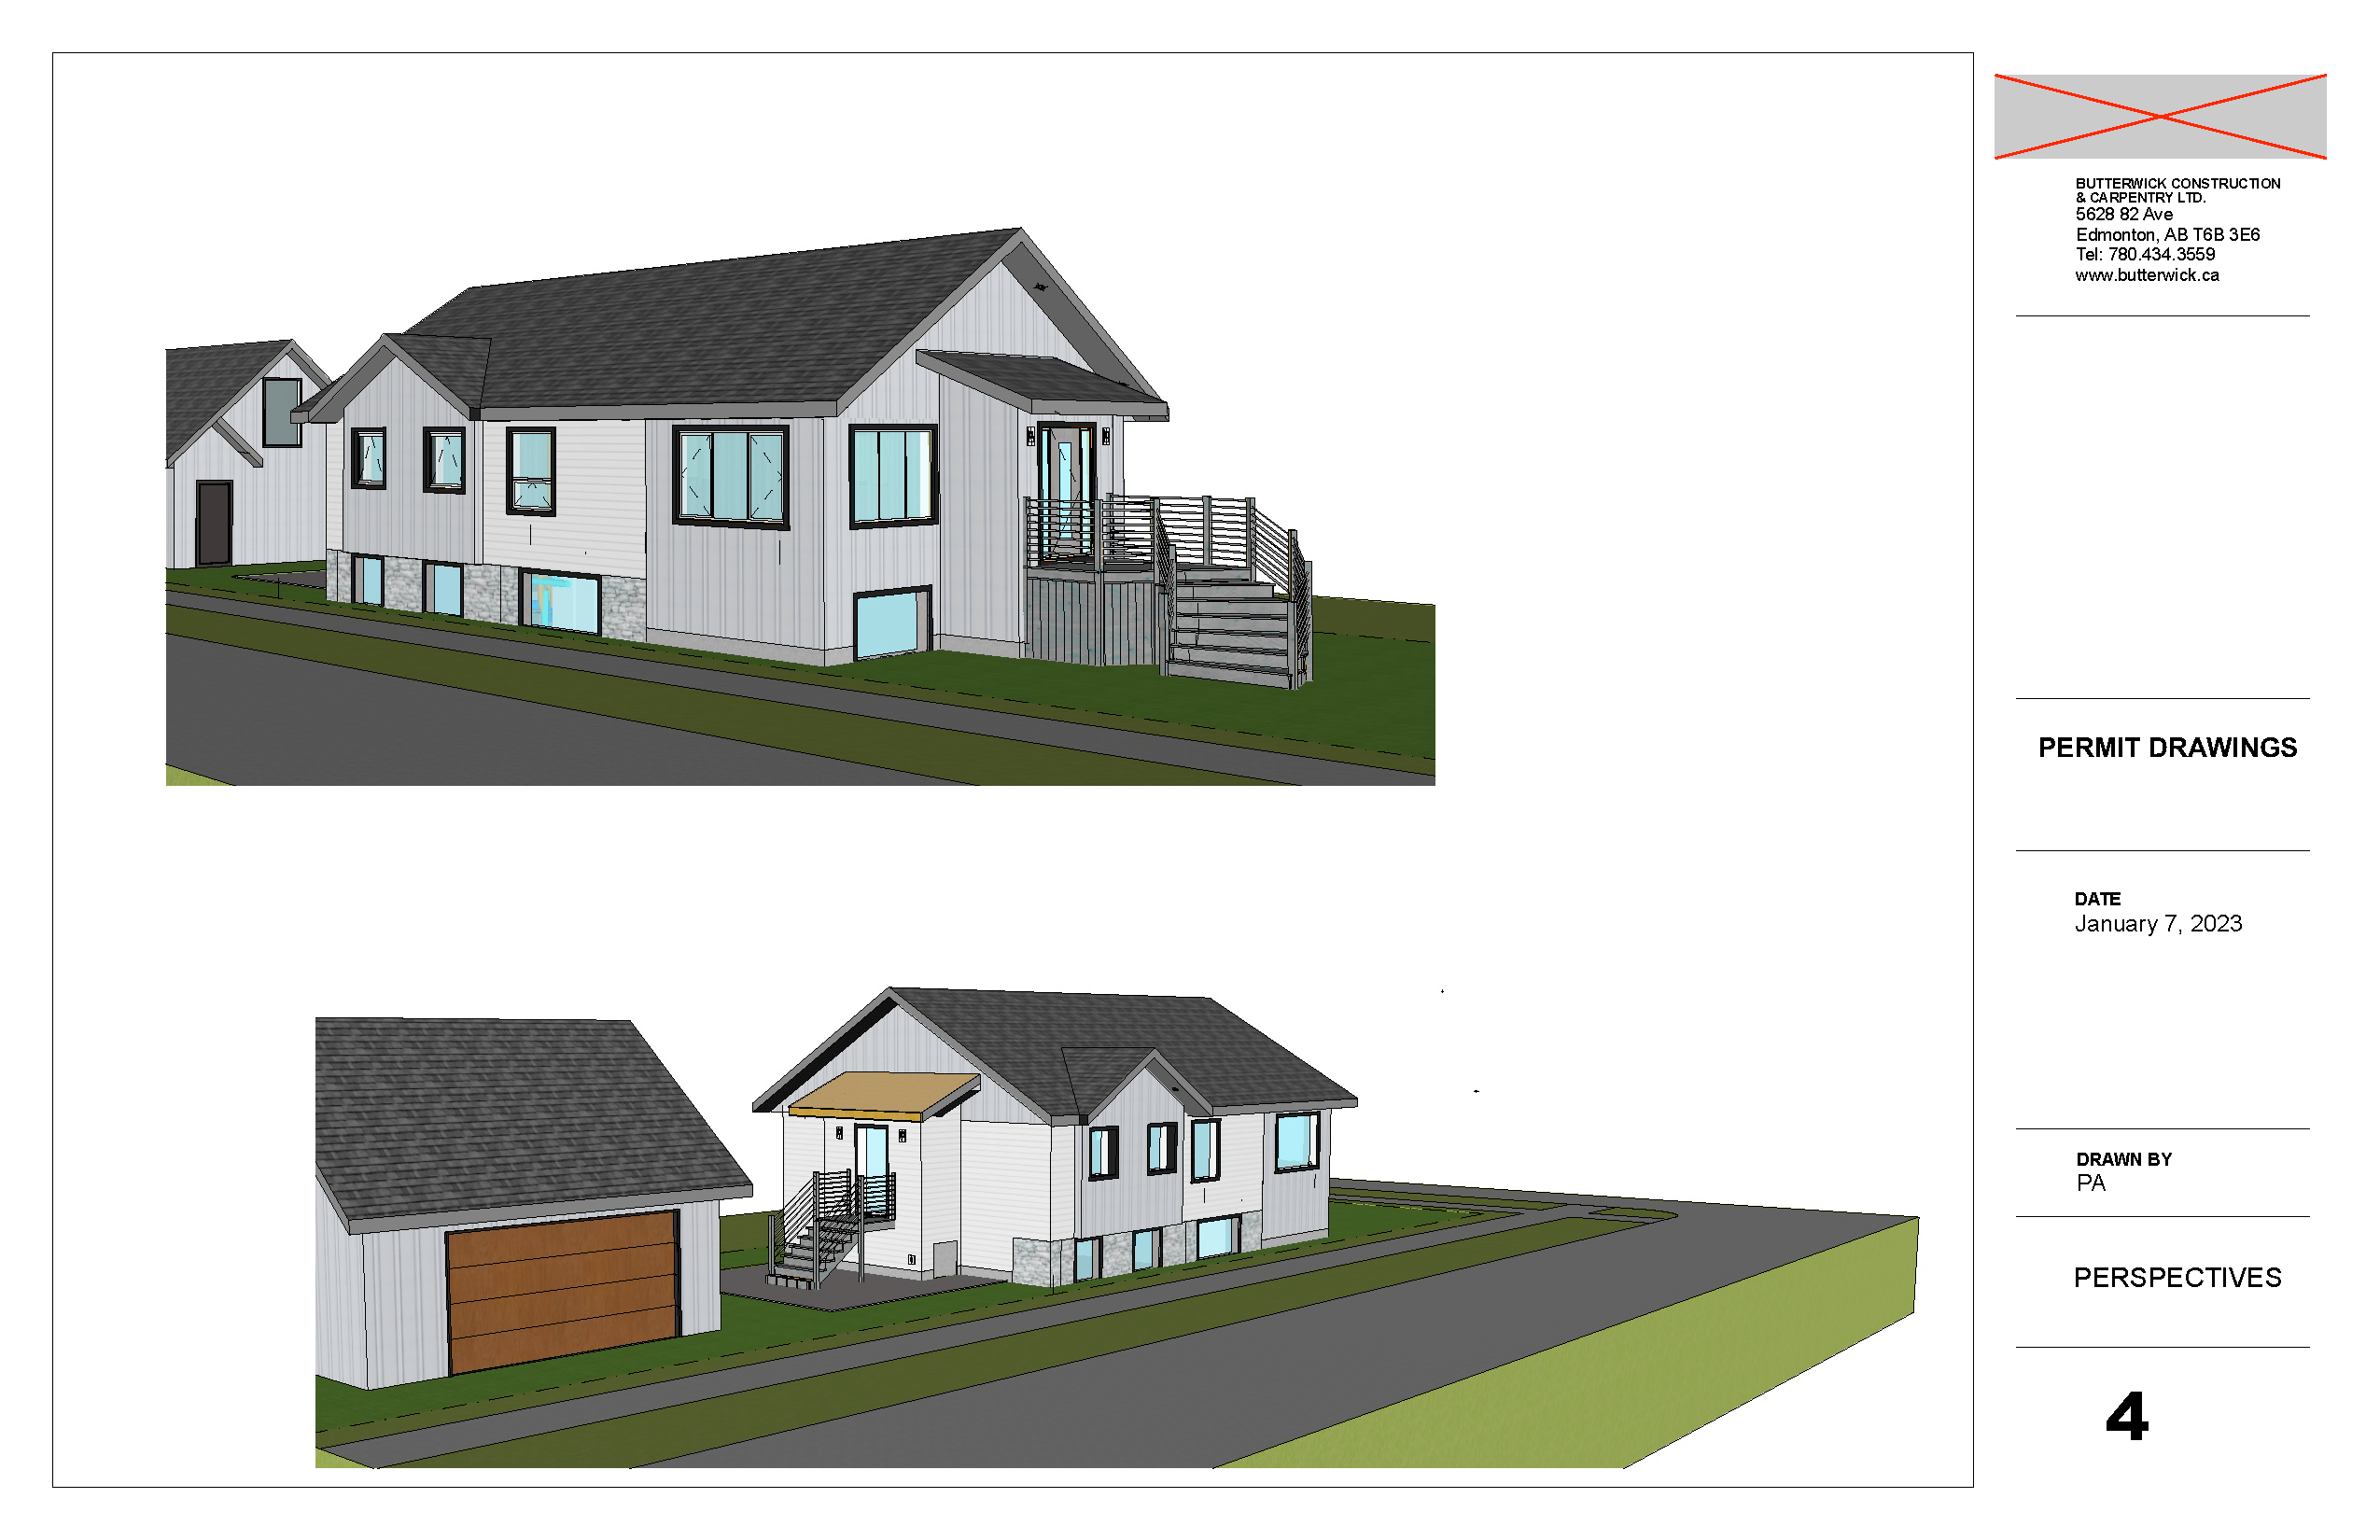
- Rejuvenated exterior
- Dramatically improved insulation in foundation, walls and attic
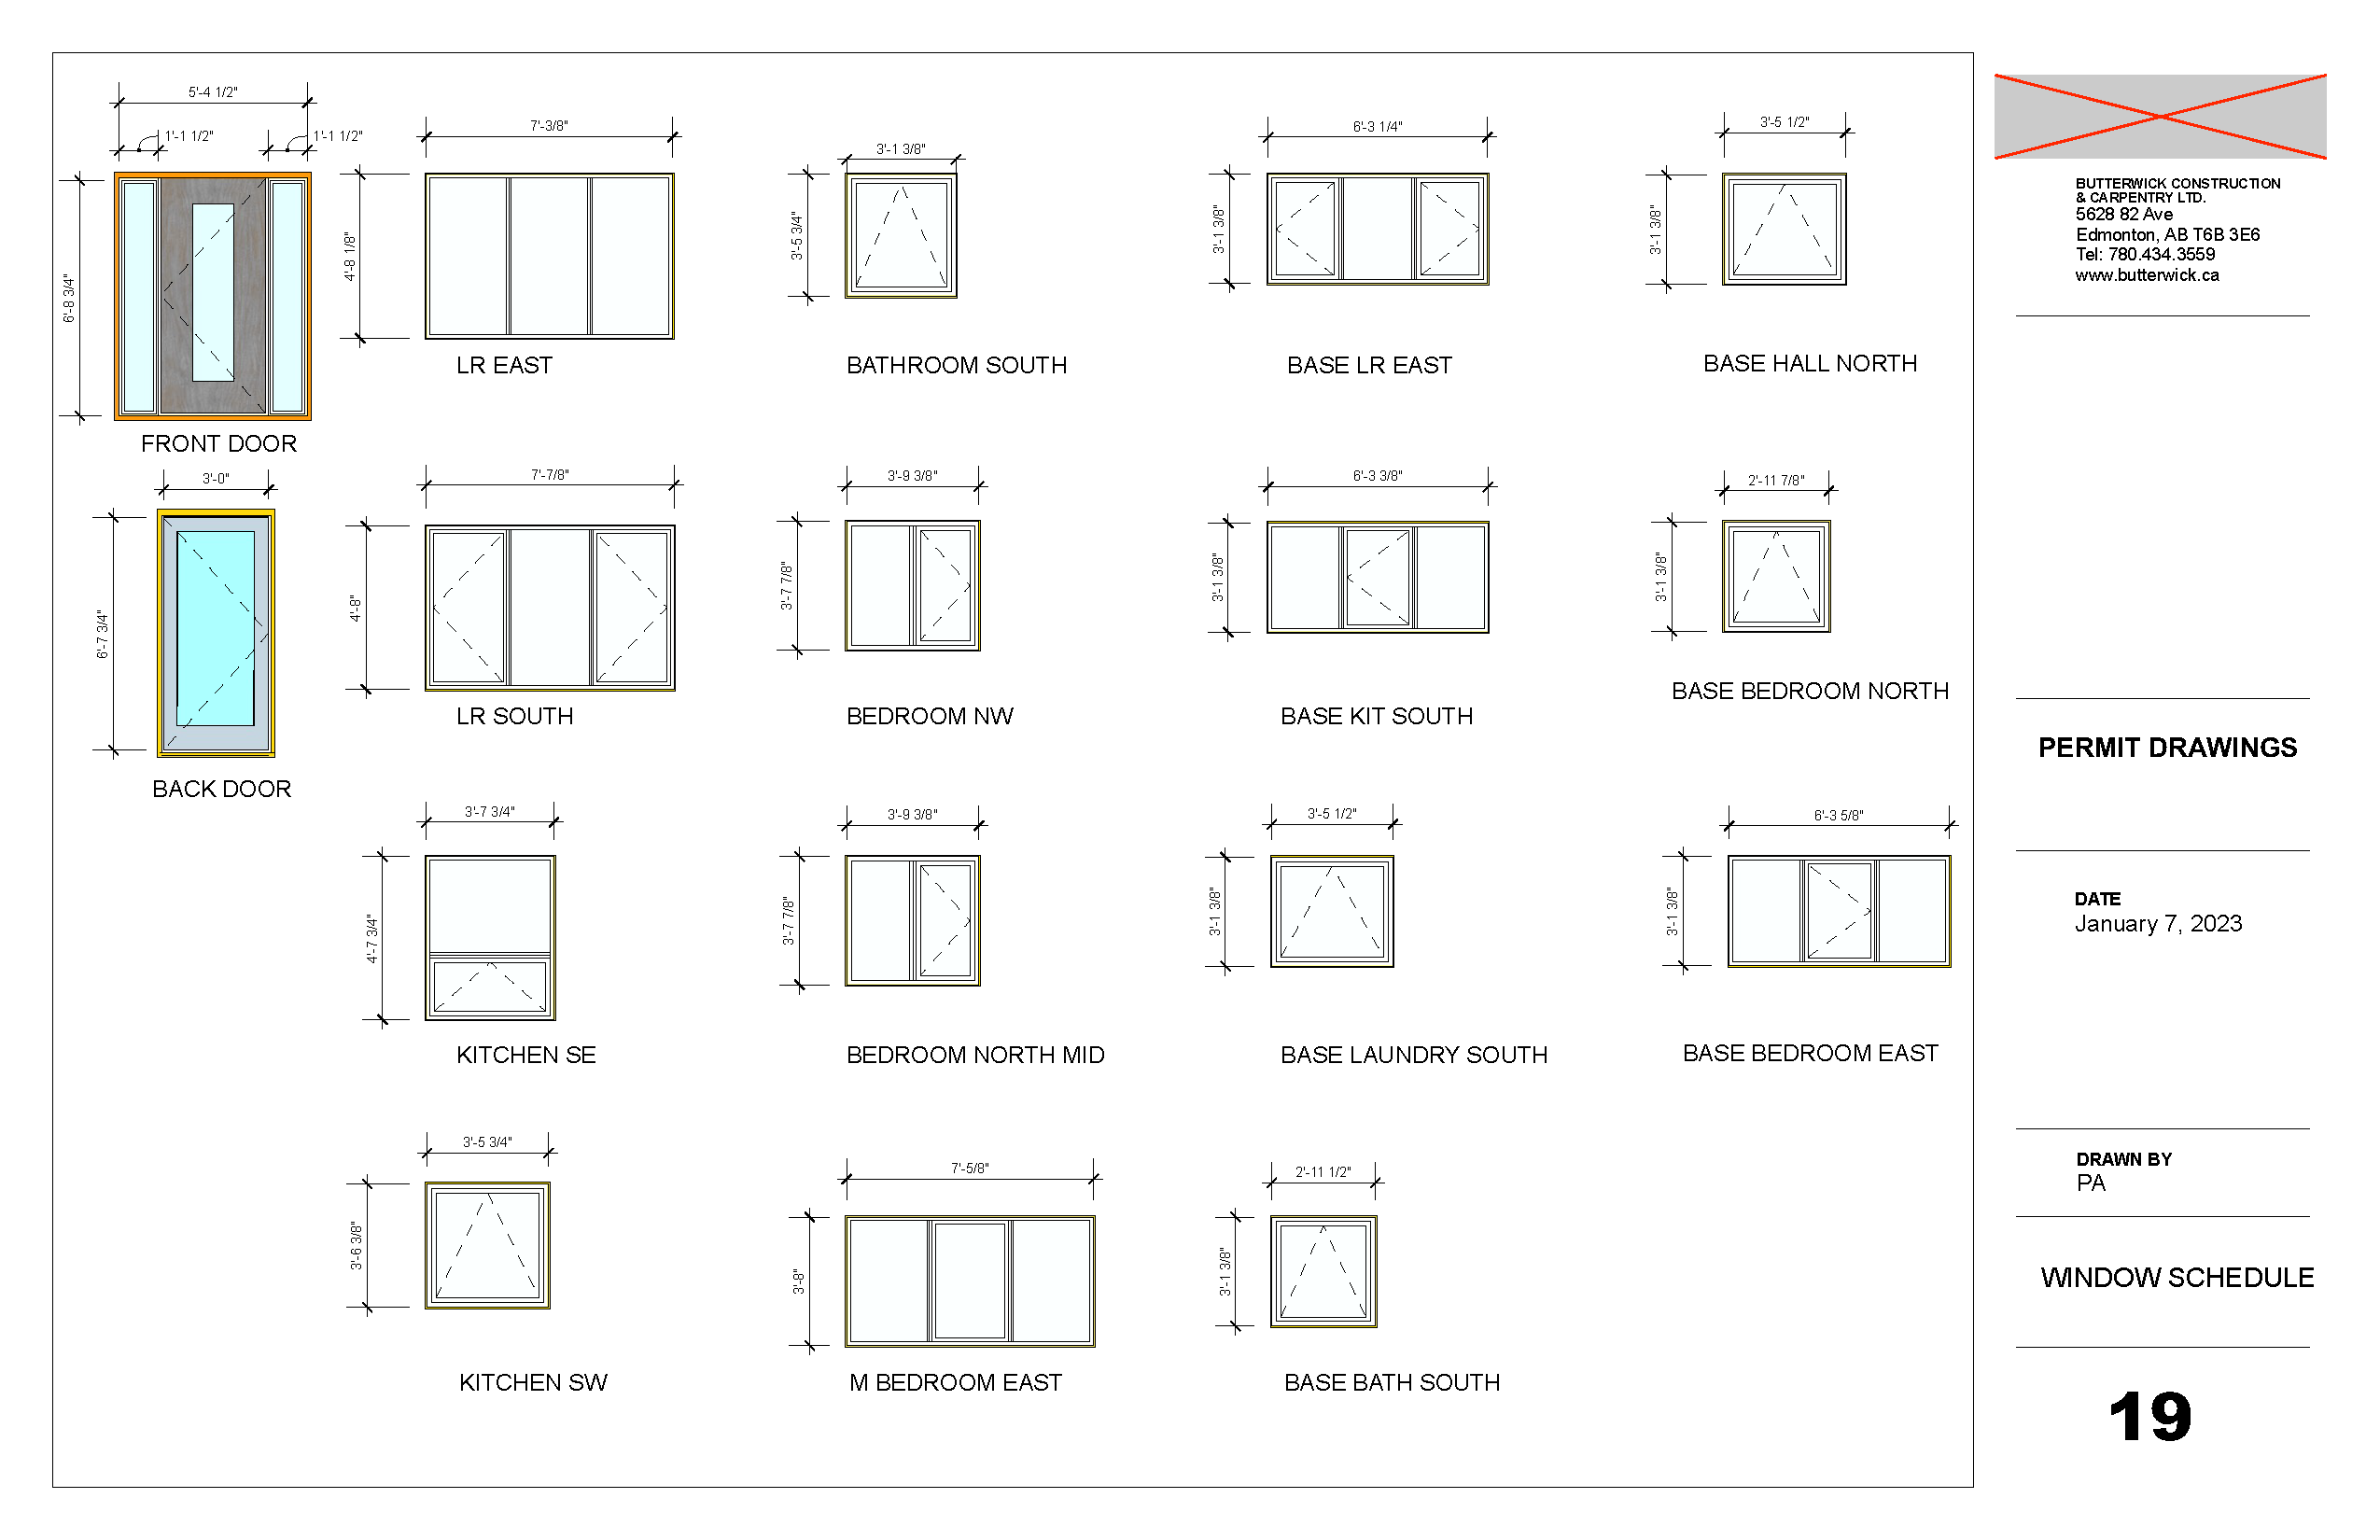
- High efficiency windows
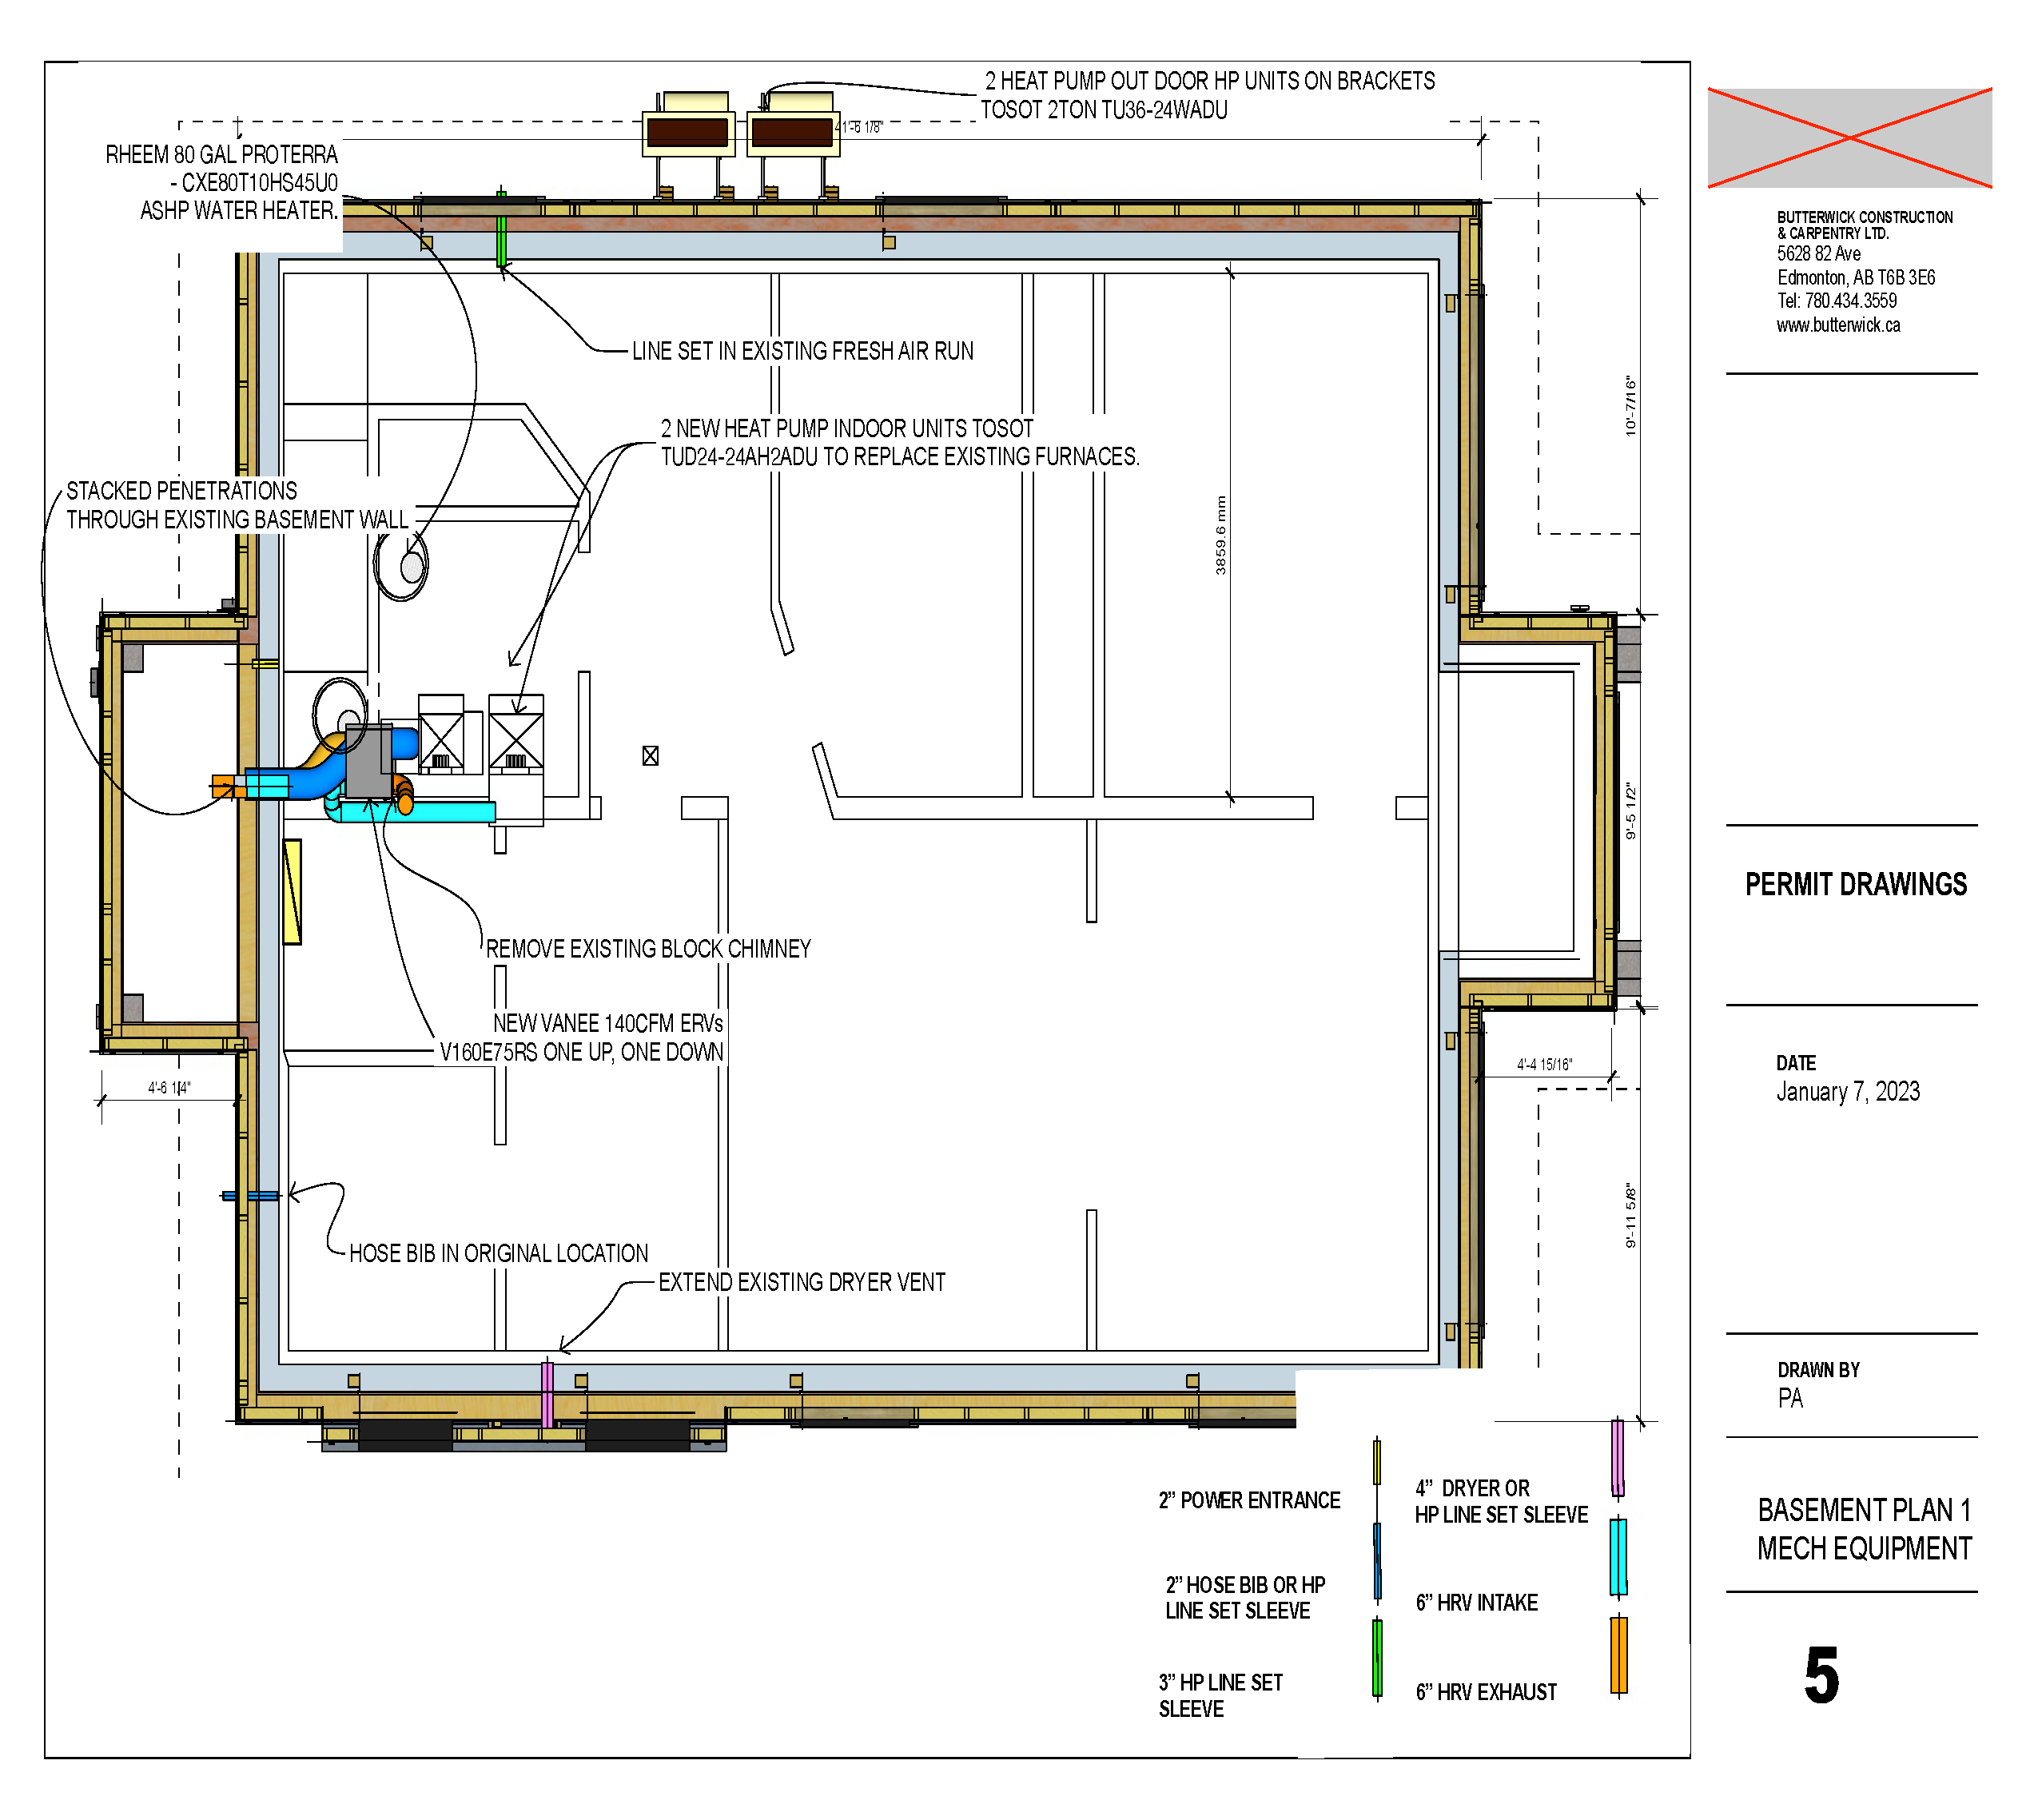
- Two Heat Recovery Unity (one for basement suite; one for main floor)
- Two Air Source Heat Pumps for separate suites (TOSOT 2TON TU36-24WADU)
- Heat Pump Hot Water Tank
Project Description
The Retrofit Story
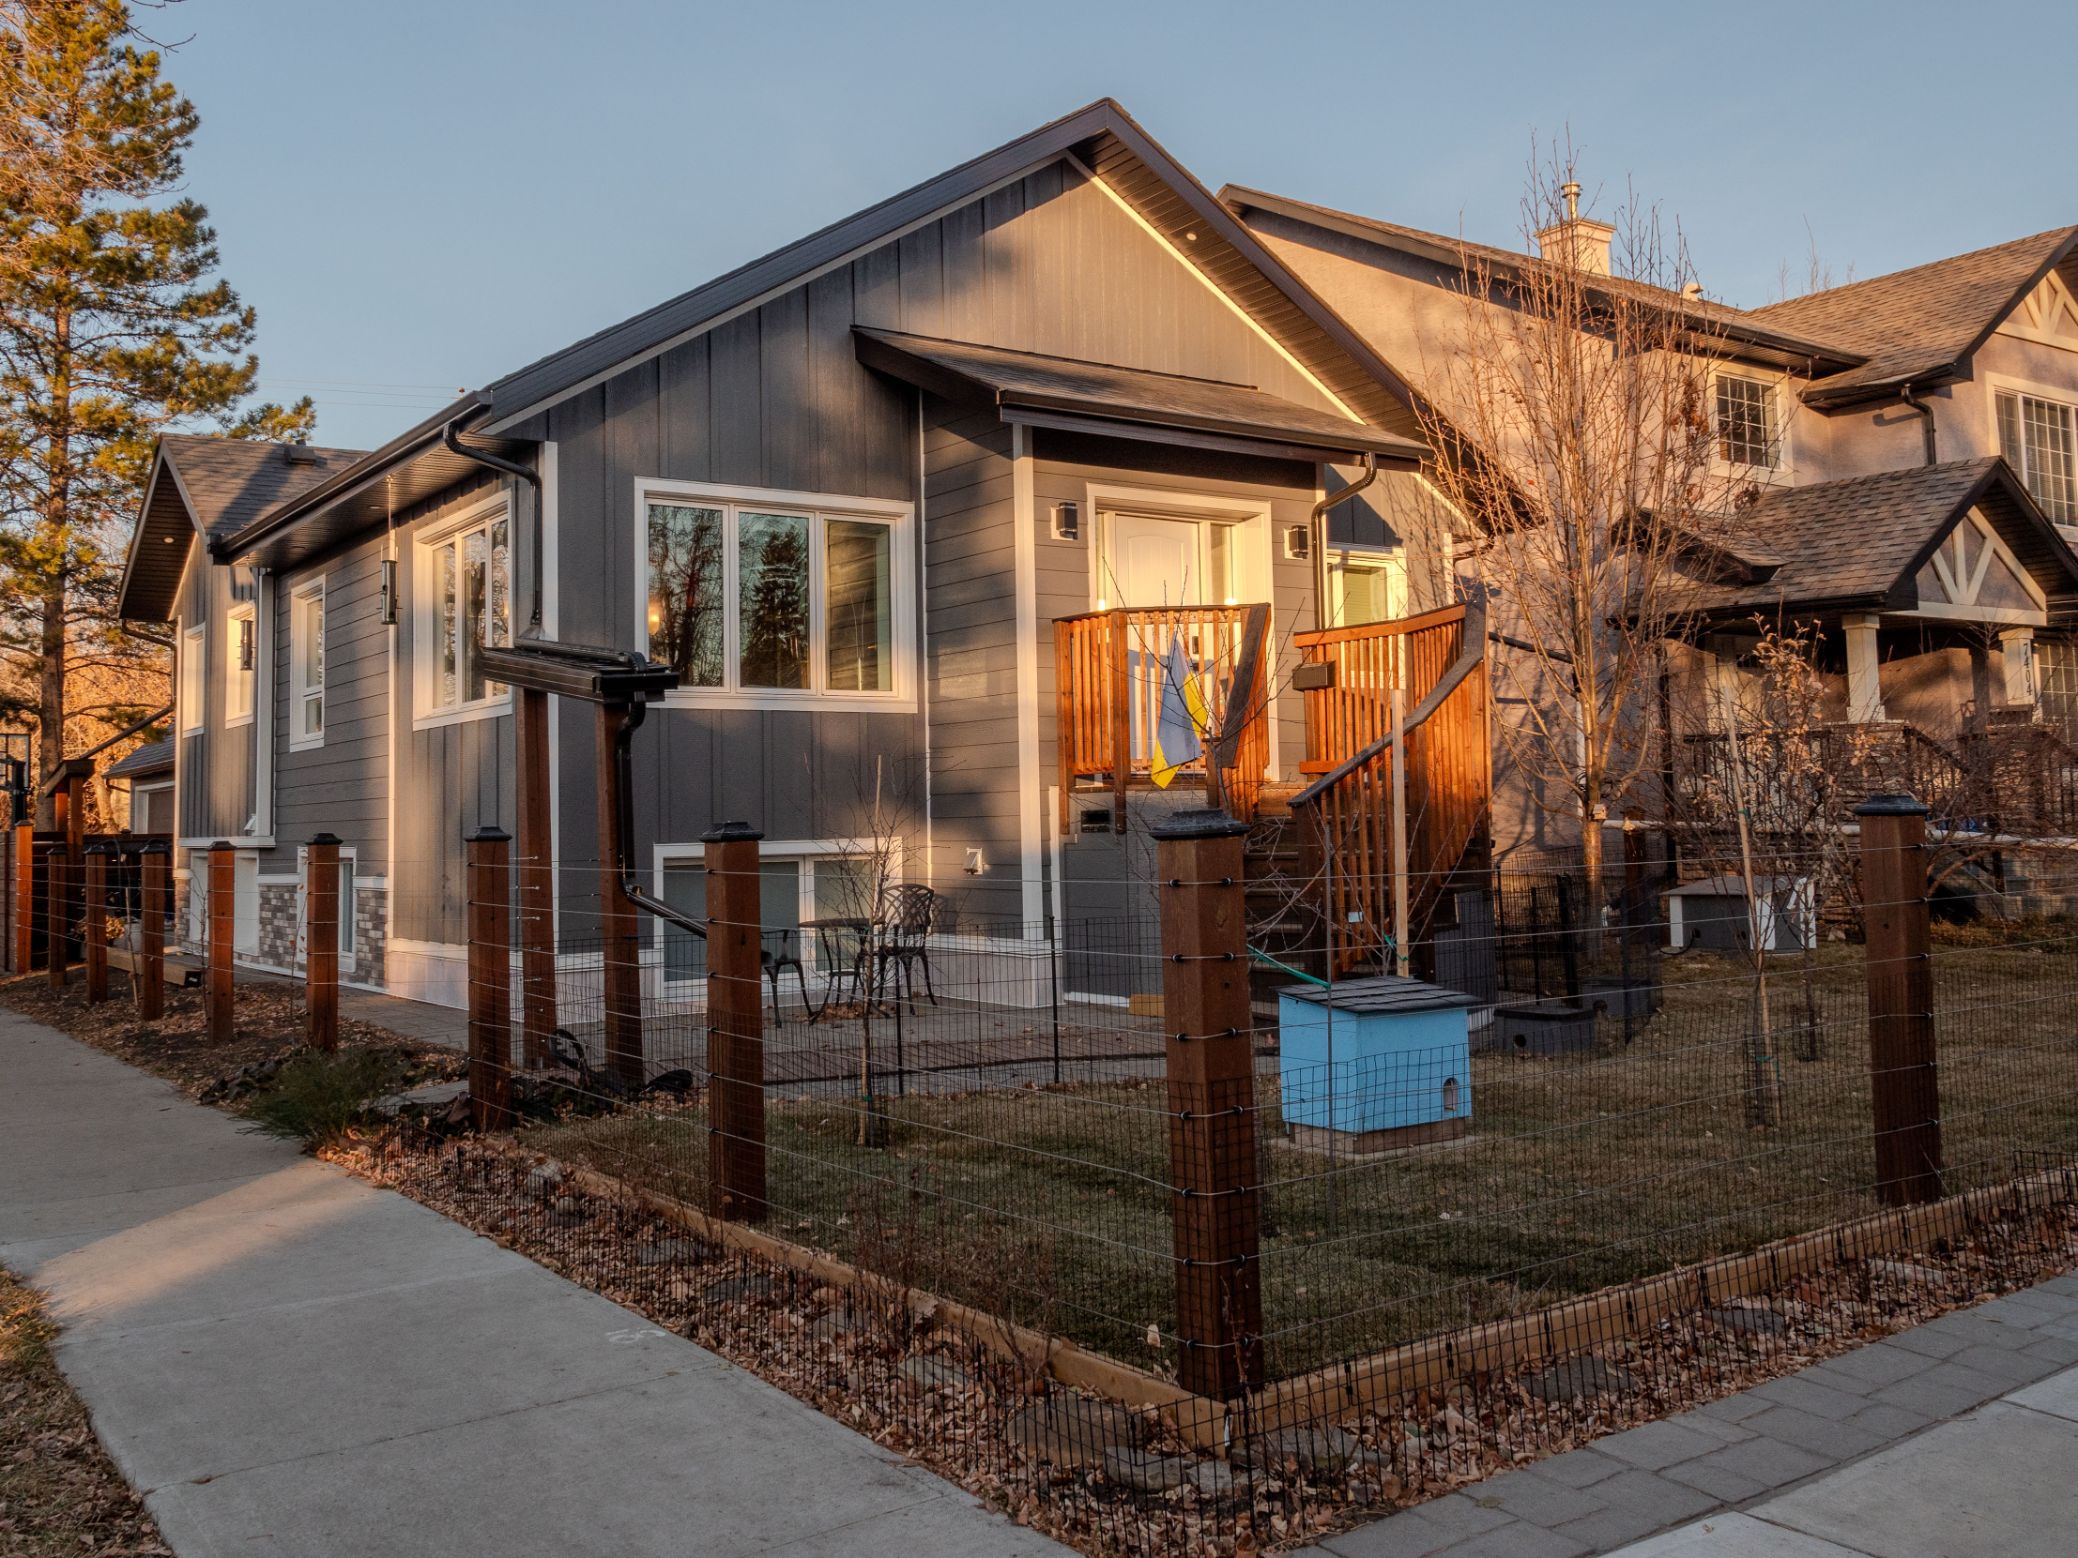
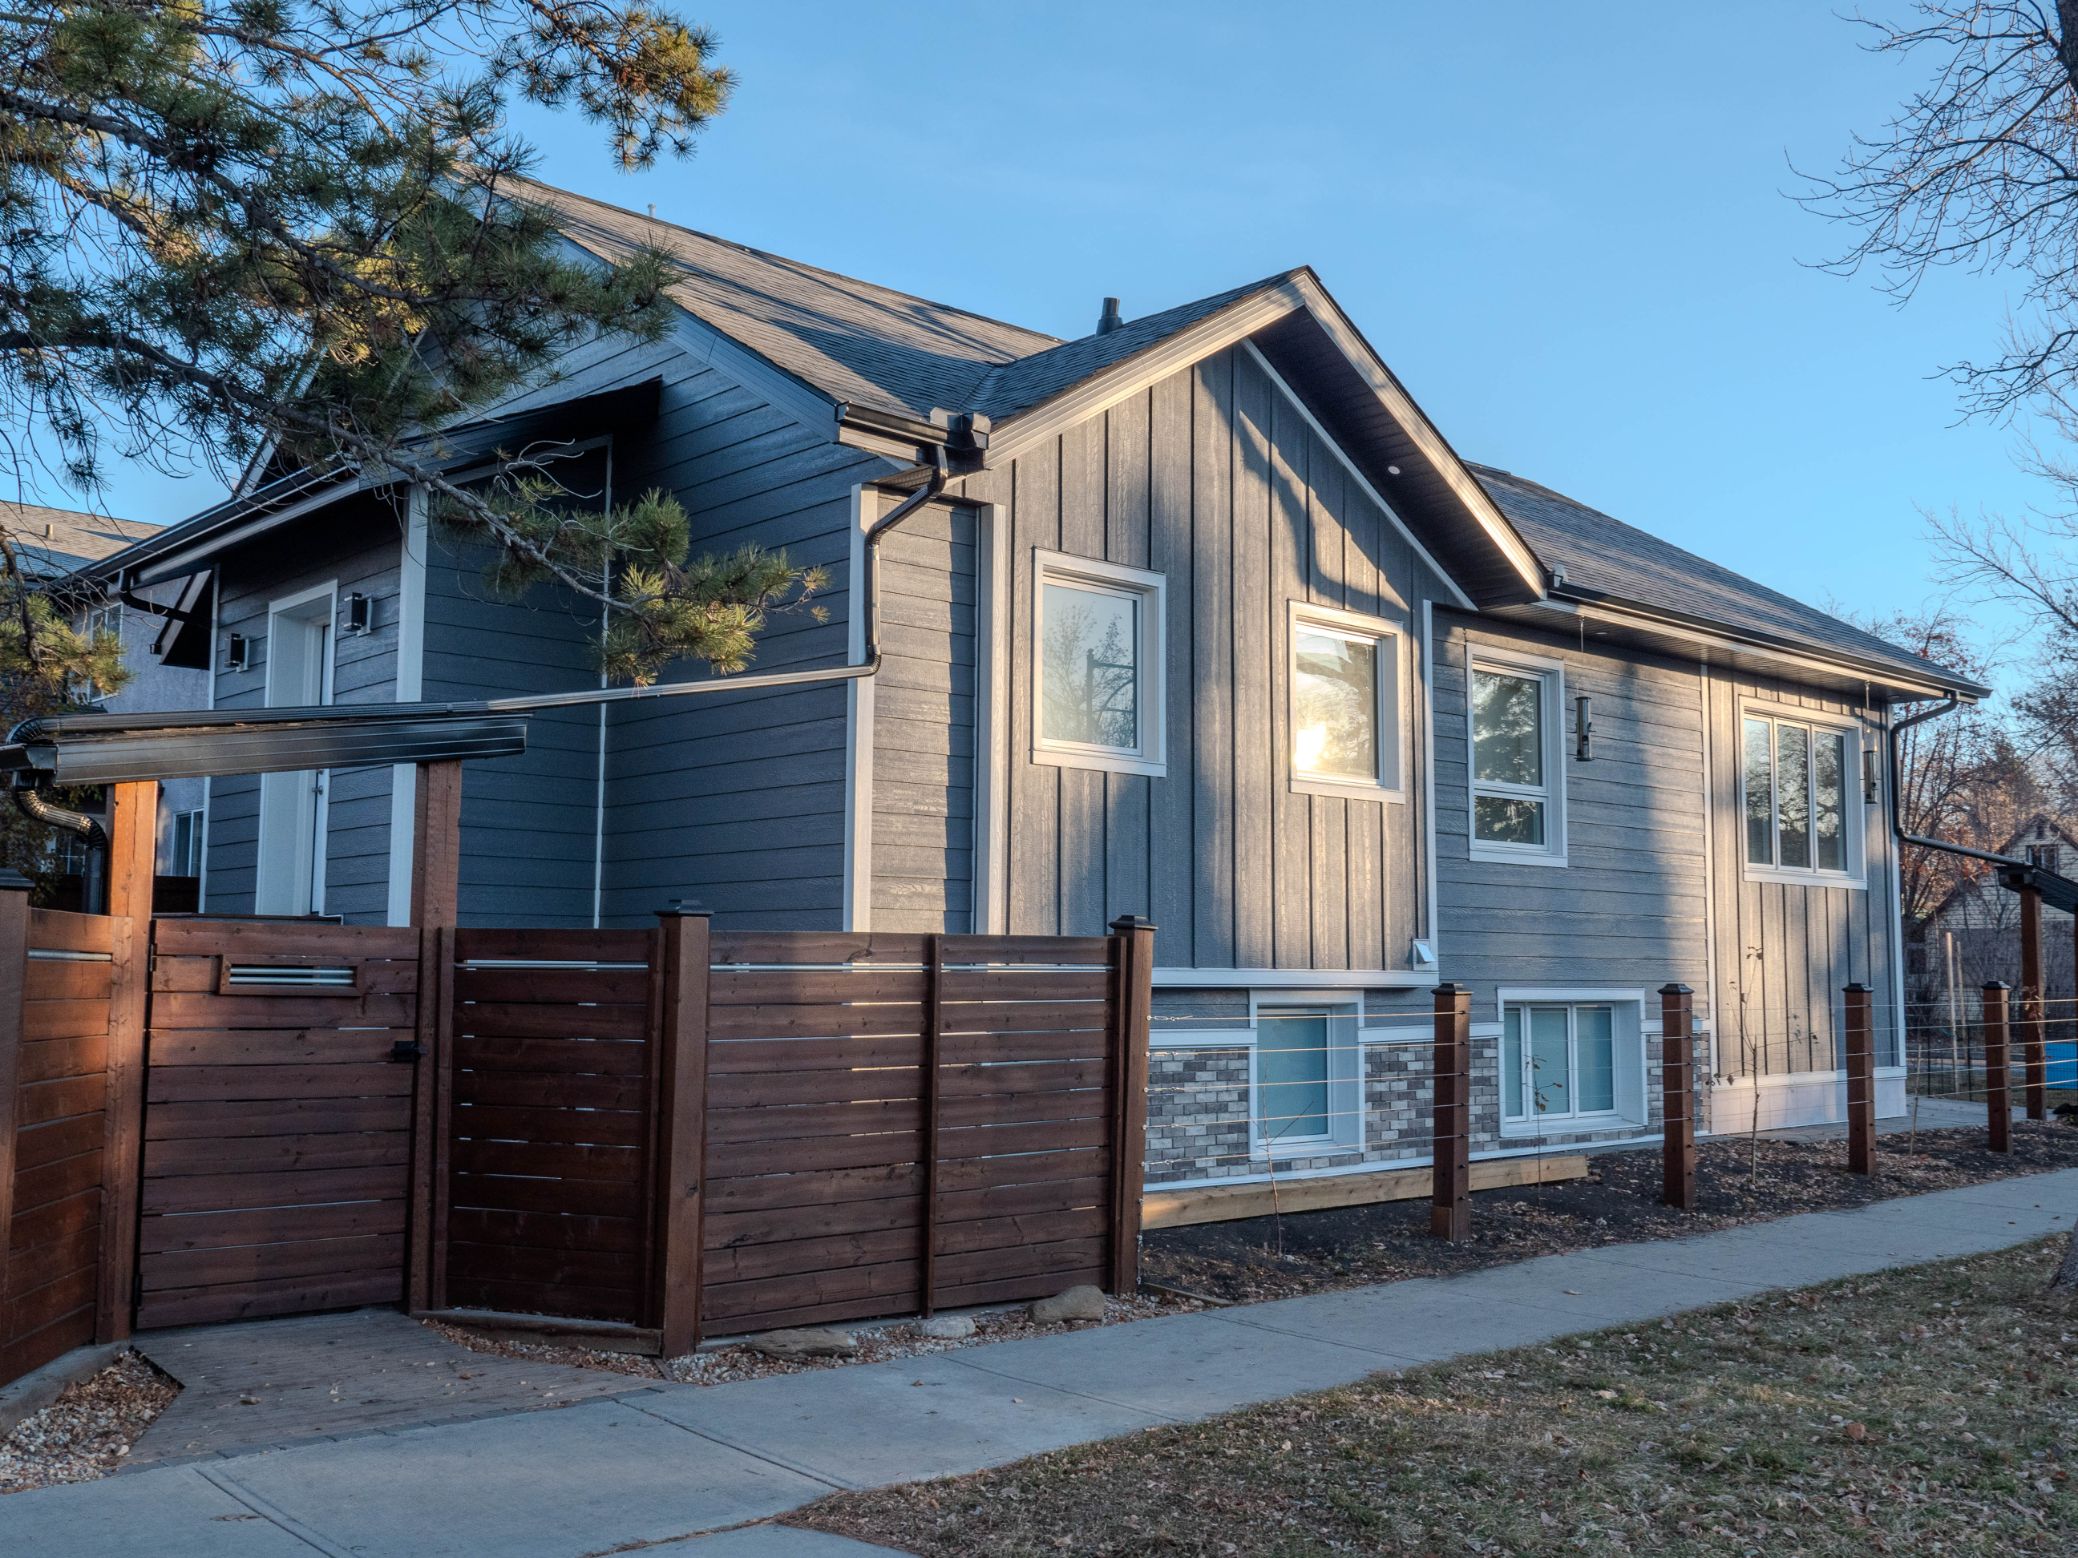
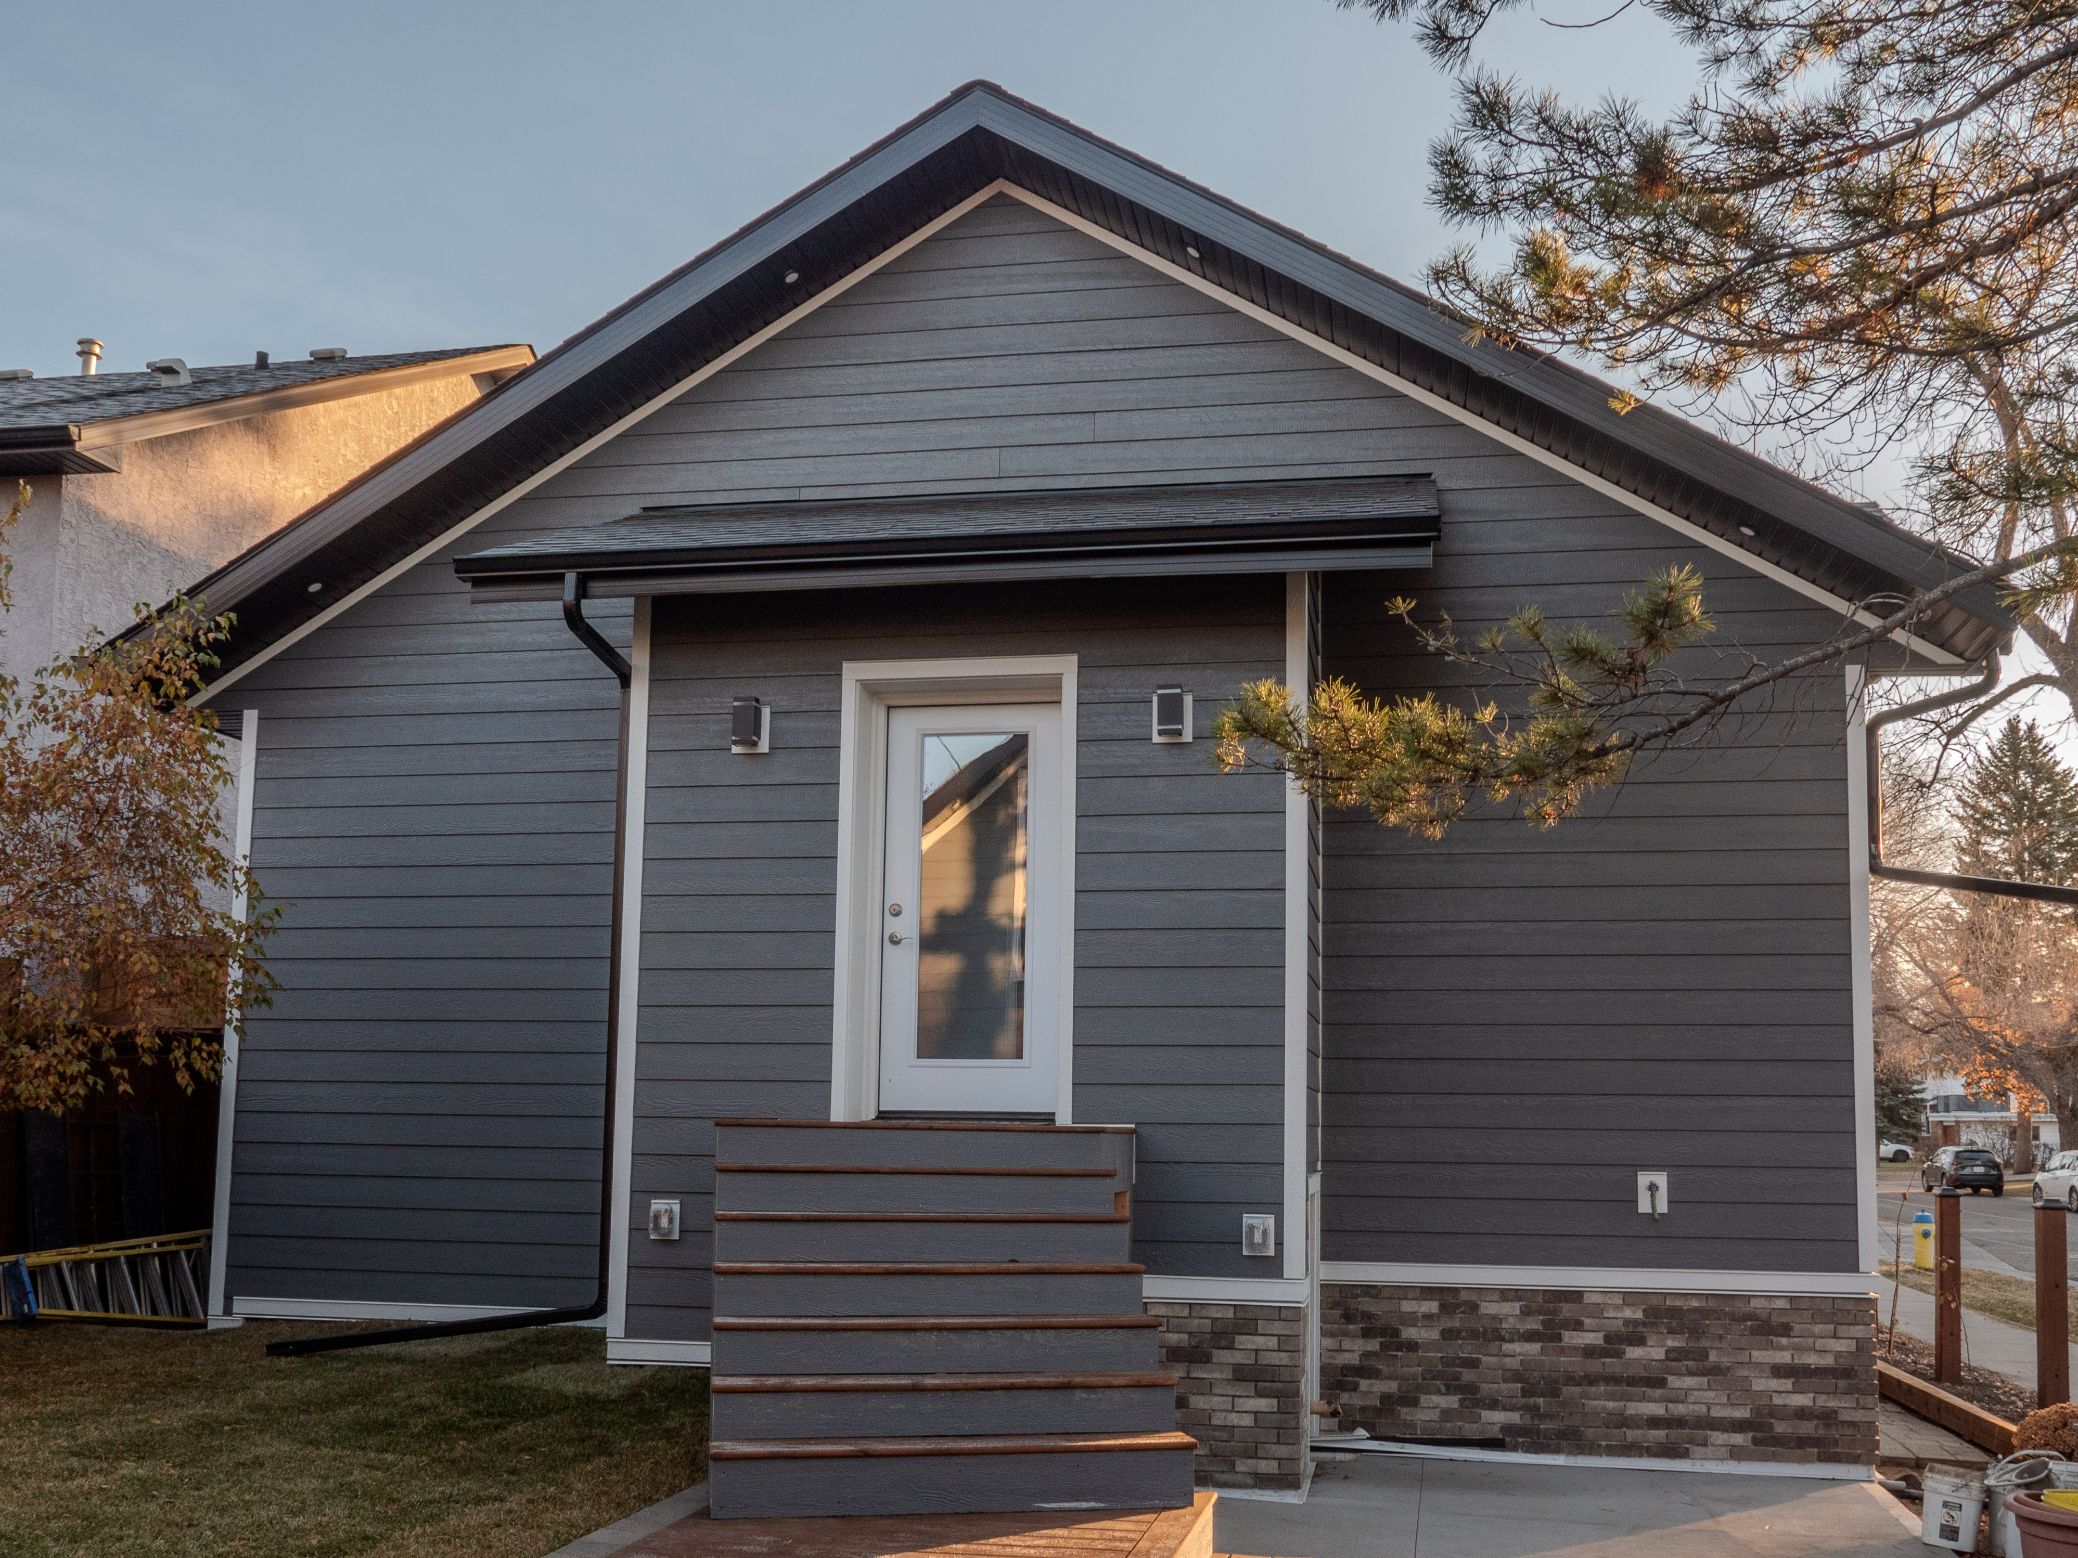
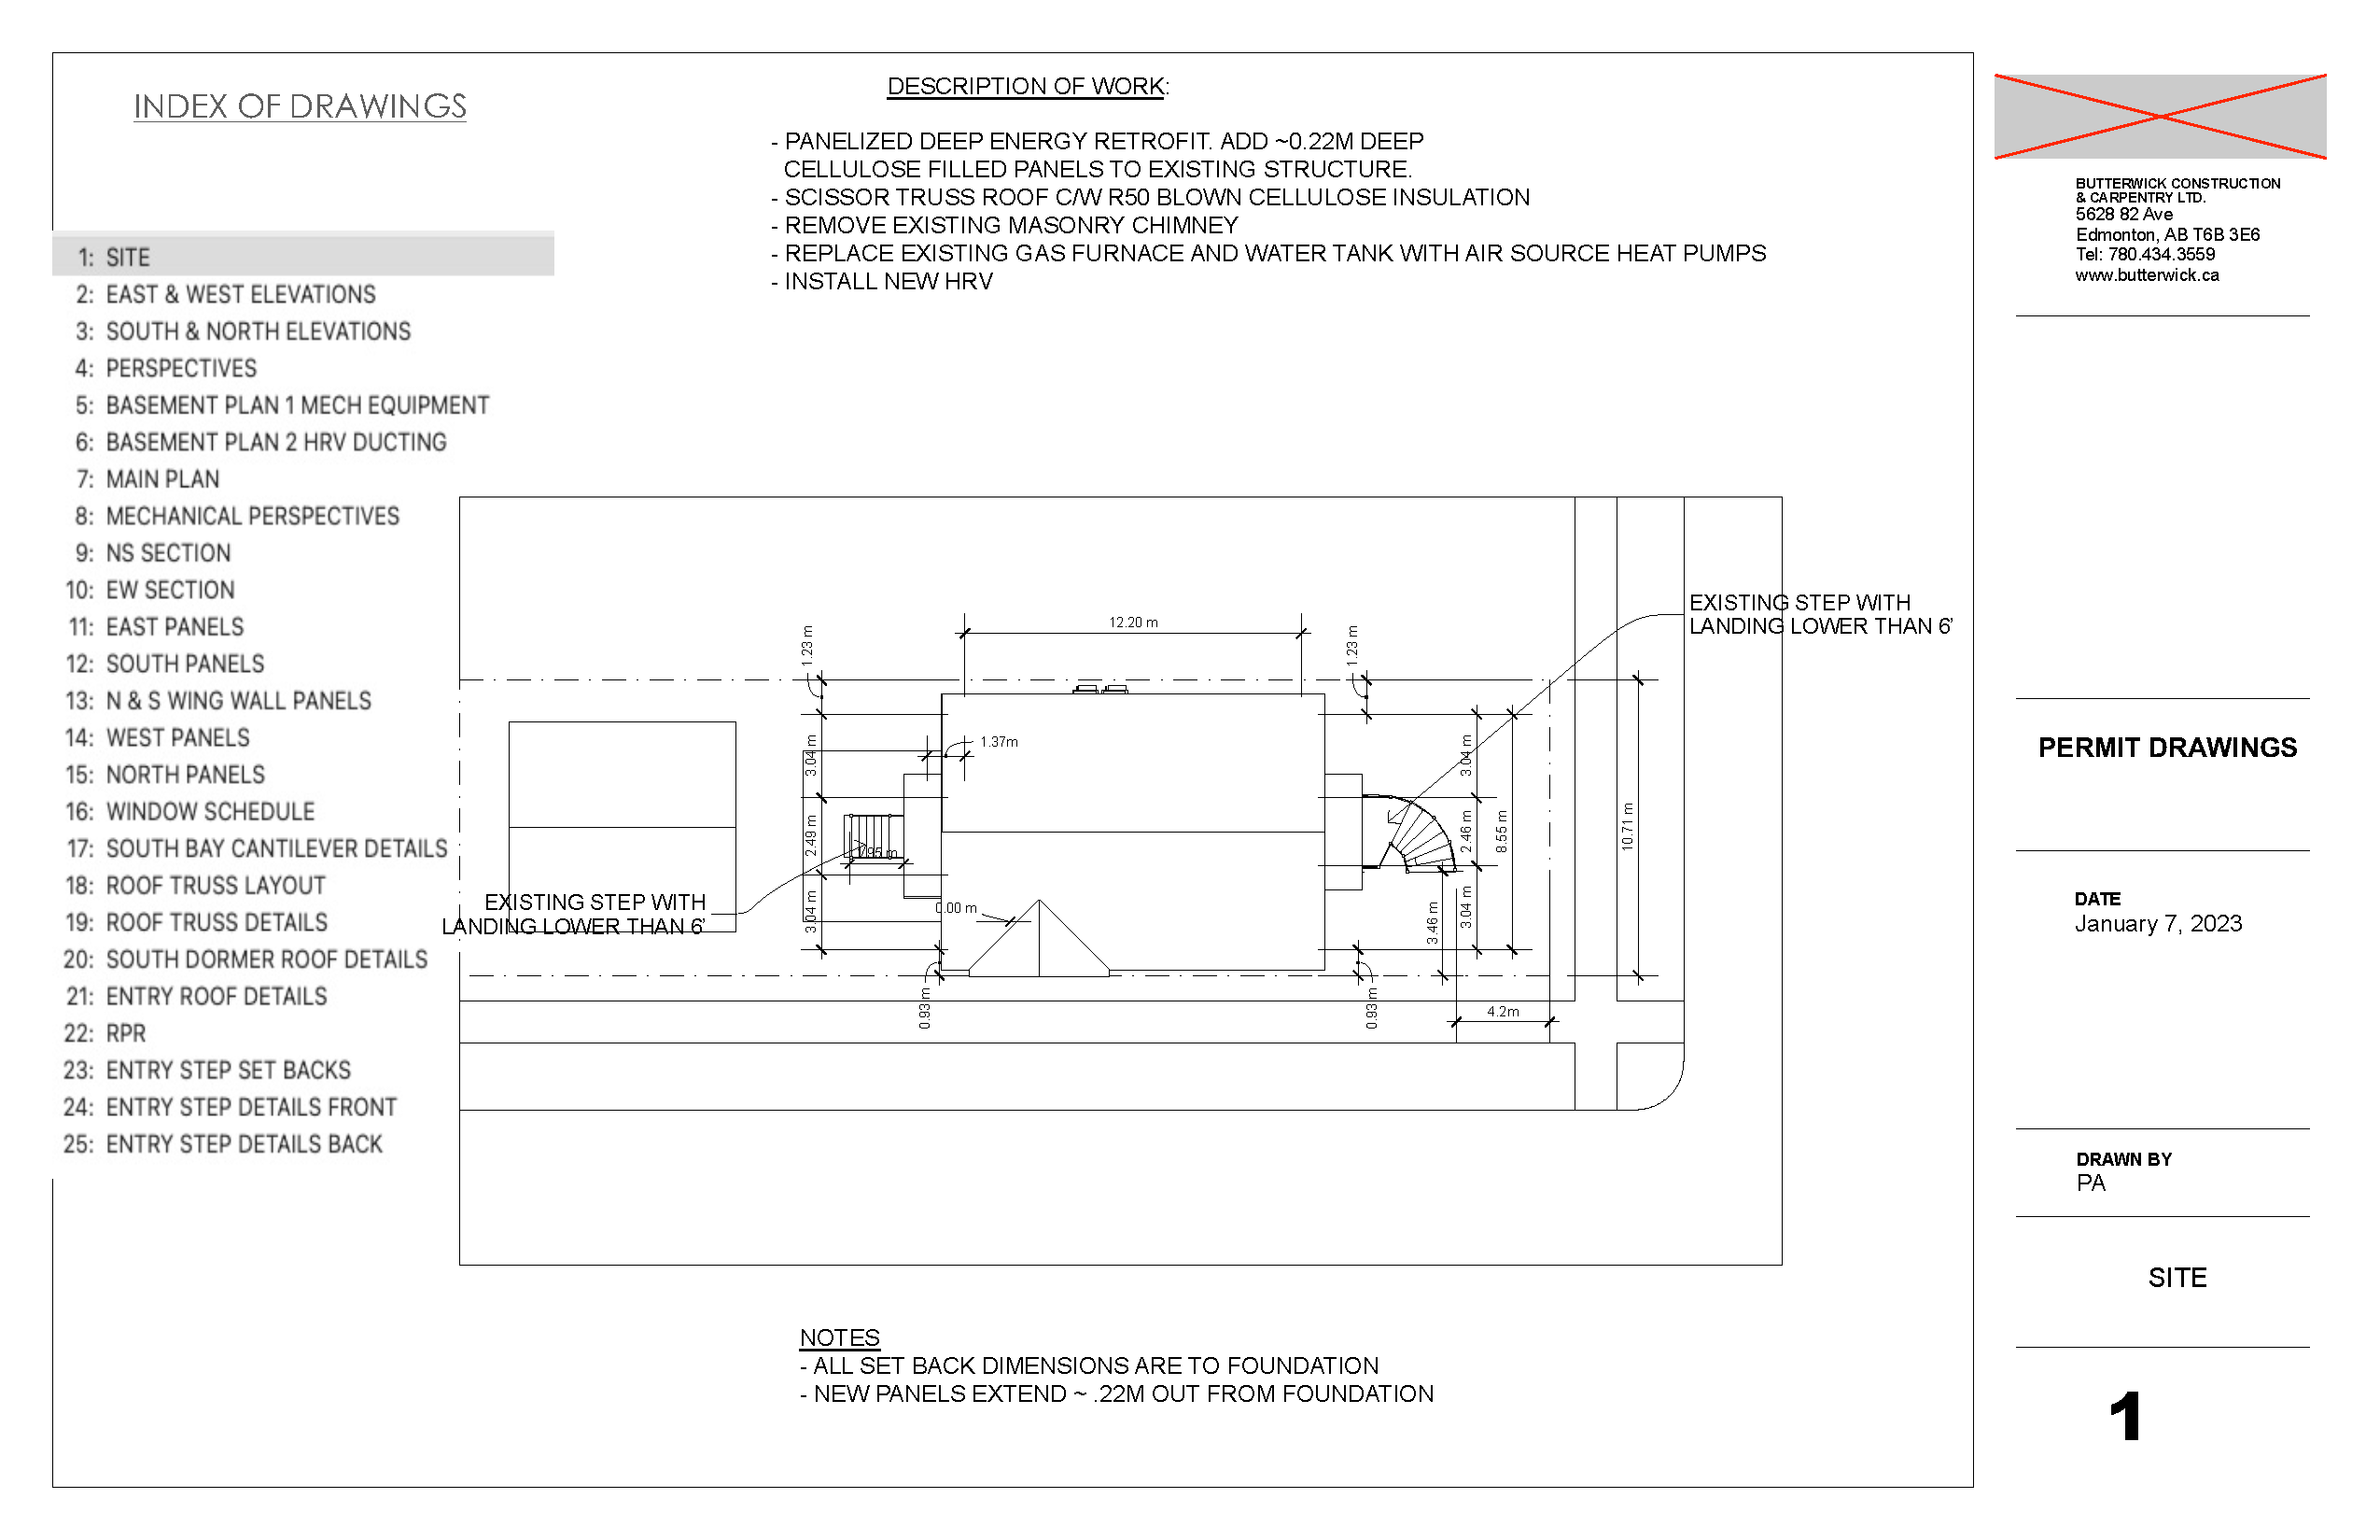
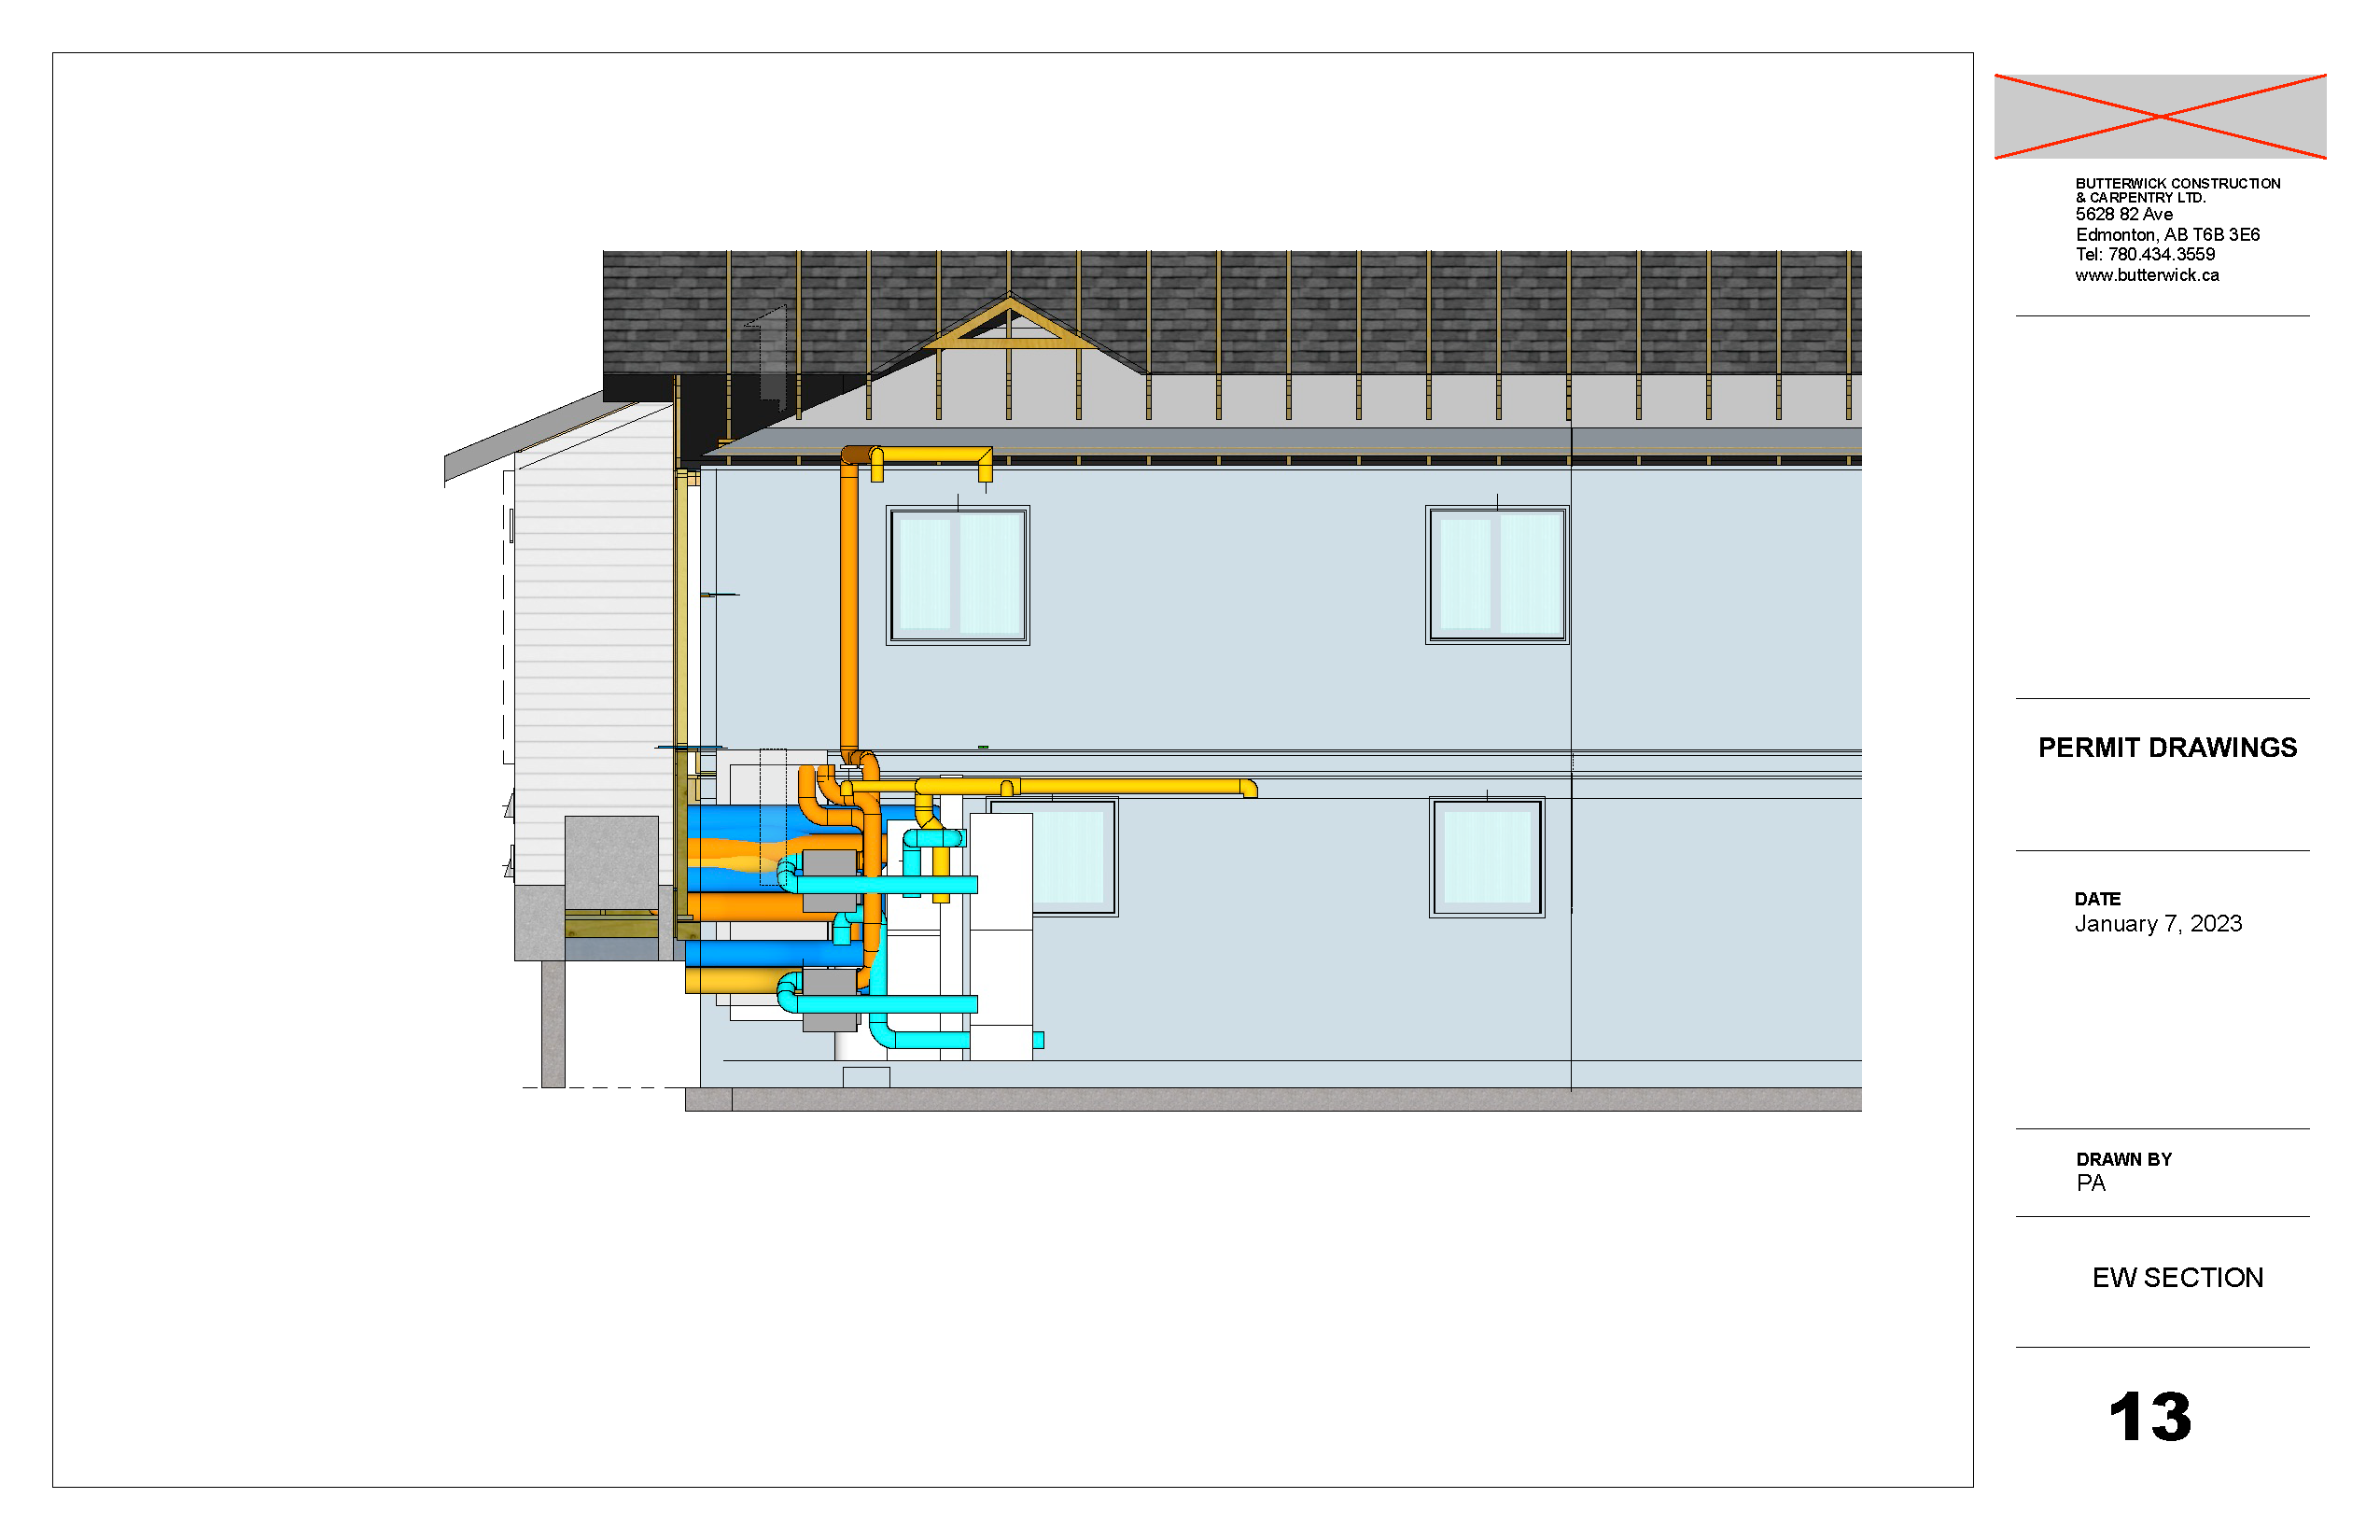
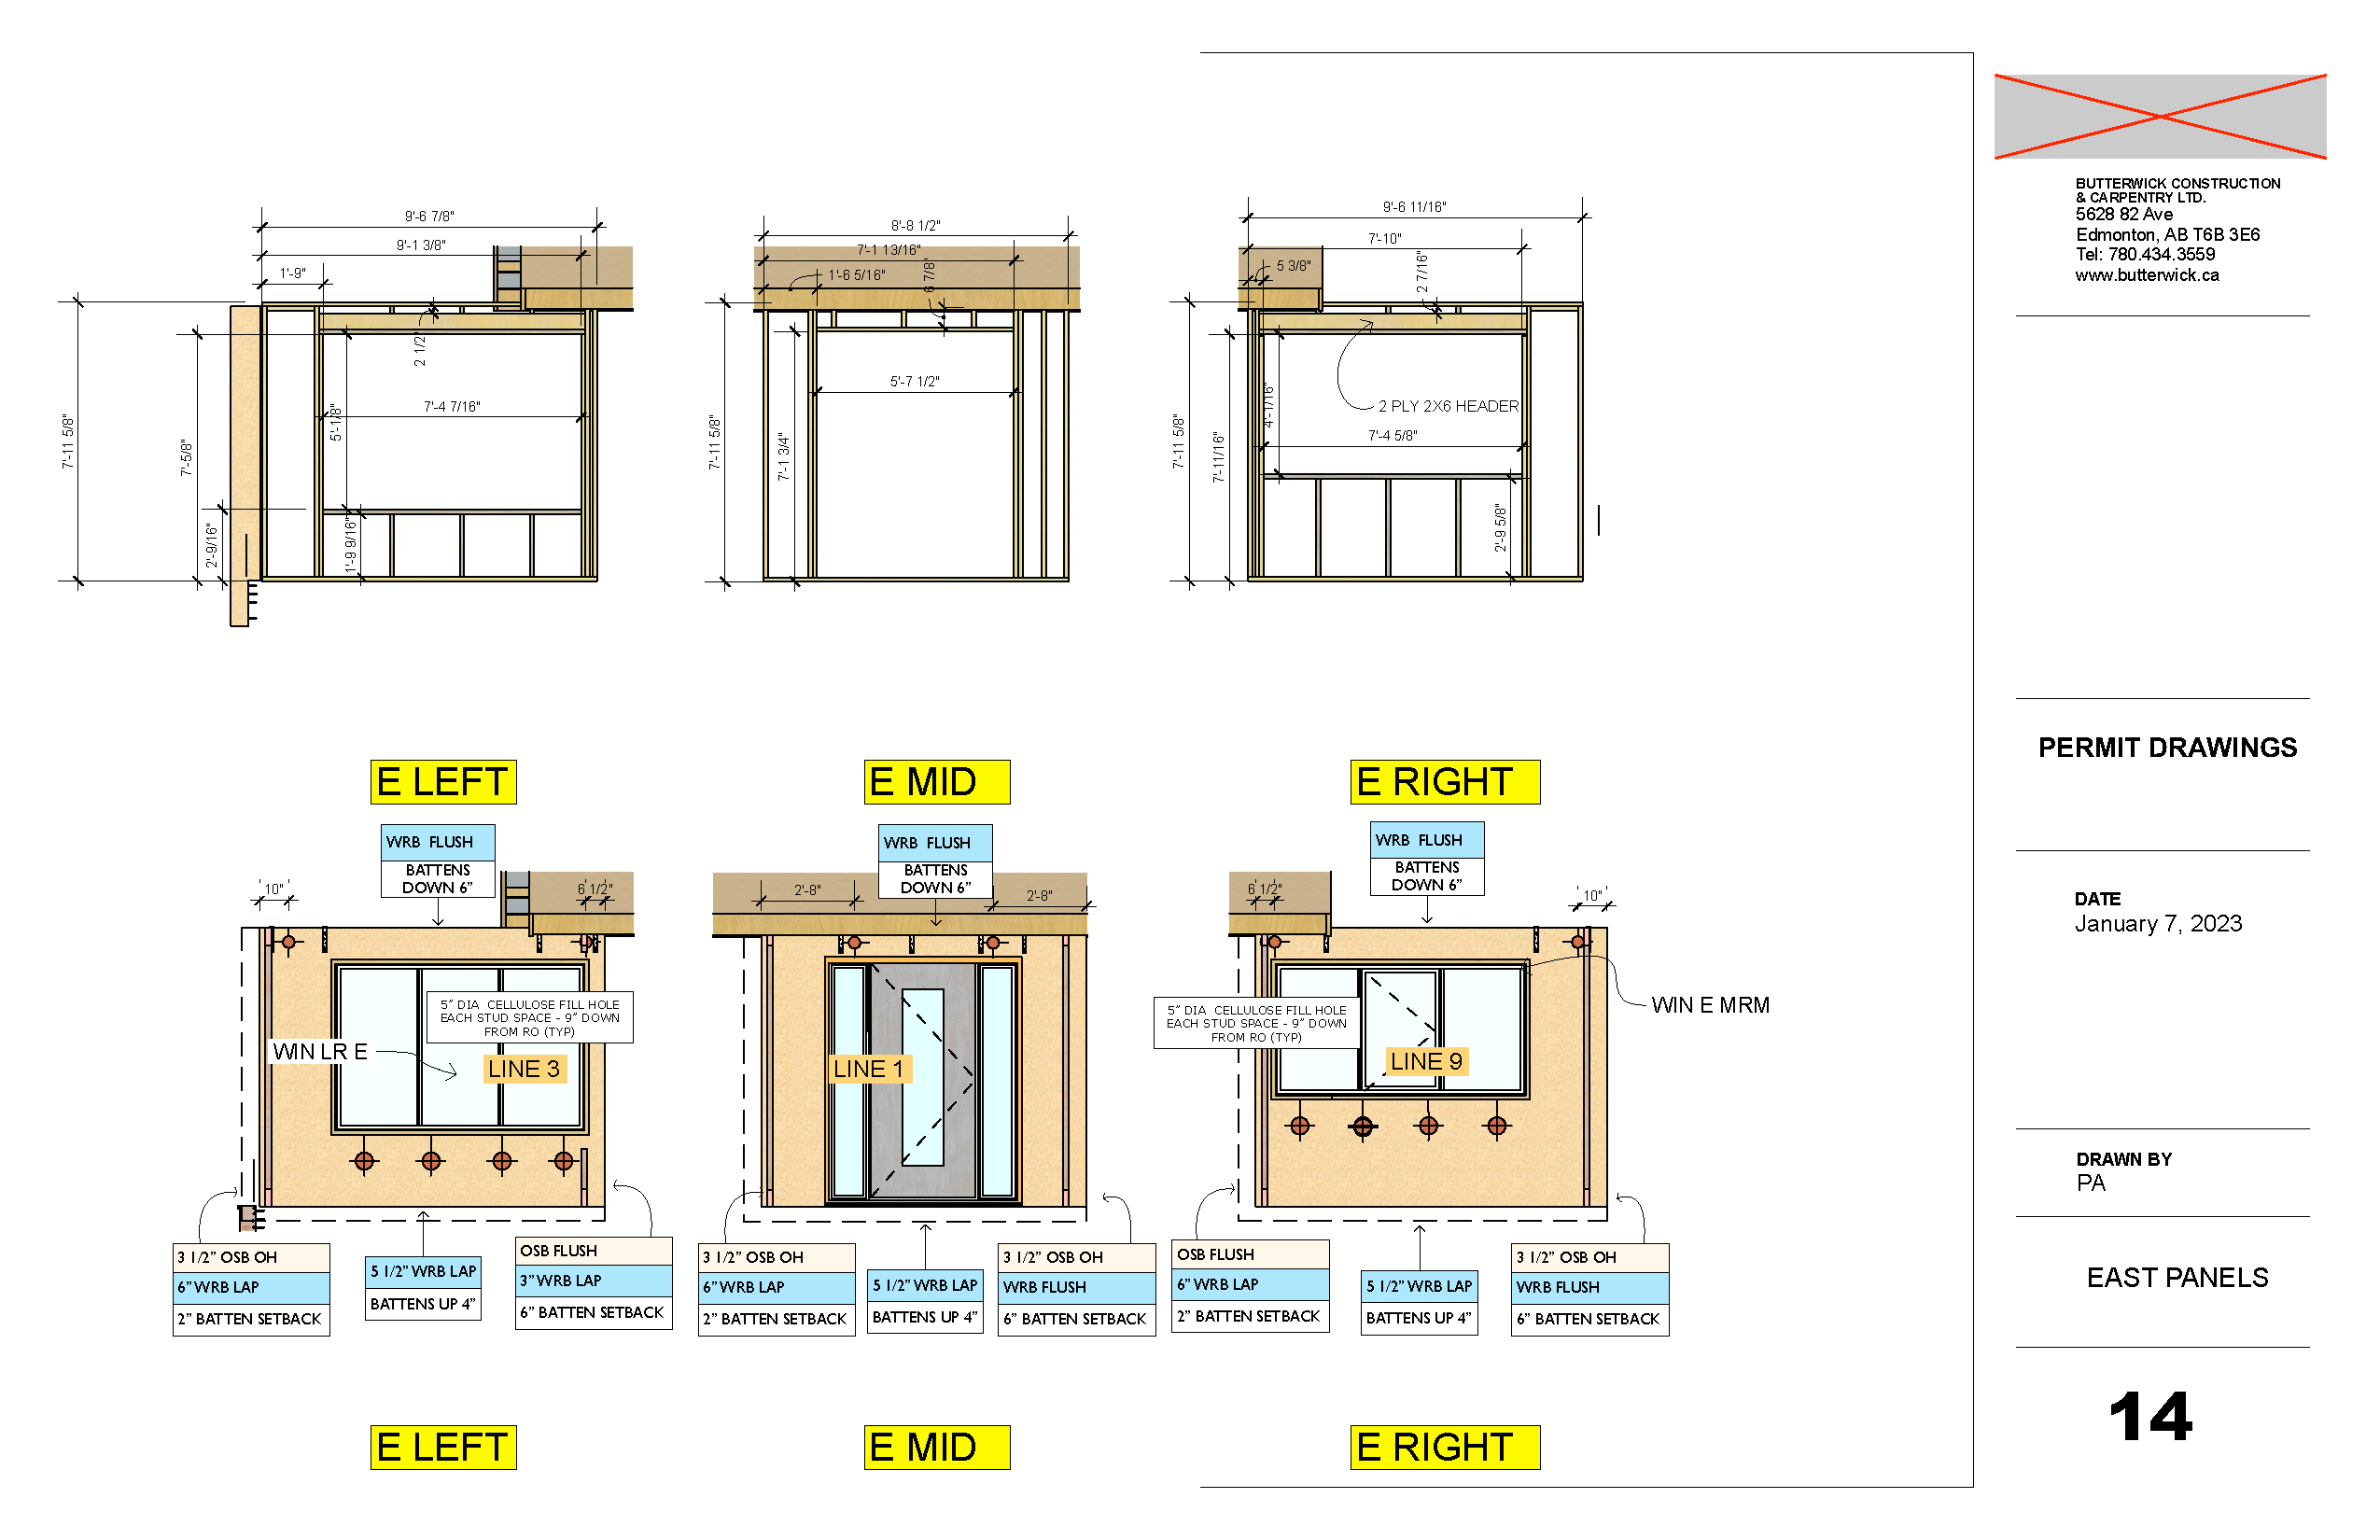
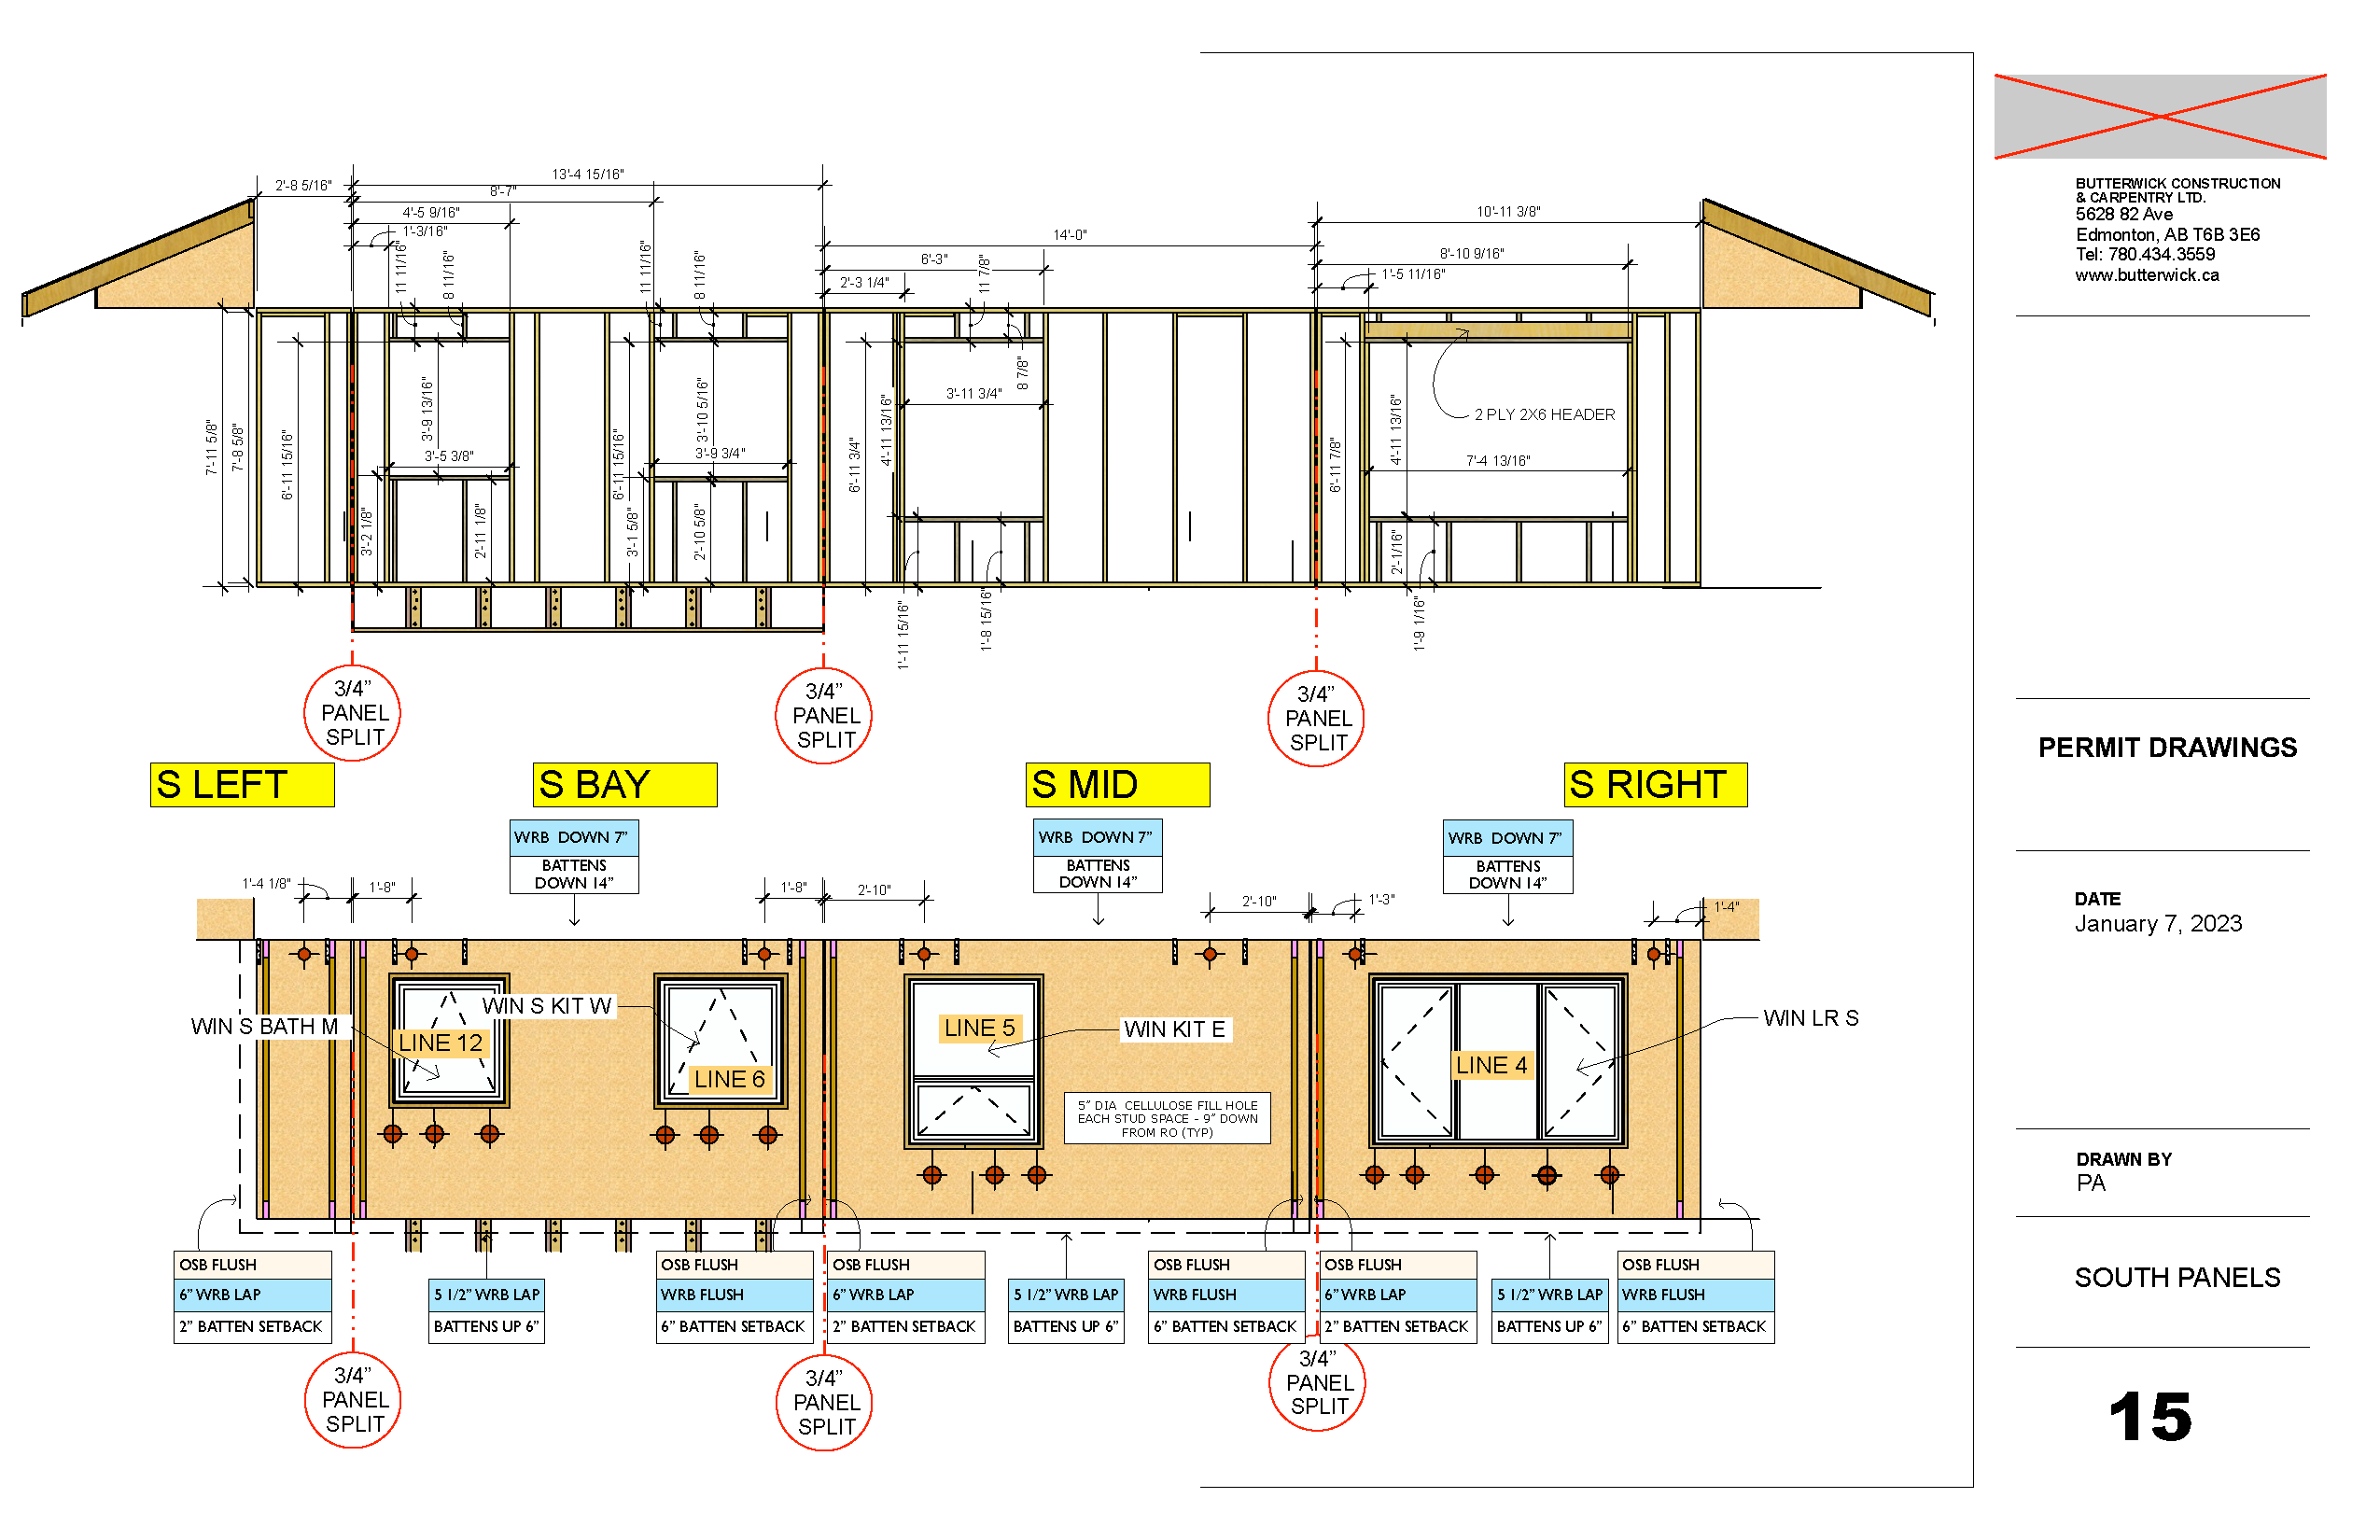
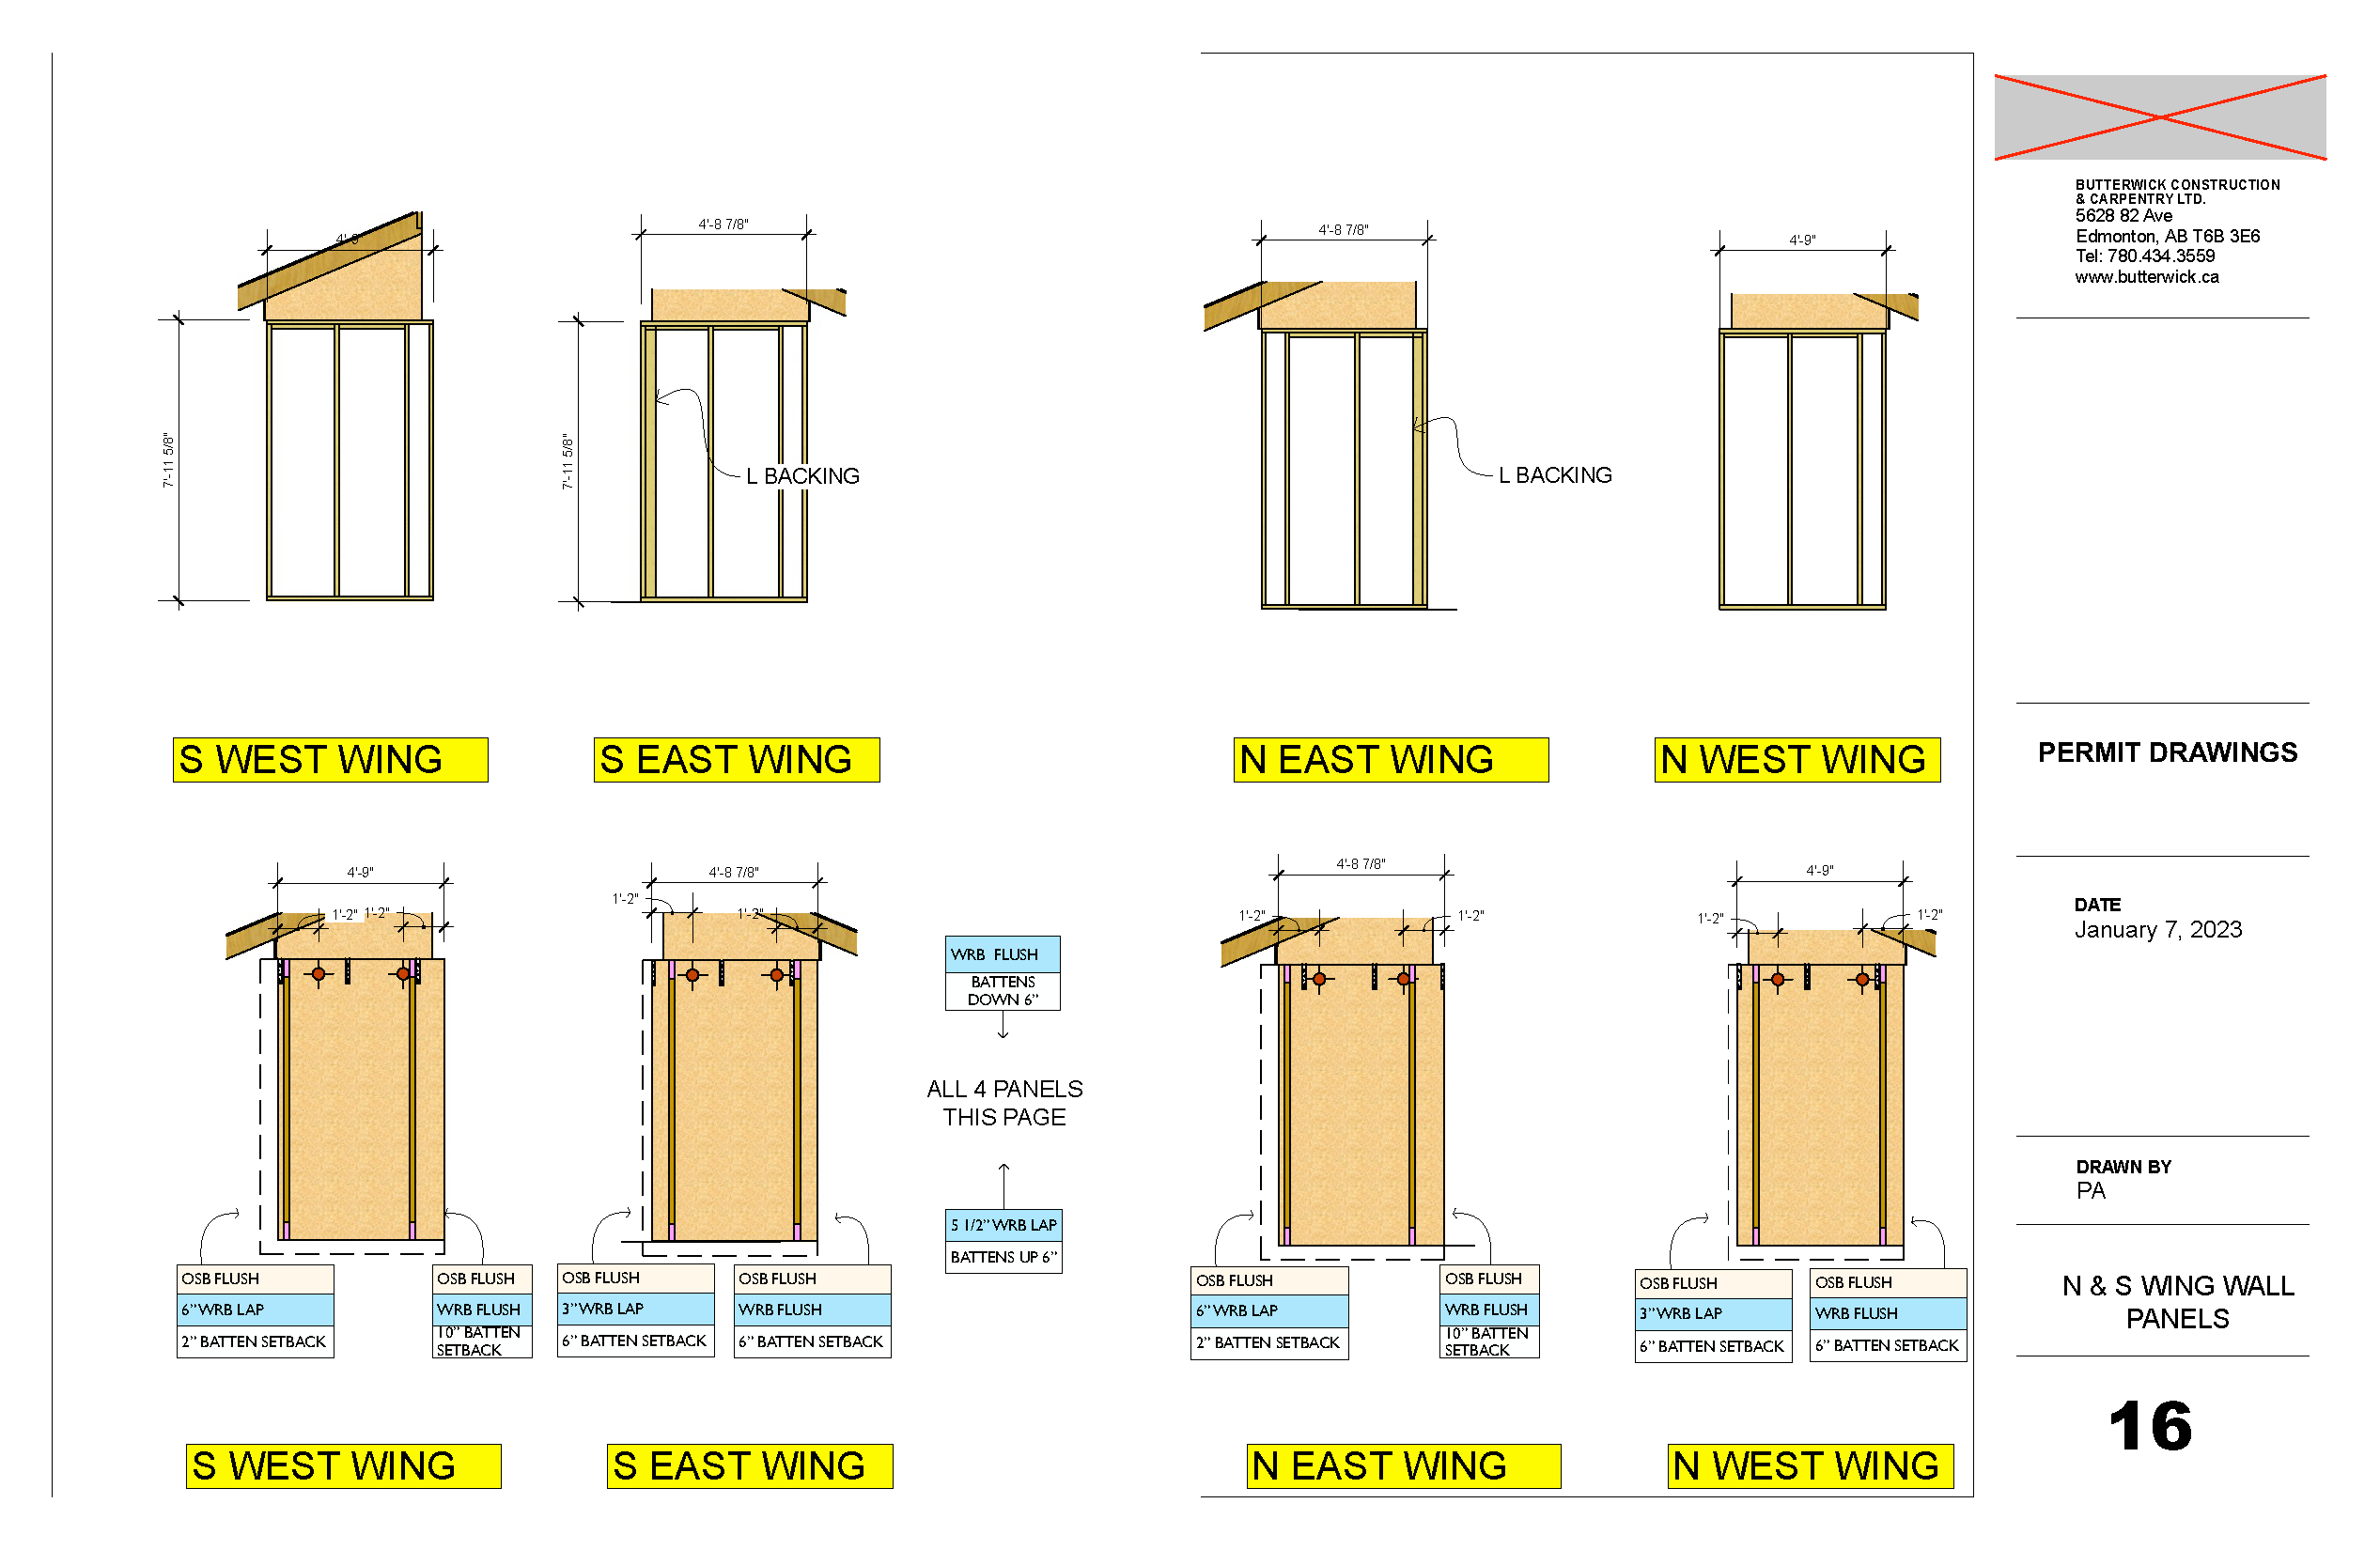
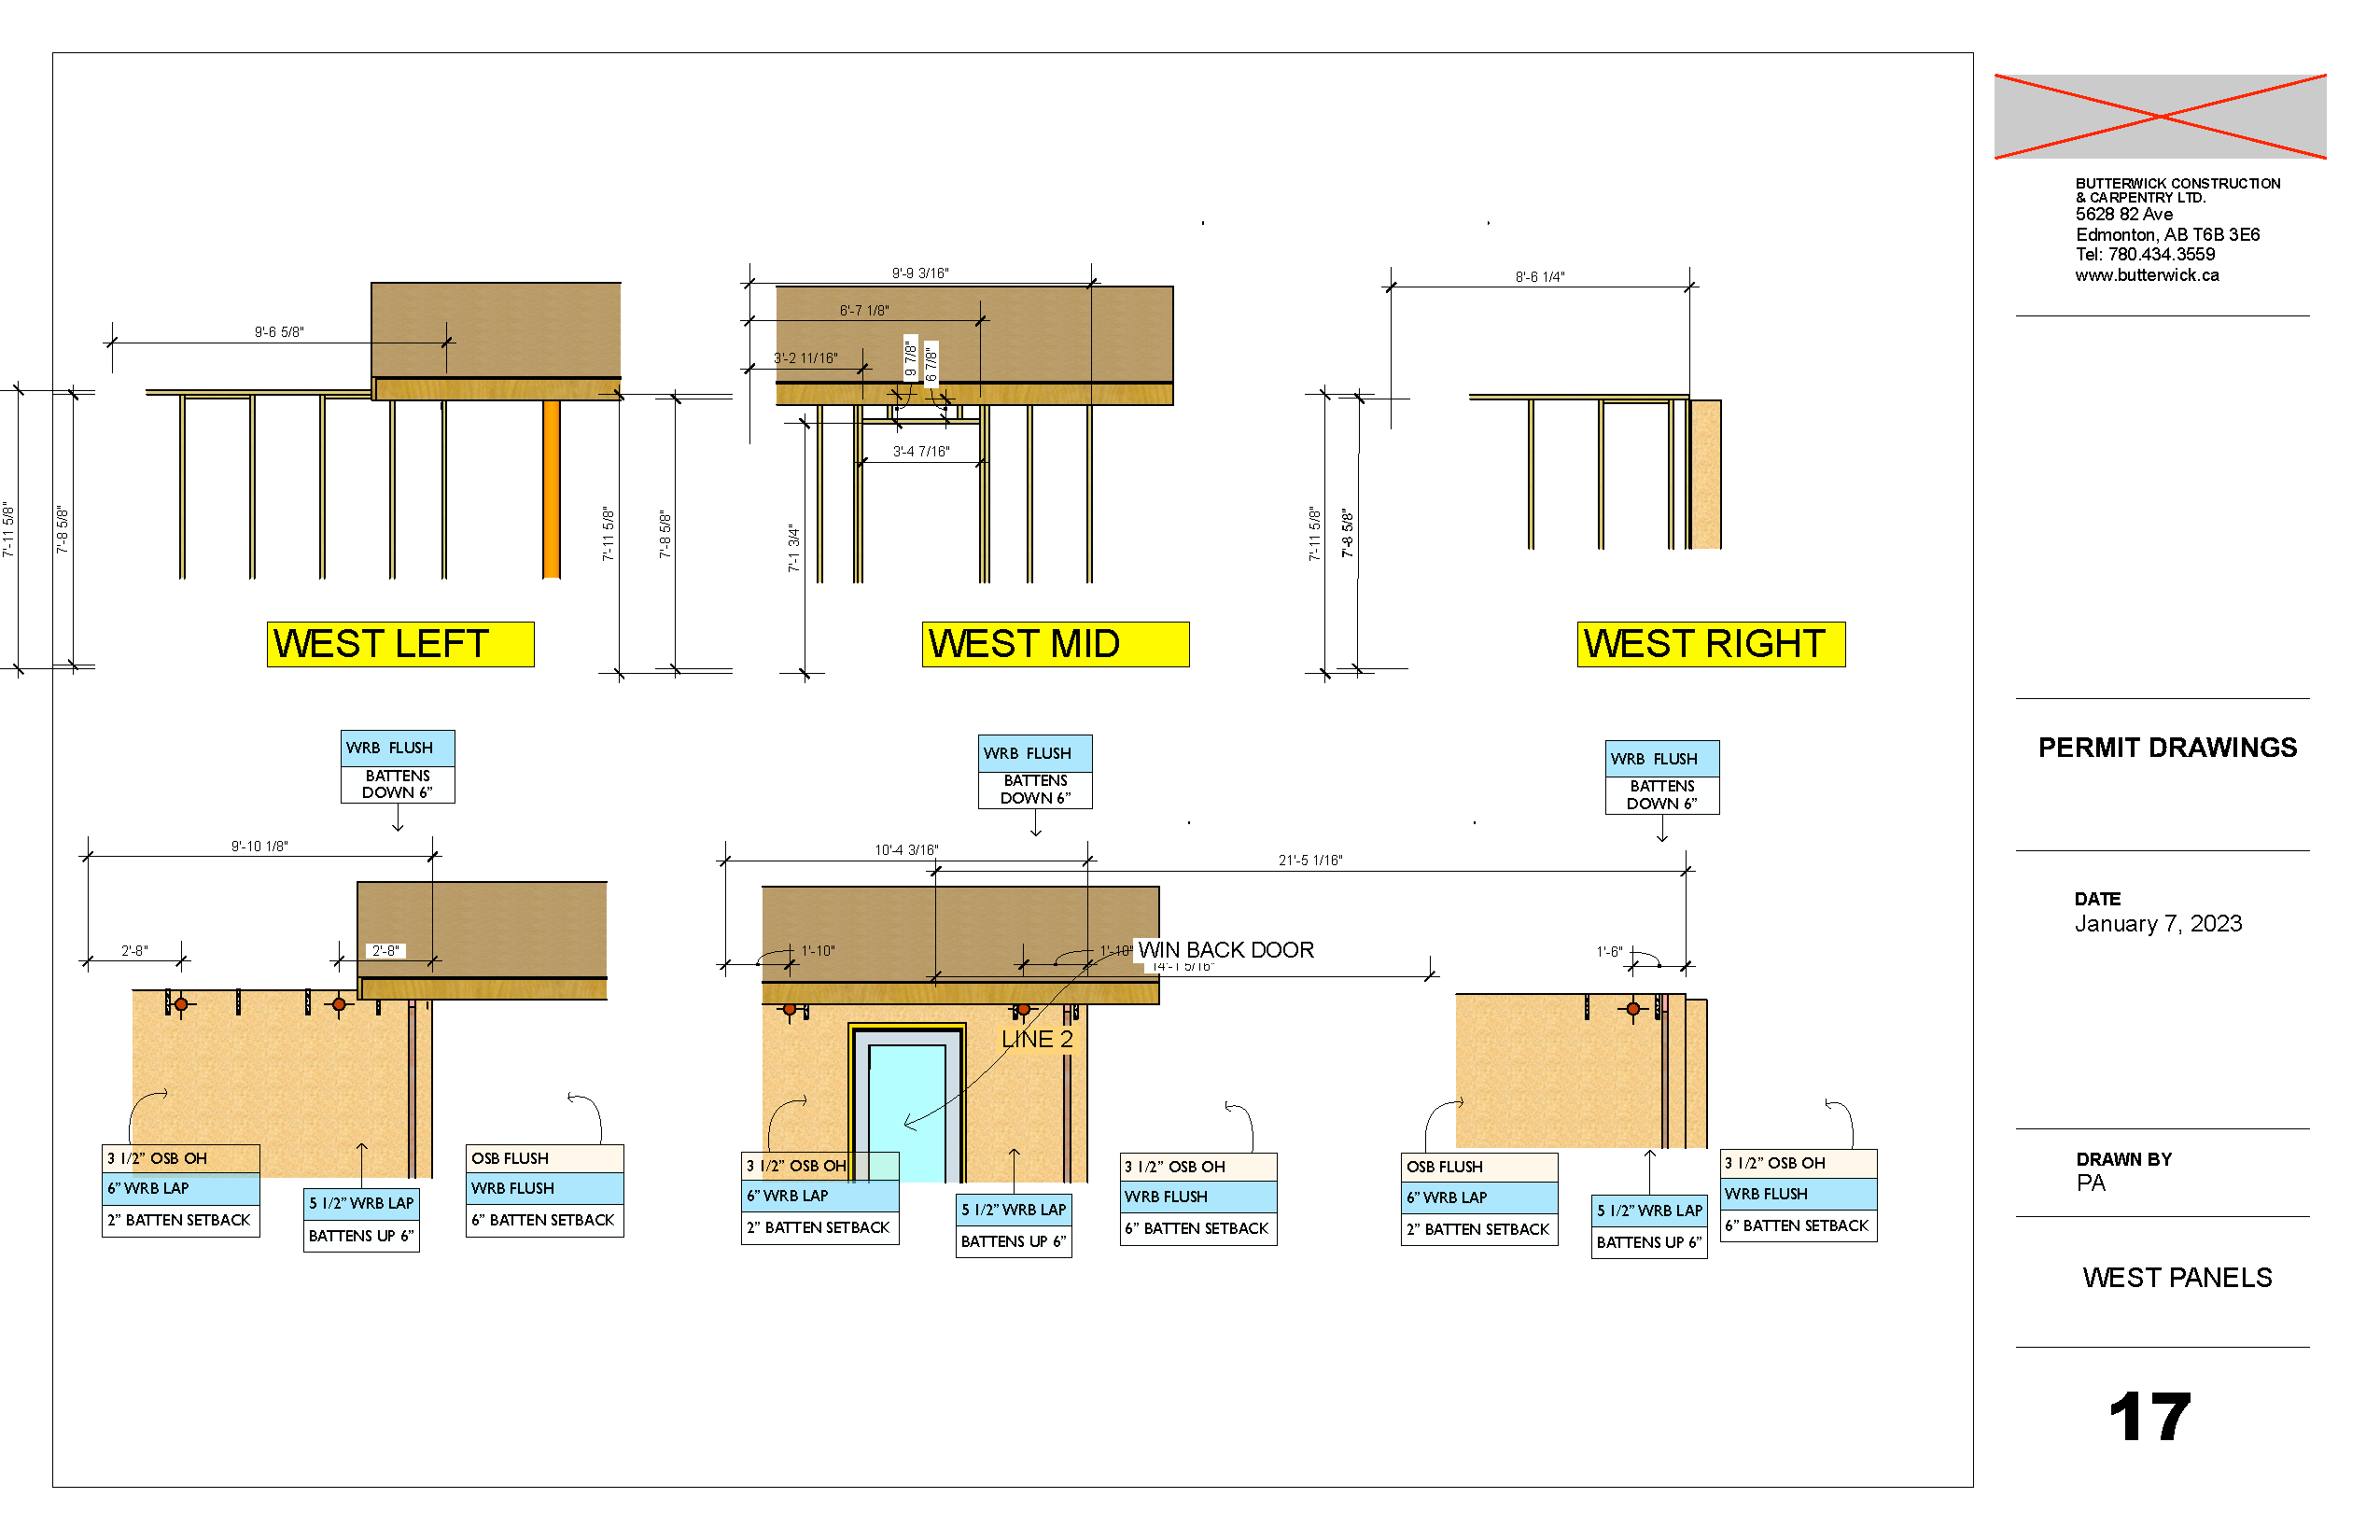
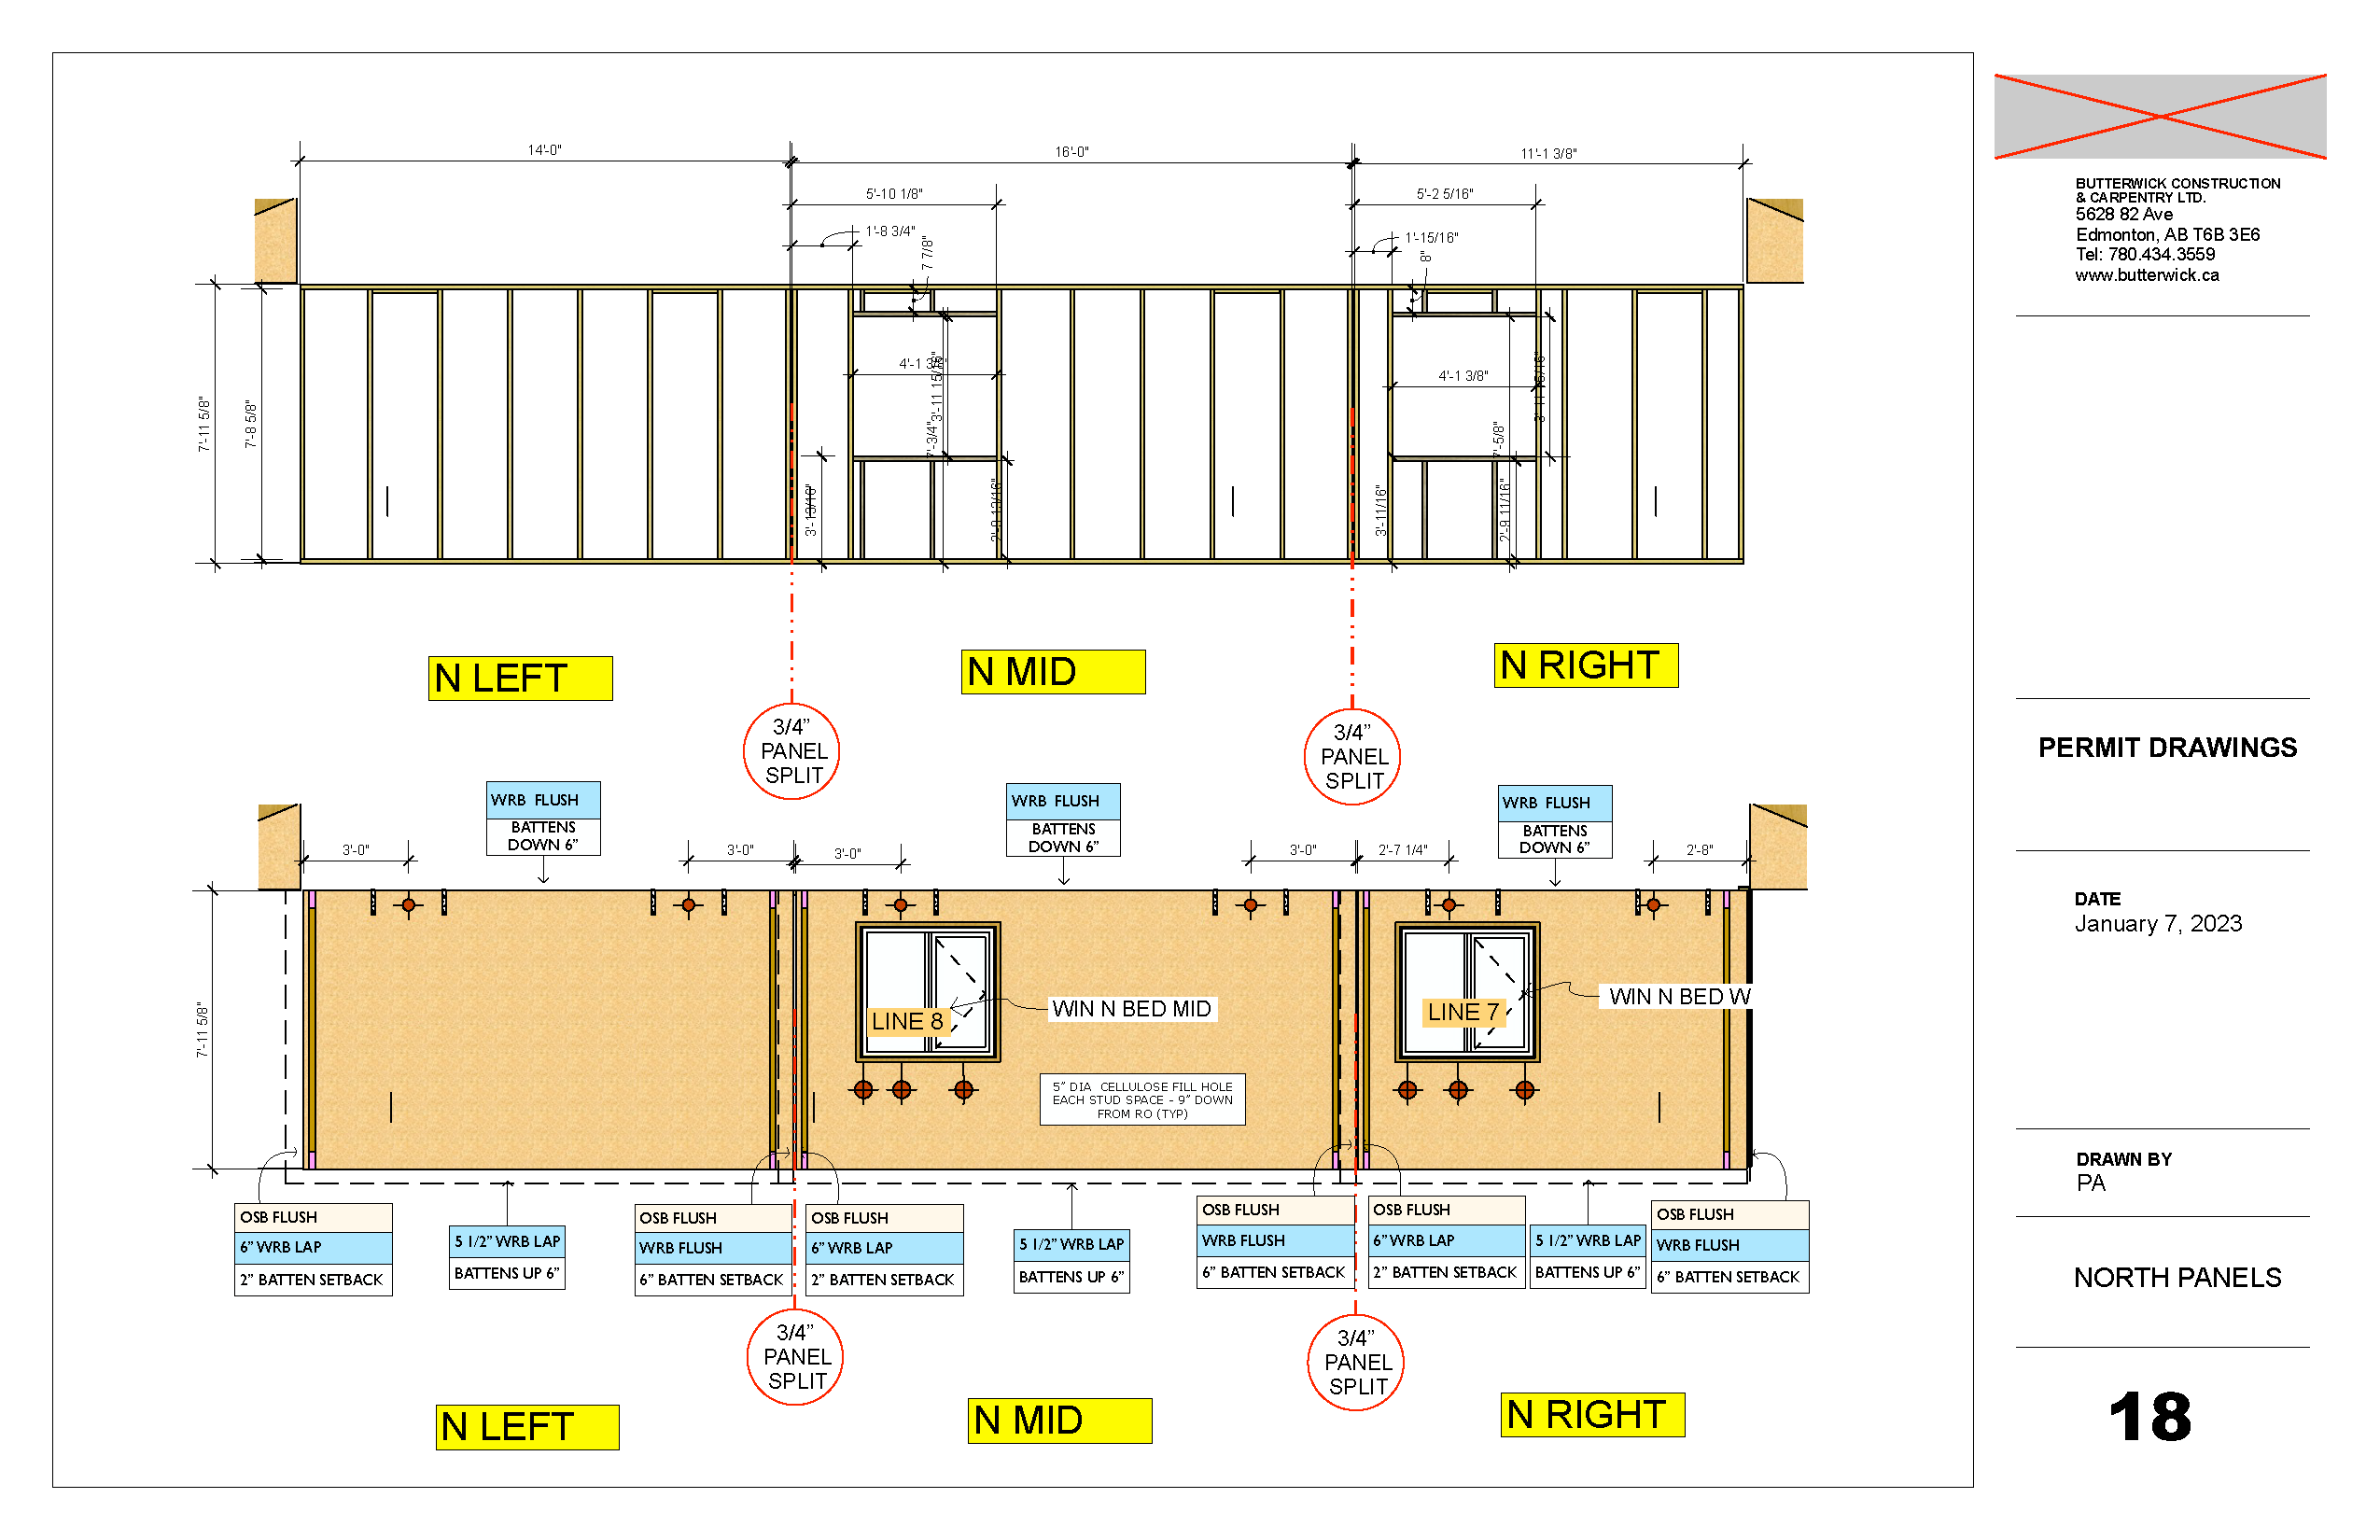
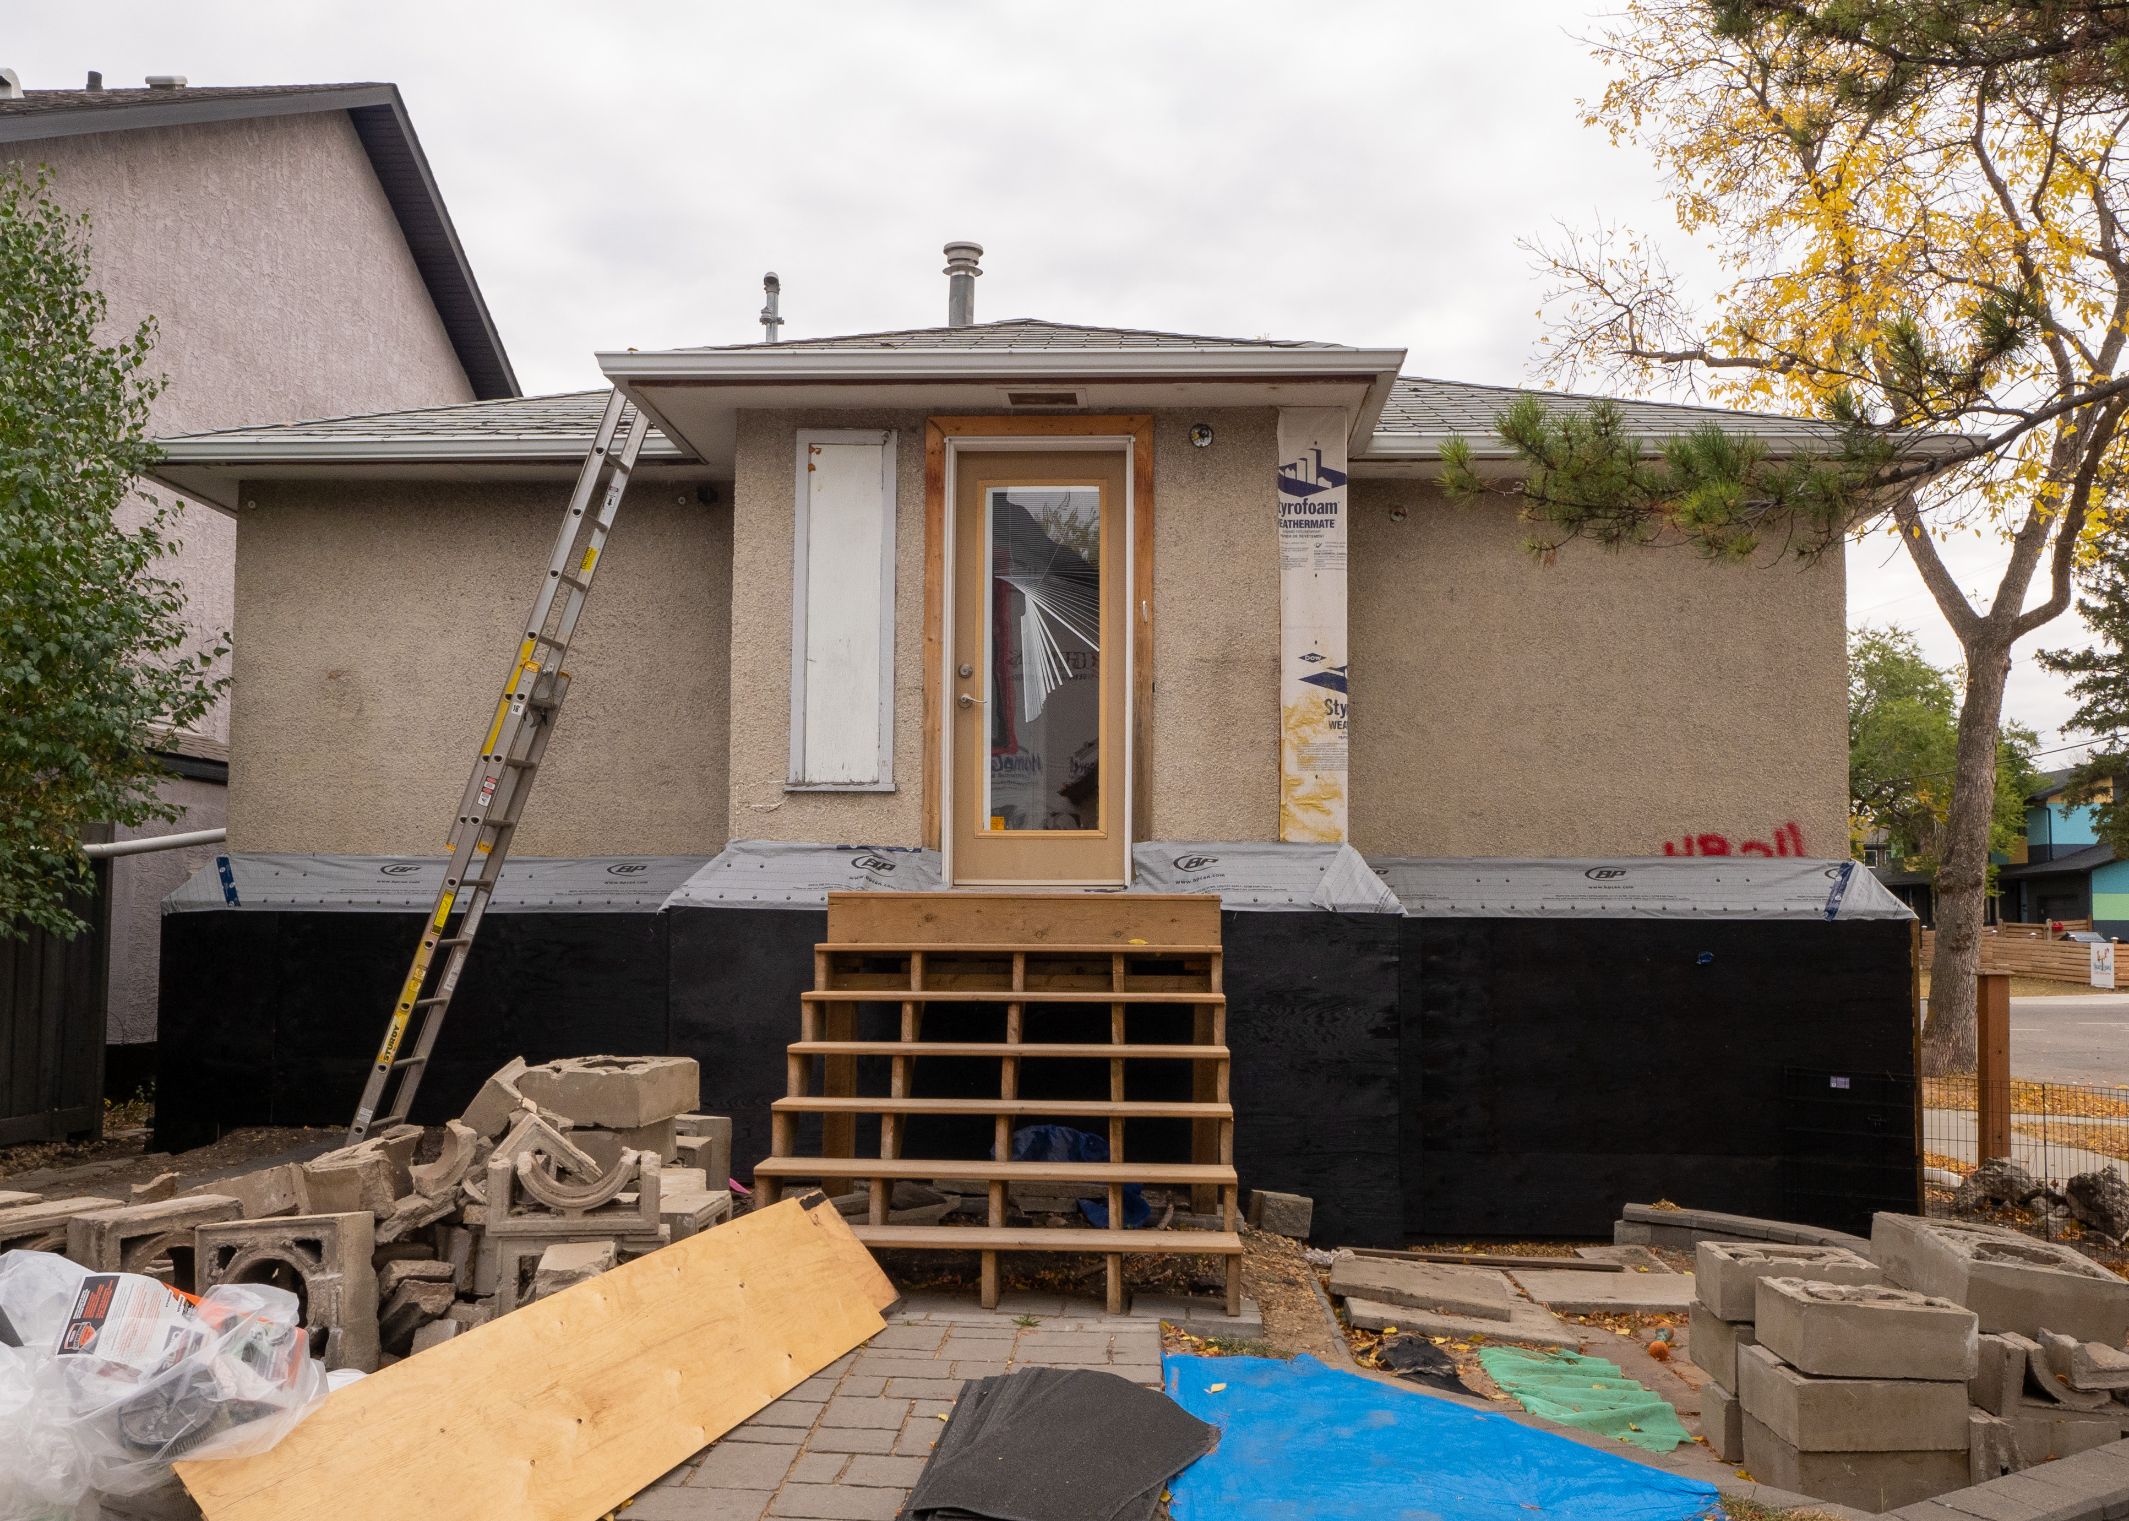
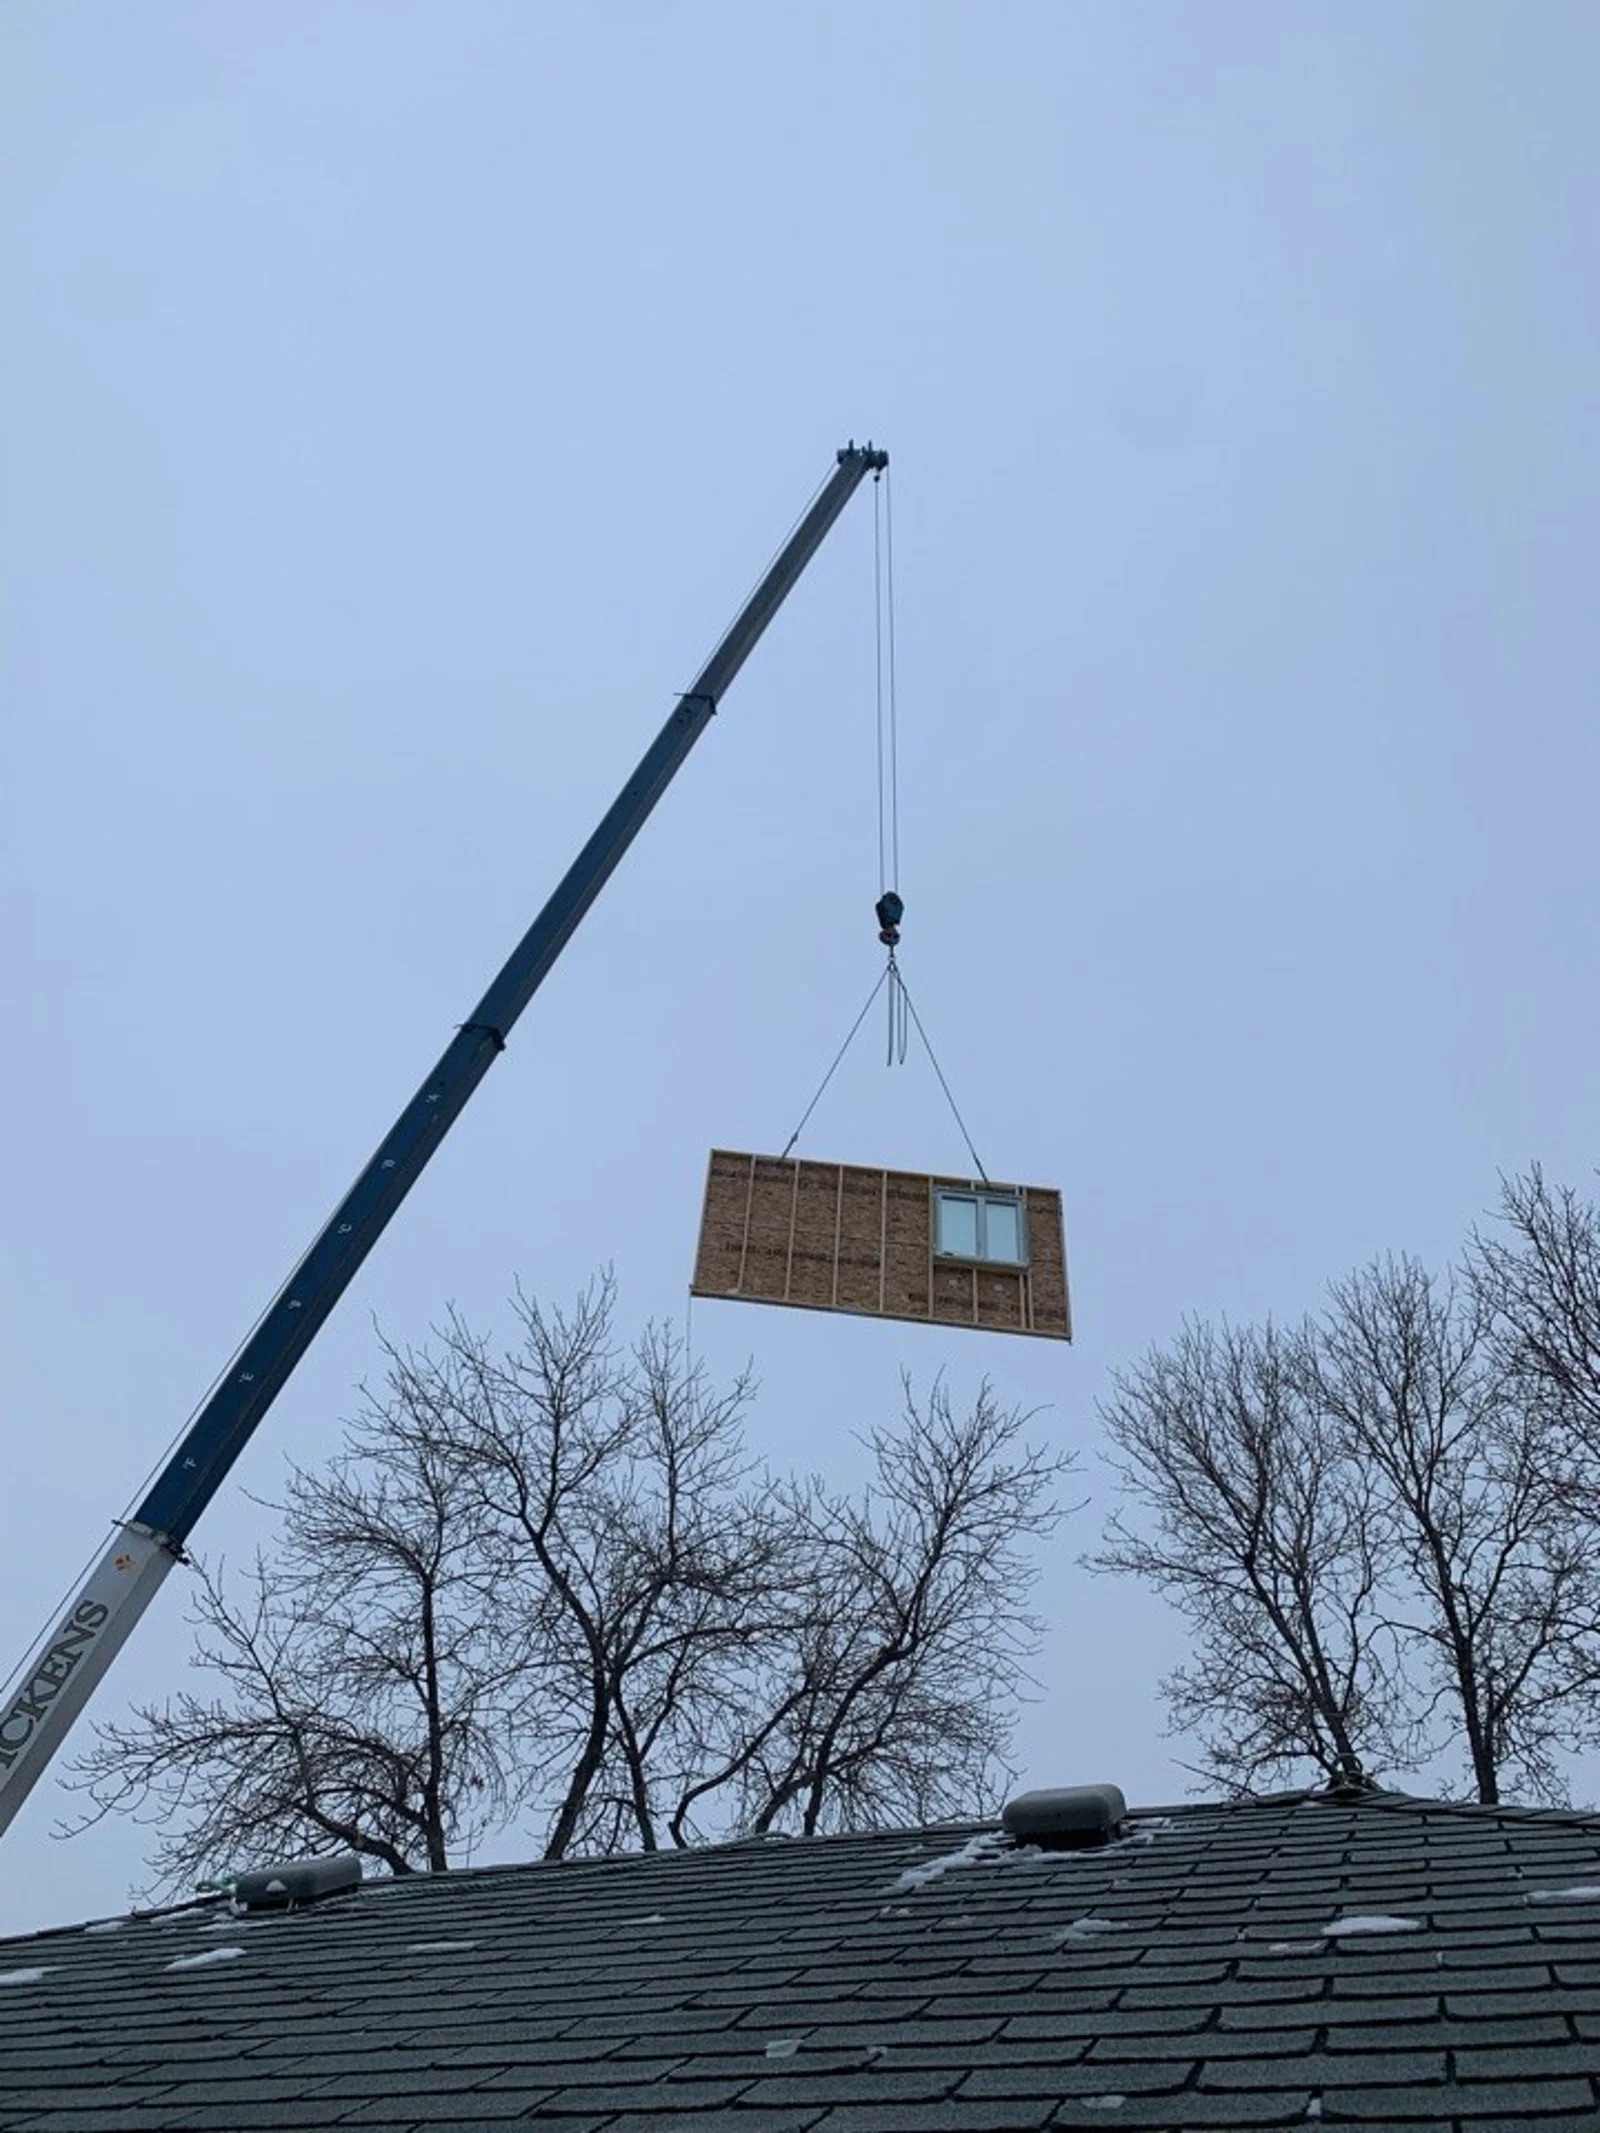
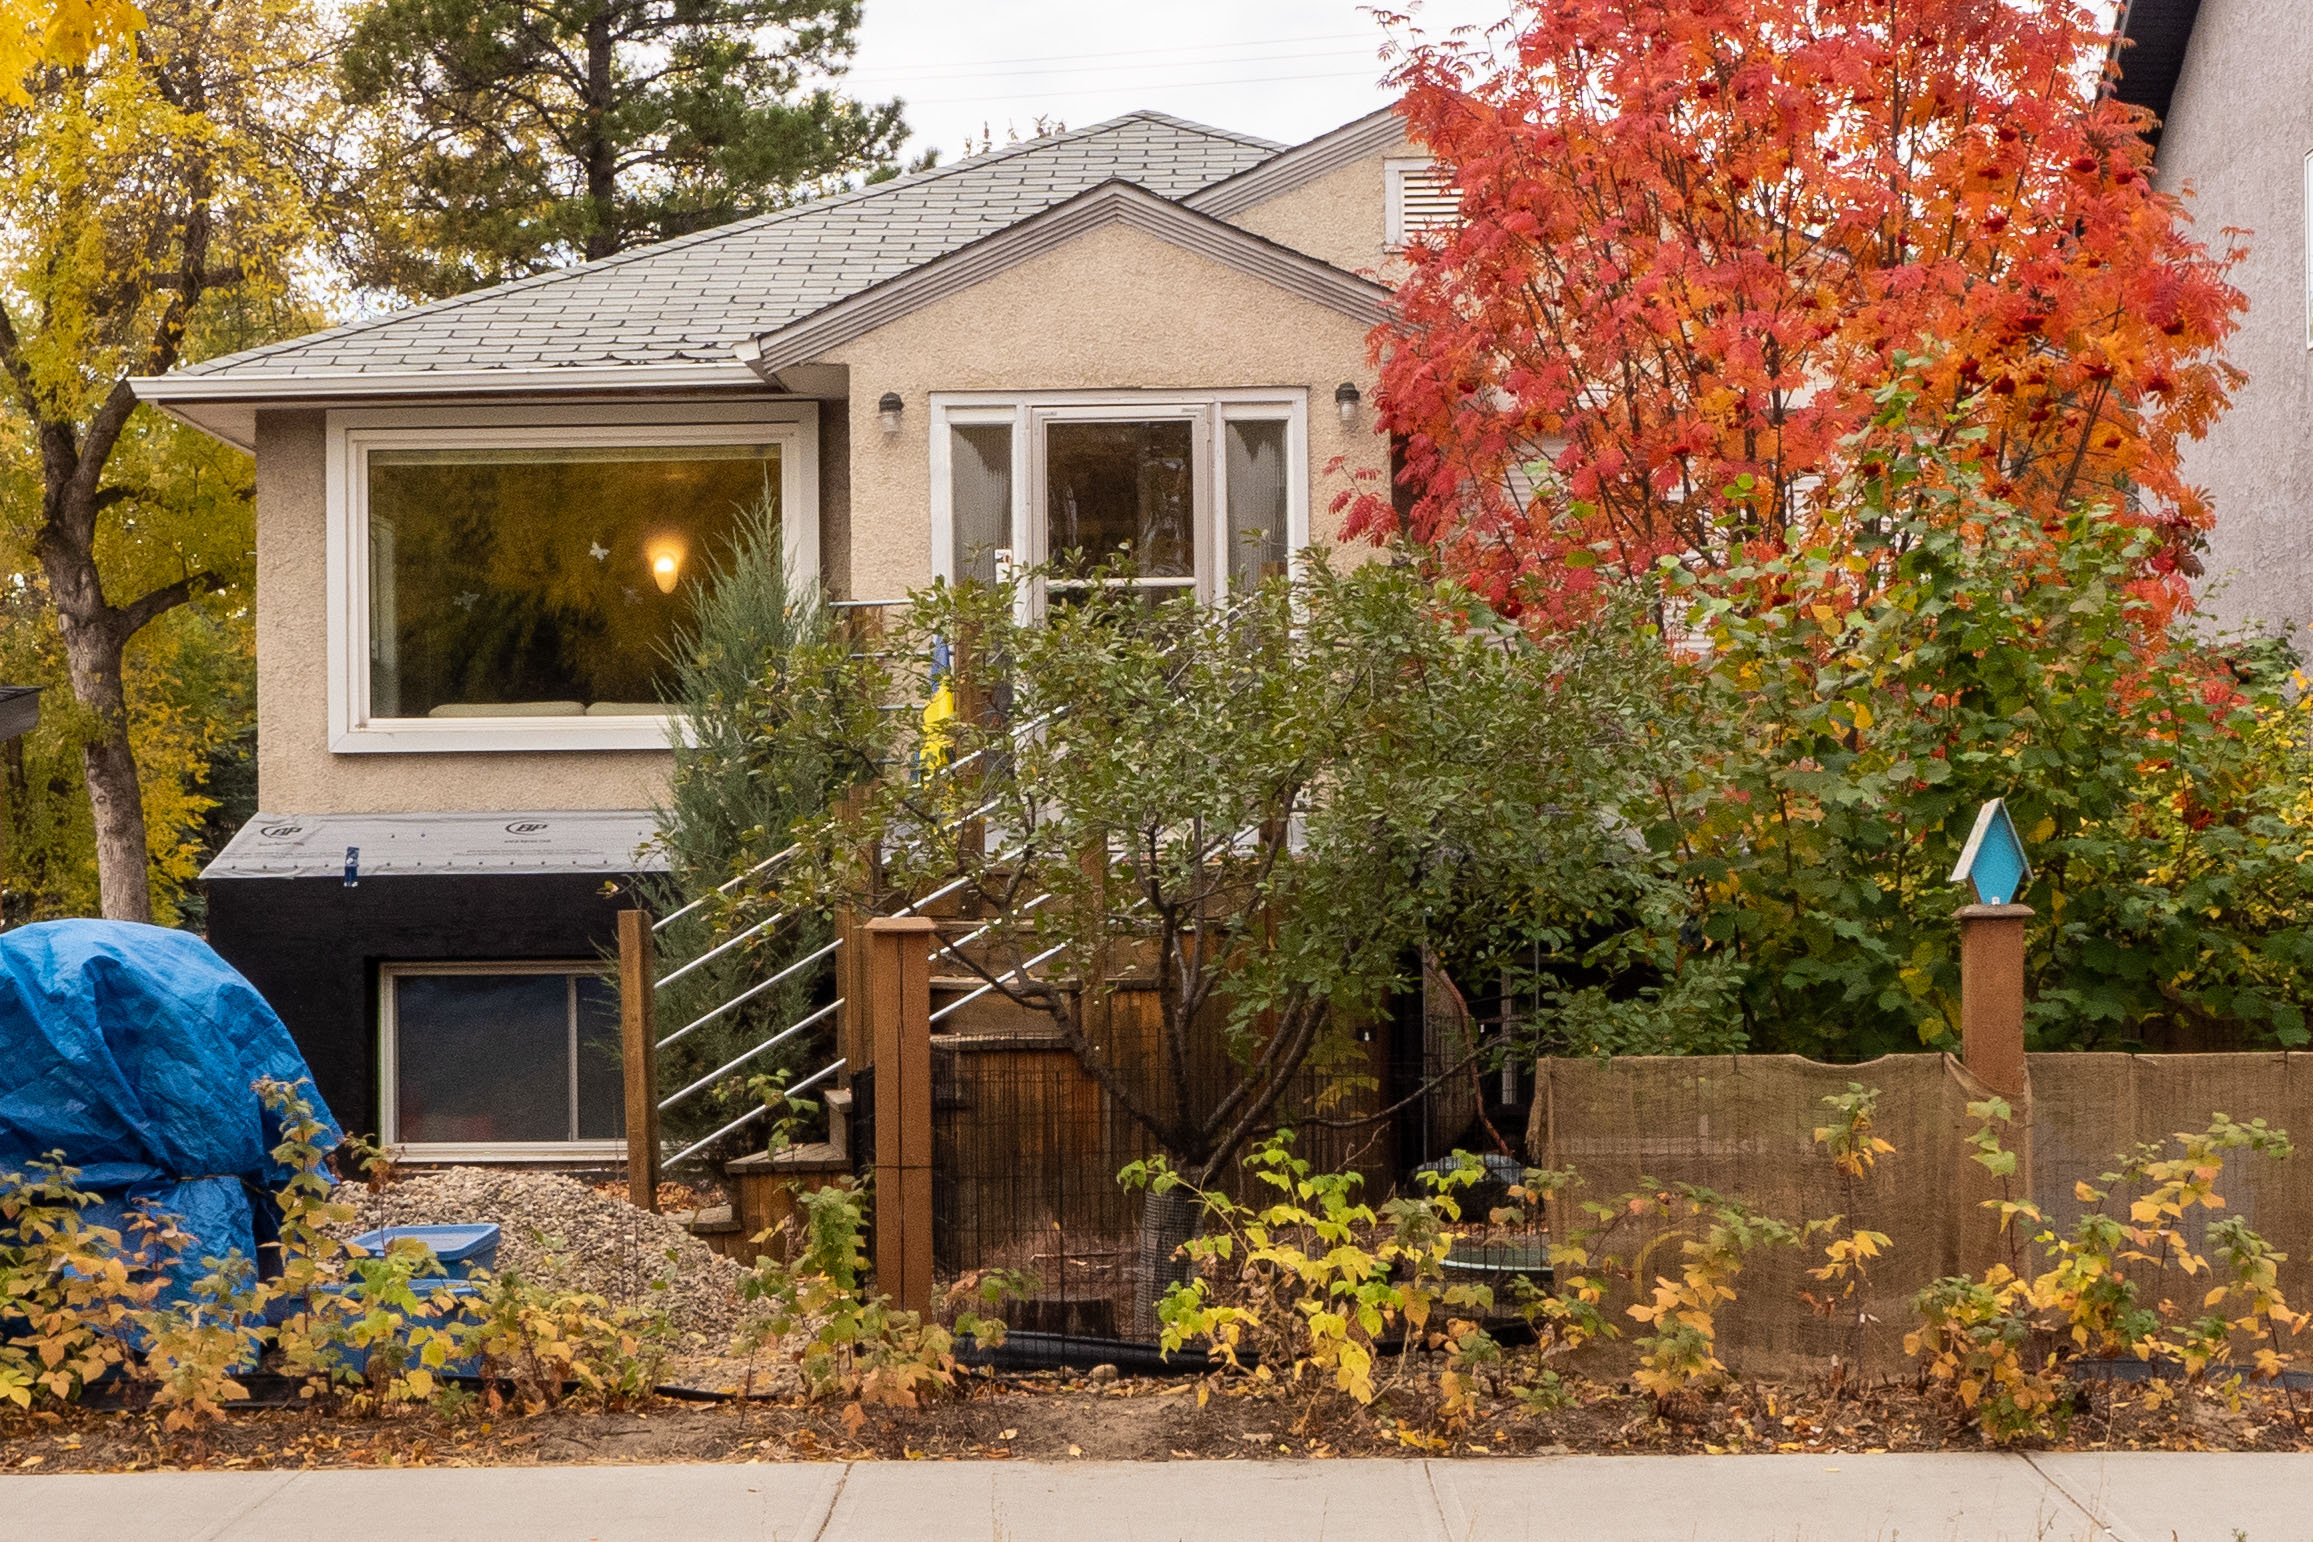
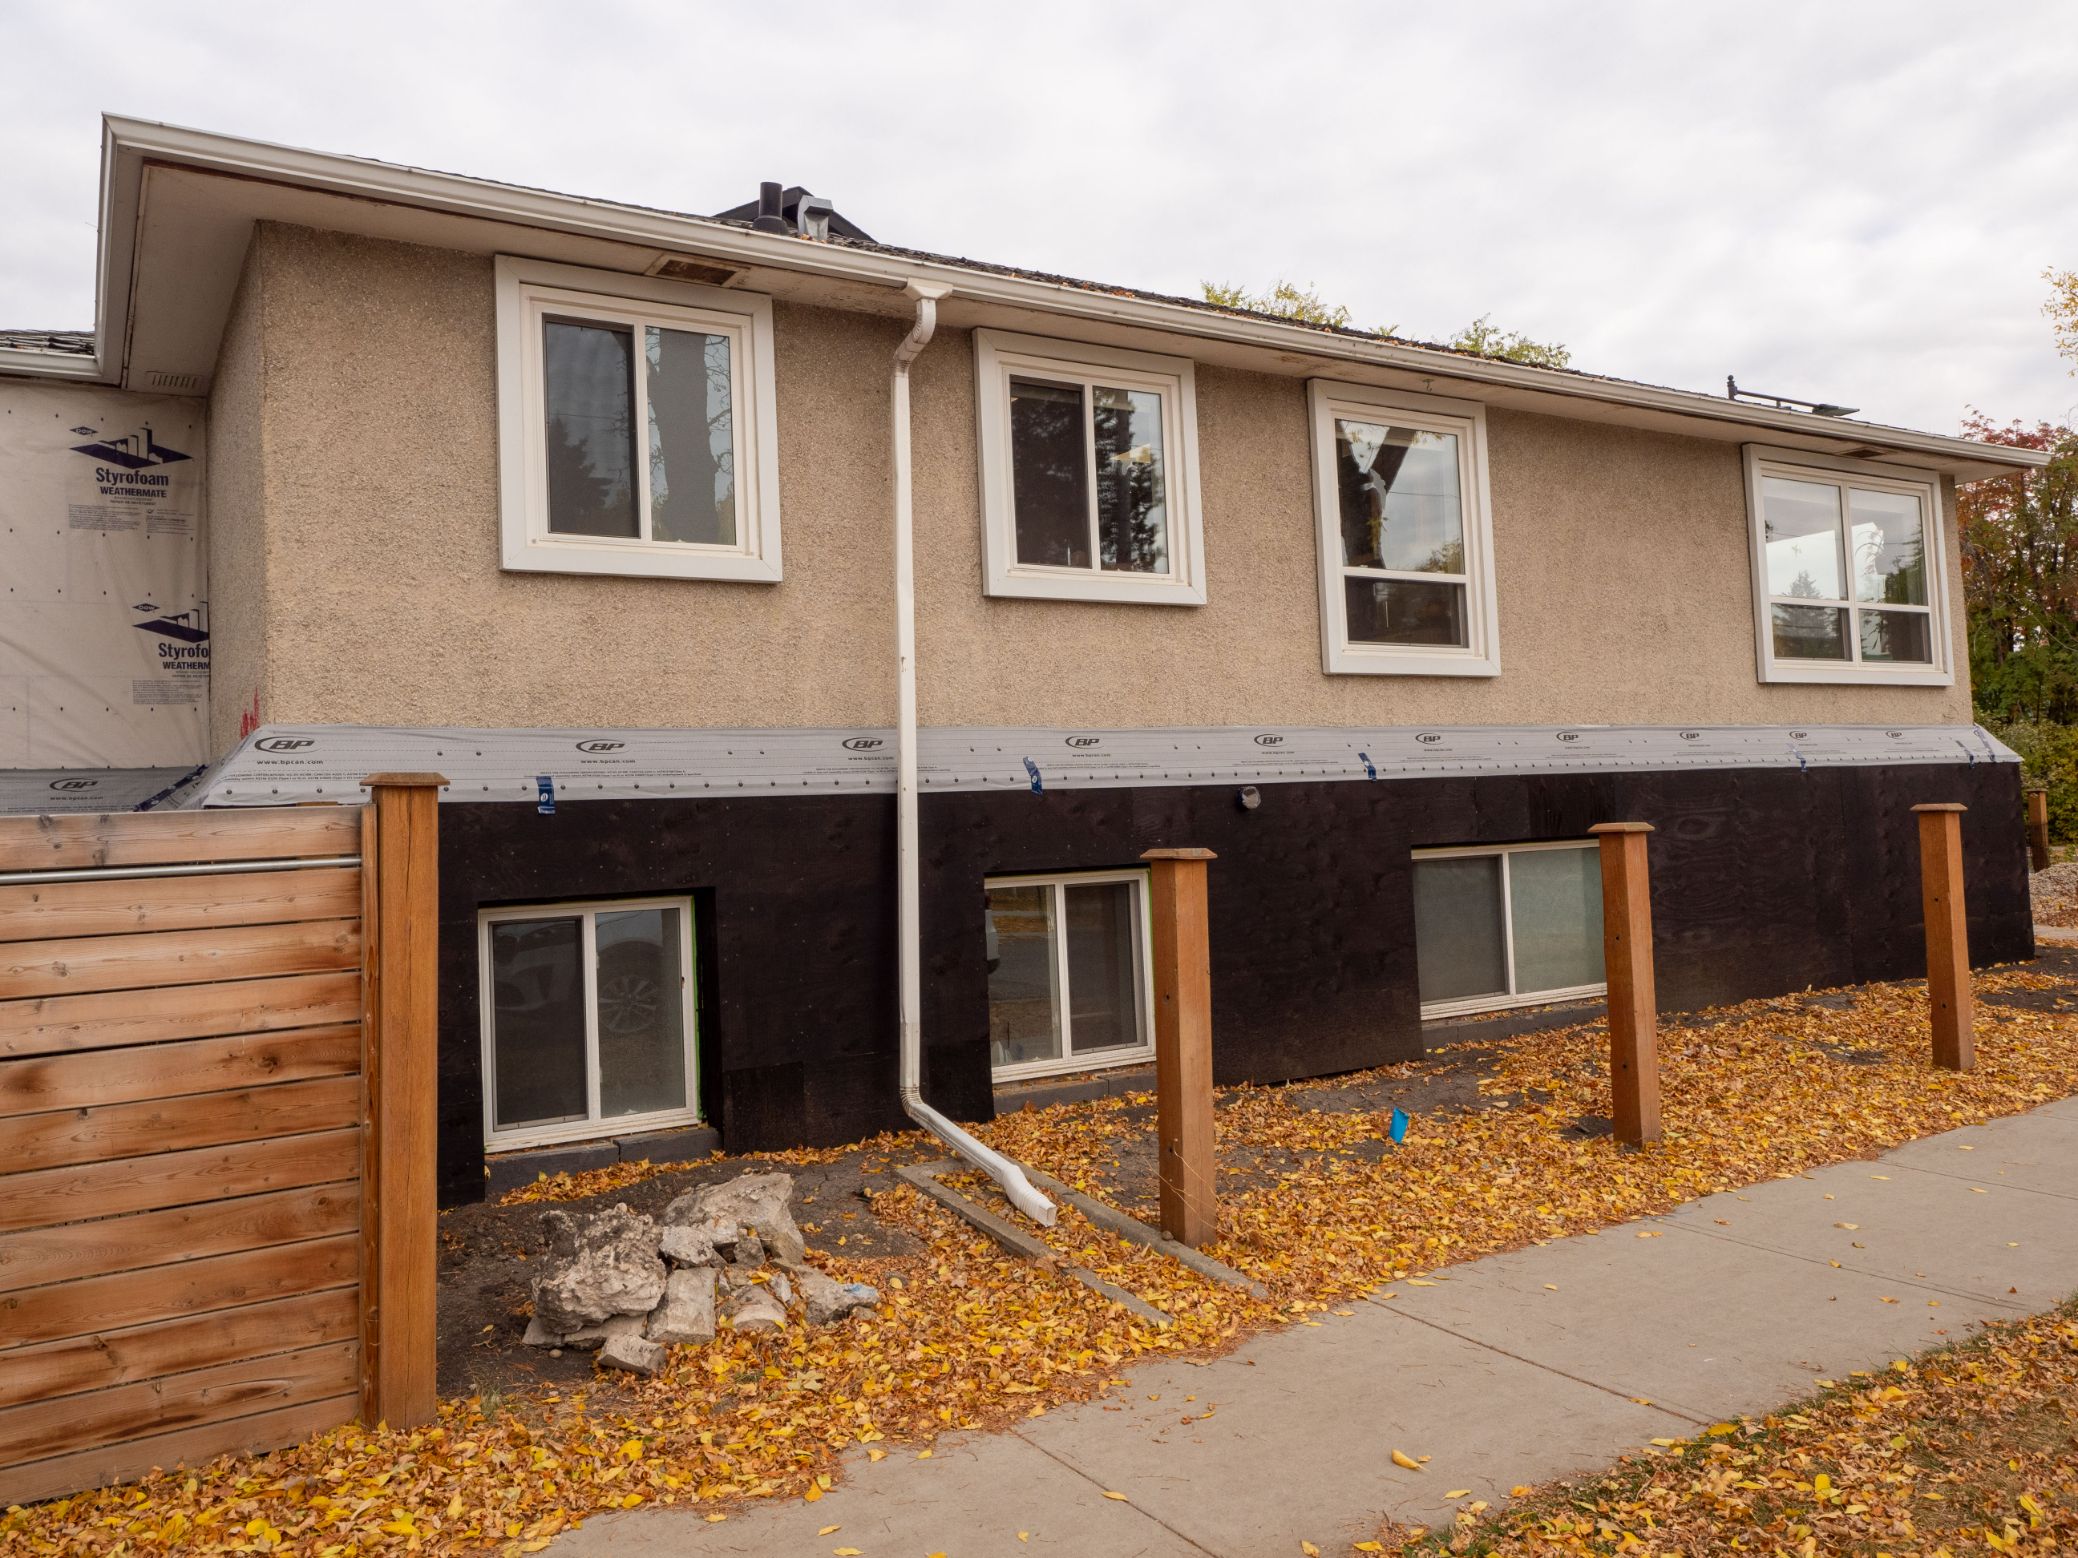
Inspired by a Netherlands green building technique called EnergieSprong, the retrofit used digital capture technology to develop an exact 3D model of the exterior of the 1,120-square-foot home. Peter Amerongen, one of Retrofit Canada’s co-founders and a partner at Butterwick Projects, used the 3D model to size the prebuilt, airtight panels for a perfect fit.
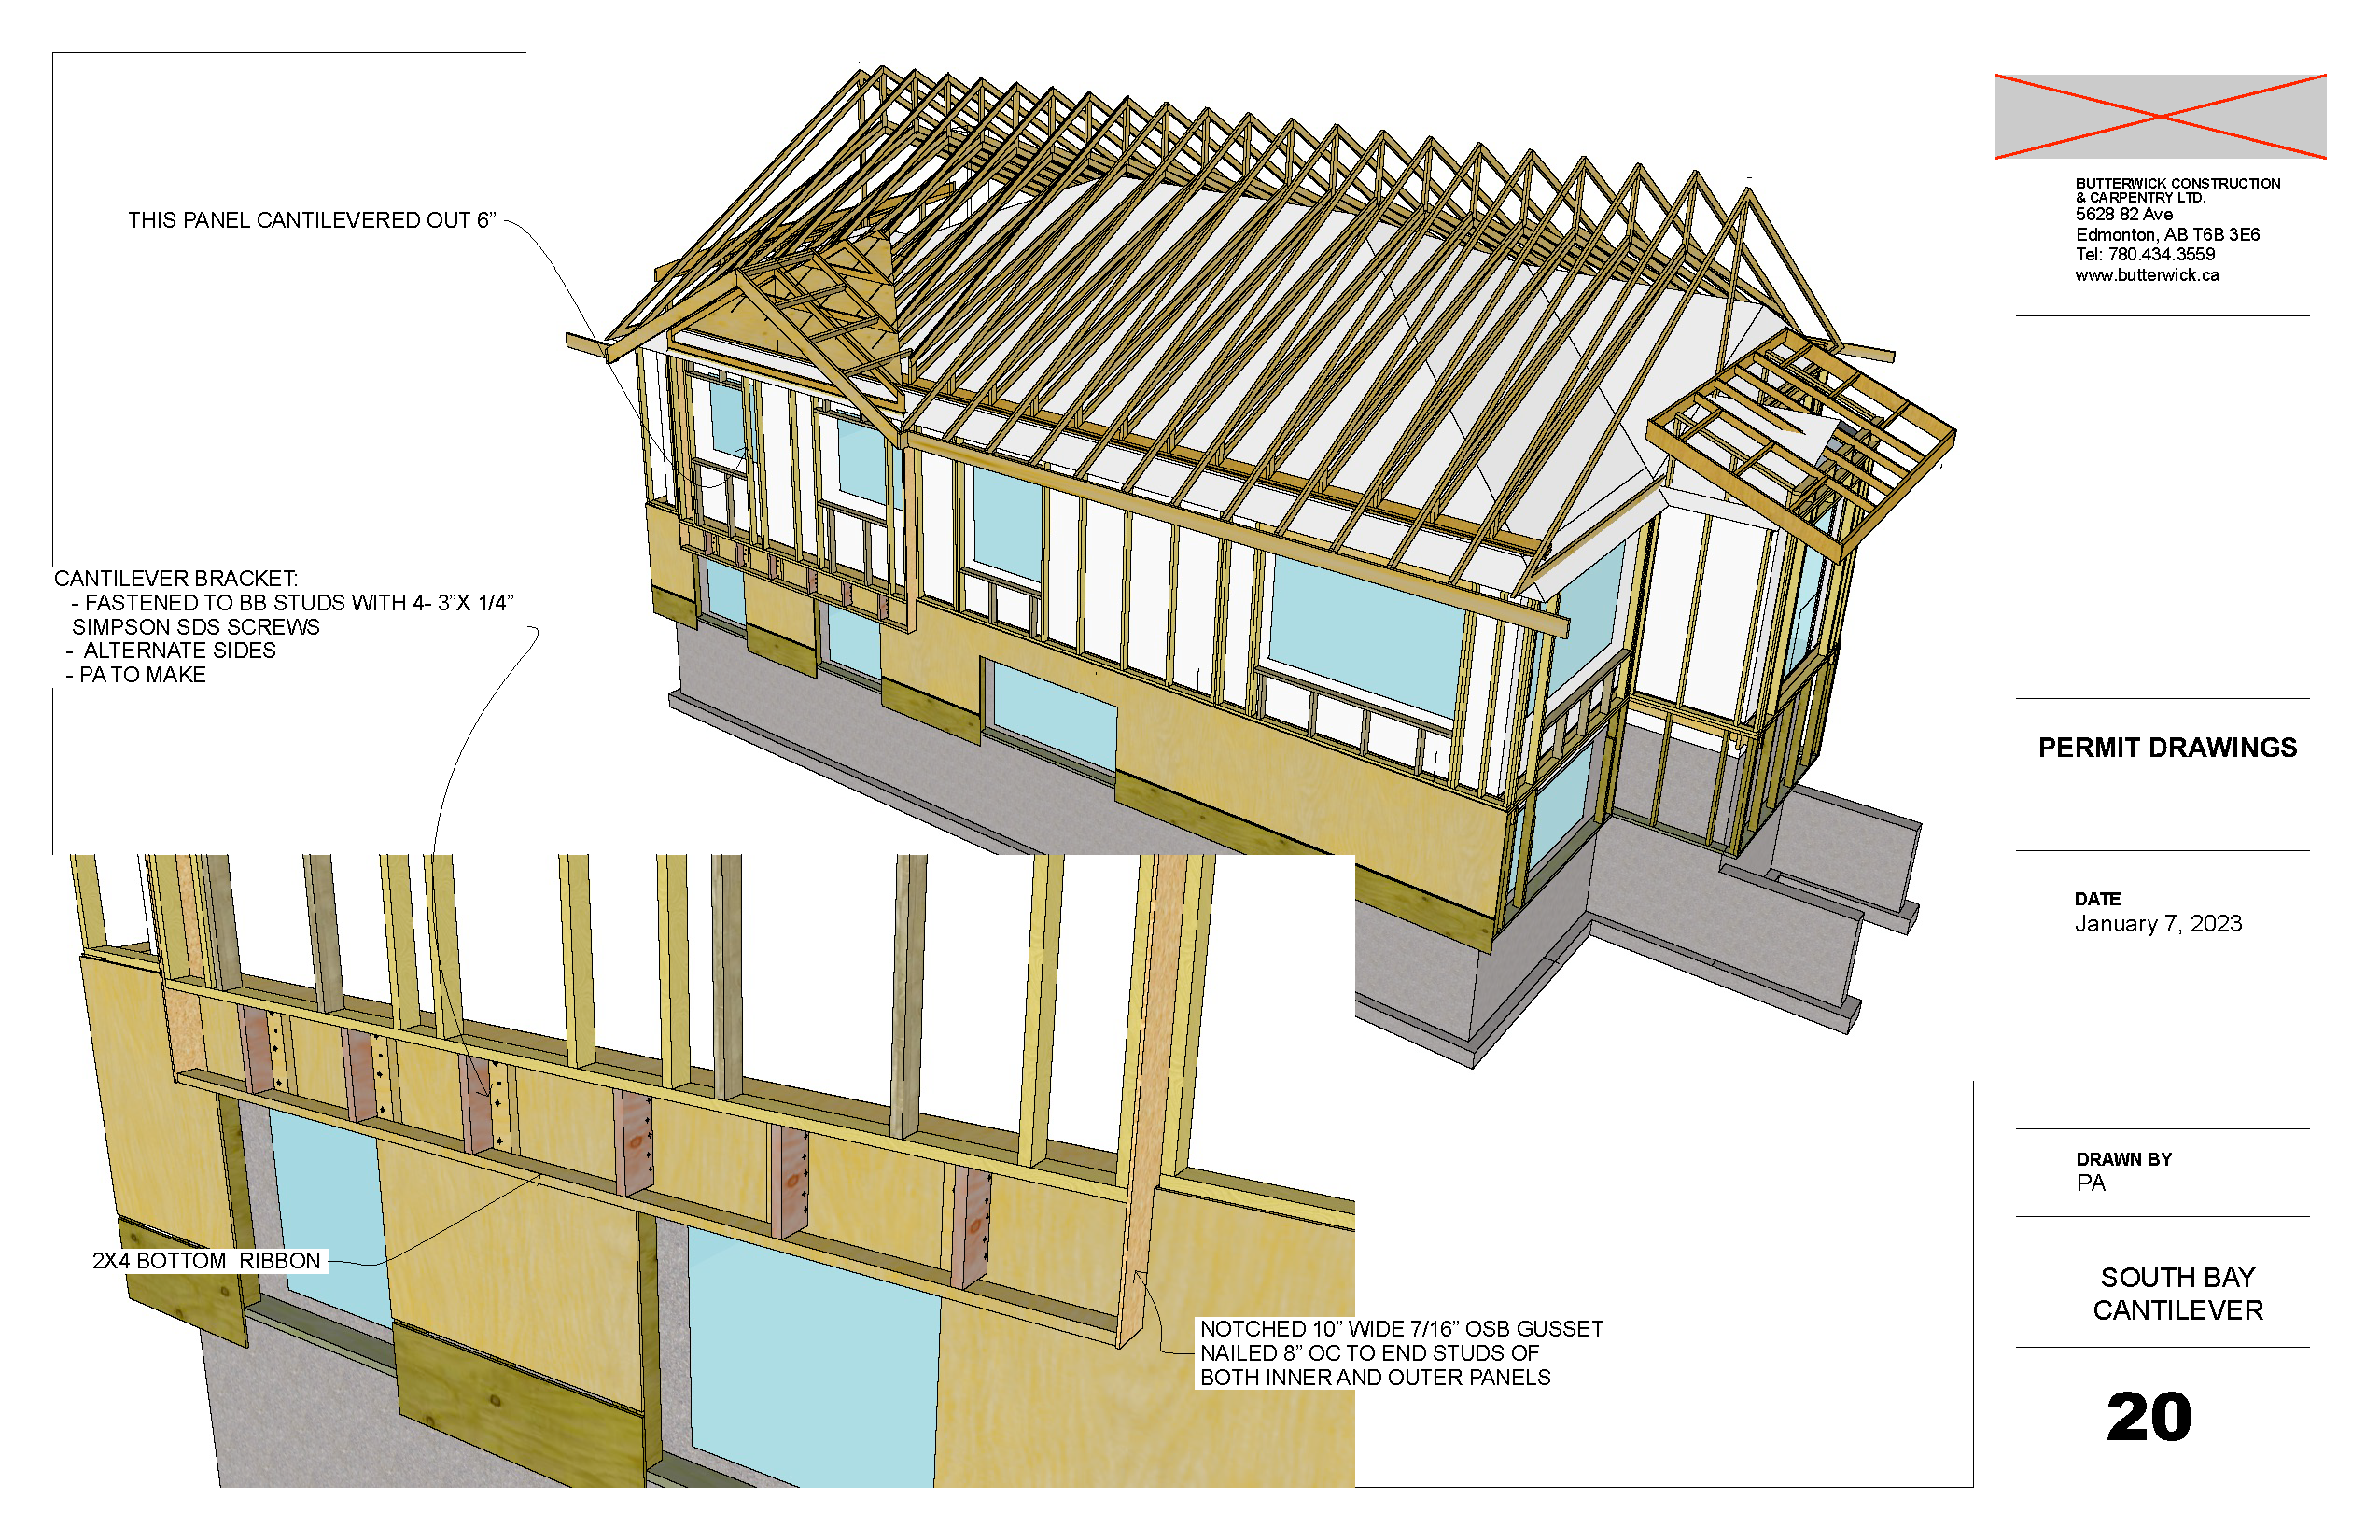
The panels were manufactured off-site and then installed on the outside of the house, resting on an insulated panel support box designed to take the weight of the panels. After securing the panels to the support box at the bottom and the eaves at the top, crews framed a new roof right over the old one, making the house airtight, super-insulated and so efficient it can get all of its annual power needs from renewables.
The building is an example of a 1950s house built high out of the ground so that the basement would be more useful, a less common feature at the time. The more elevated basement meant the project required less excavation. But compared to the two other projects that were part of the same demonstration project, the panel support box, which runs along the seam where the concrete foundation meets the main floor, was much taller.
The home is now net-zero-ready.
Construction Activities
Pre-panel installation:
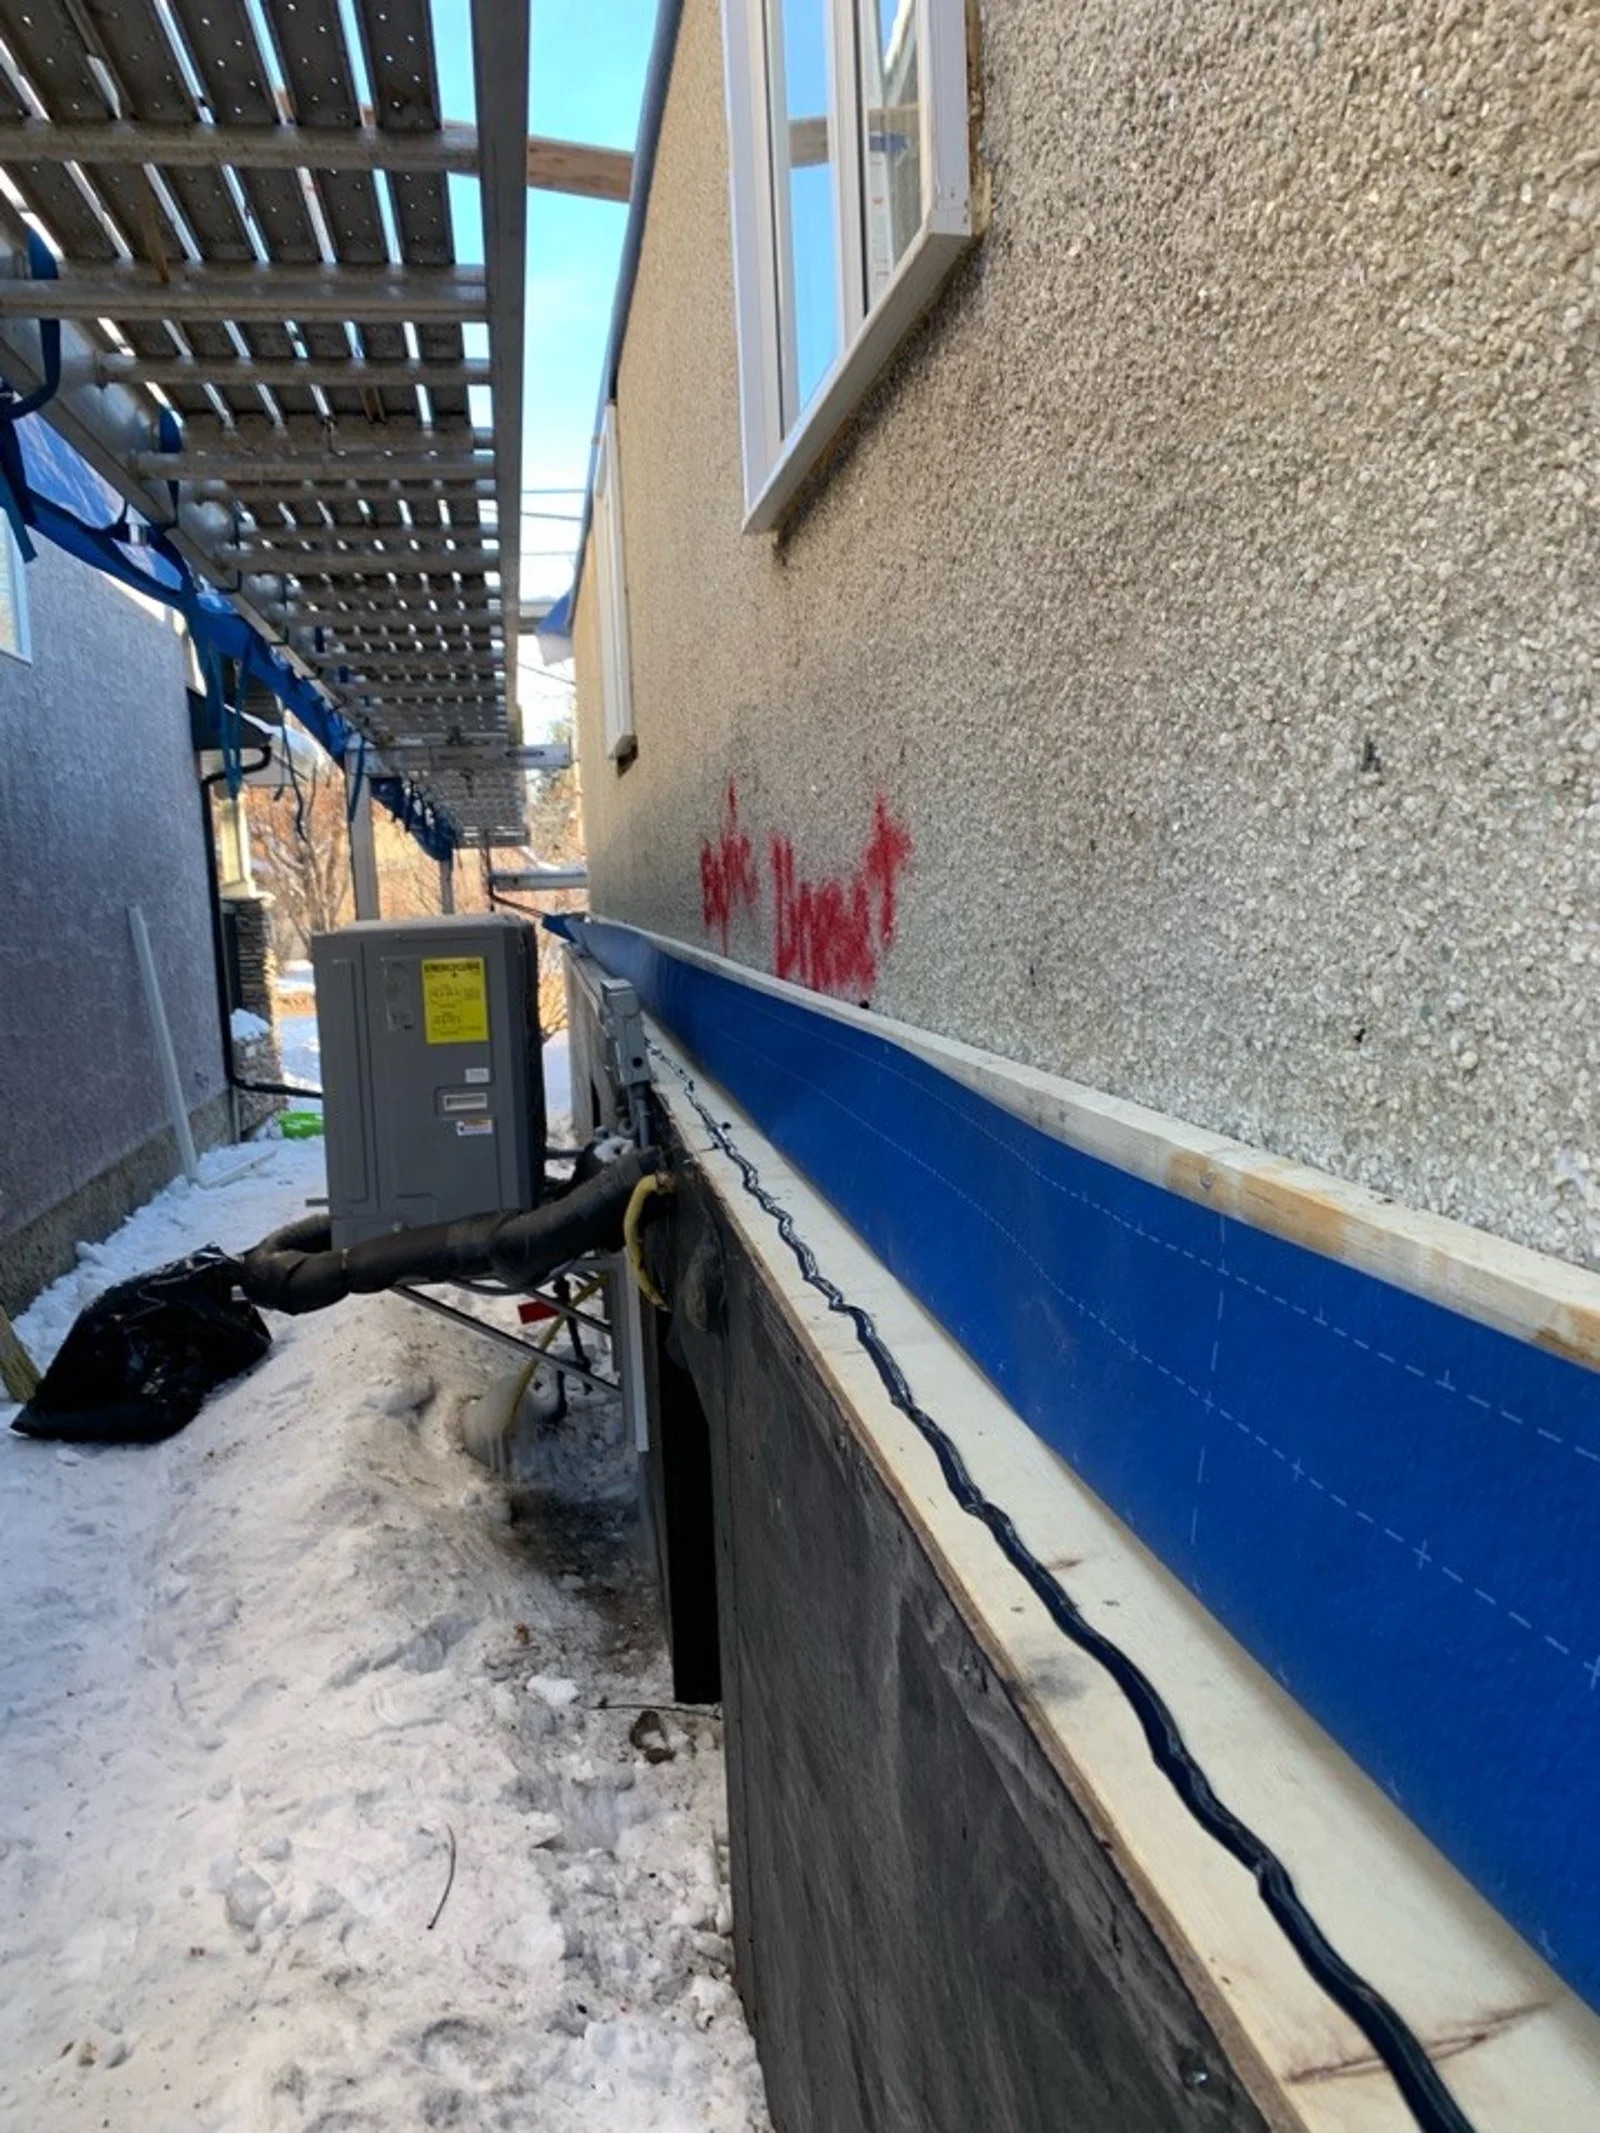
- Use trench previously dug around the house for weeping tile replacement to add a waterproofing membrane and insulation to the foundation.
- Install a “drainage” layer of insulation with vertical grooves resting right against the foundation and a second layer of EPS foam insulation (combined total of 5.5” of insulation).
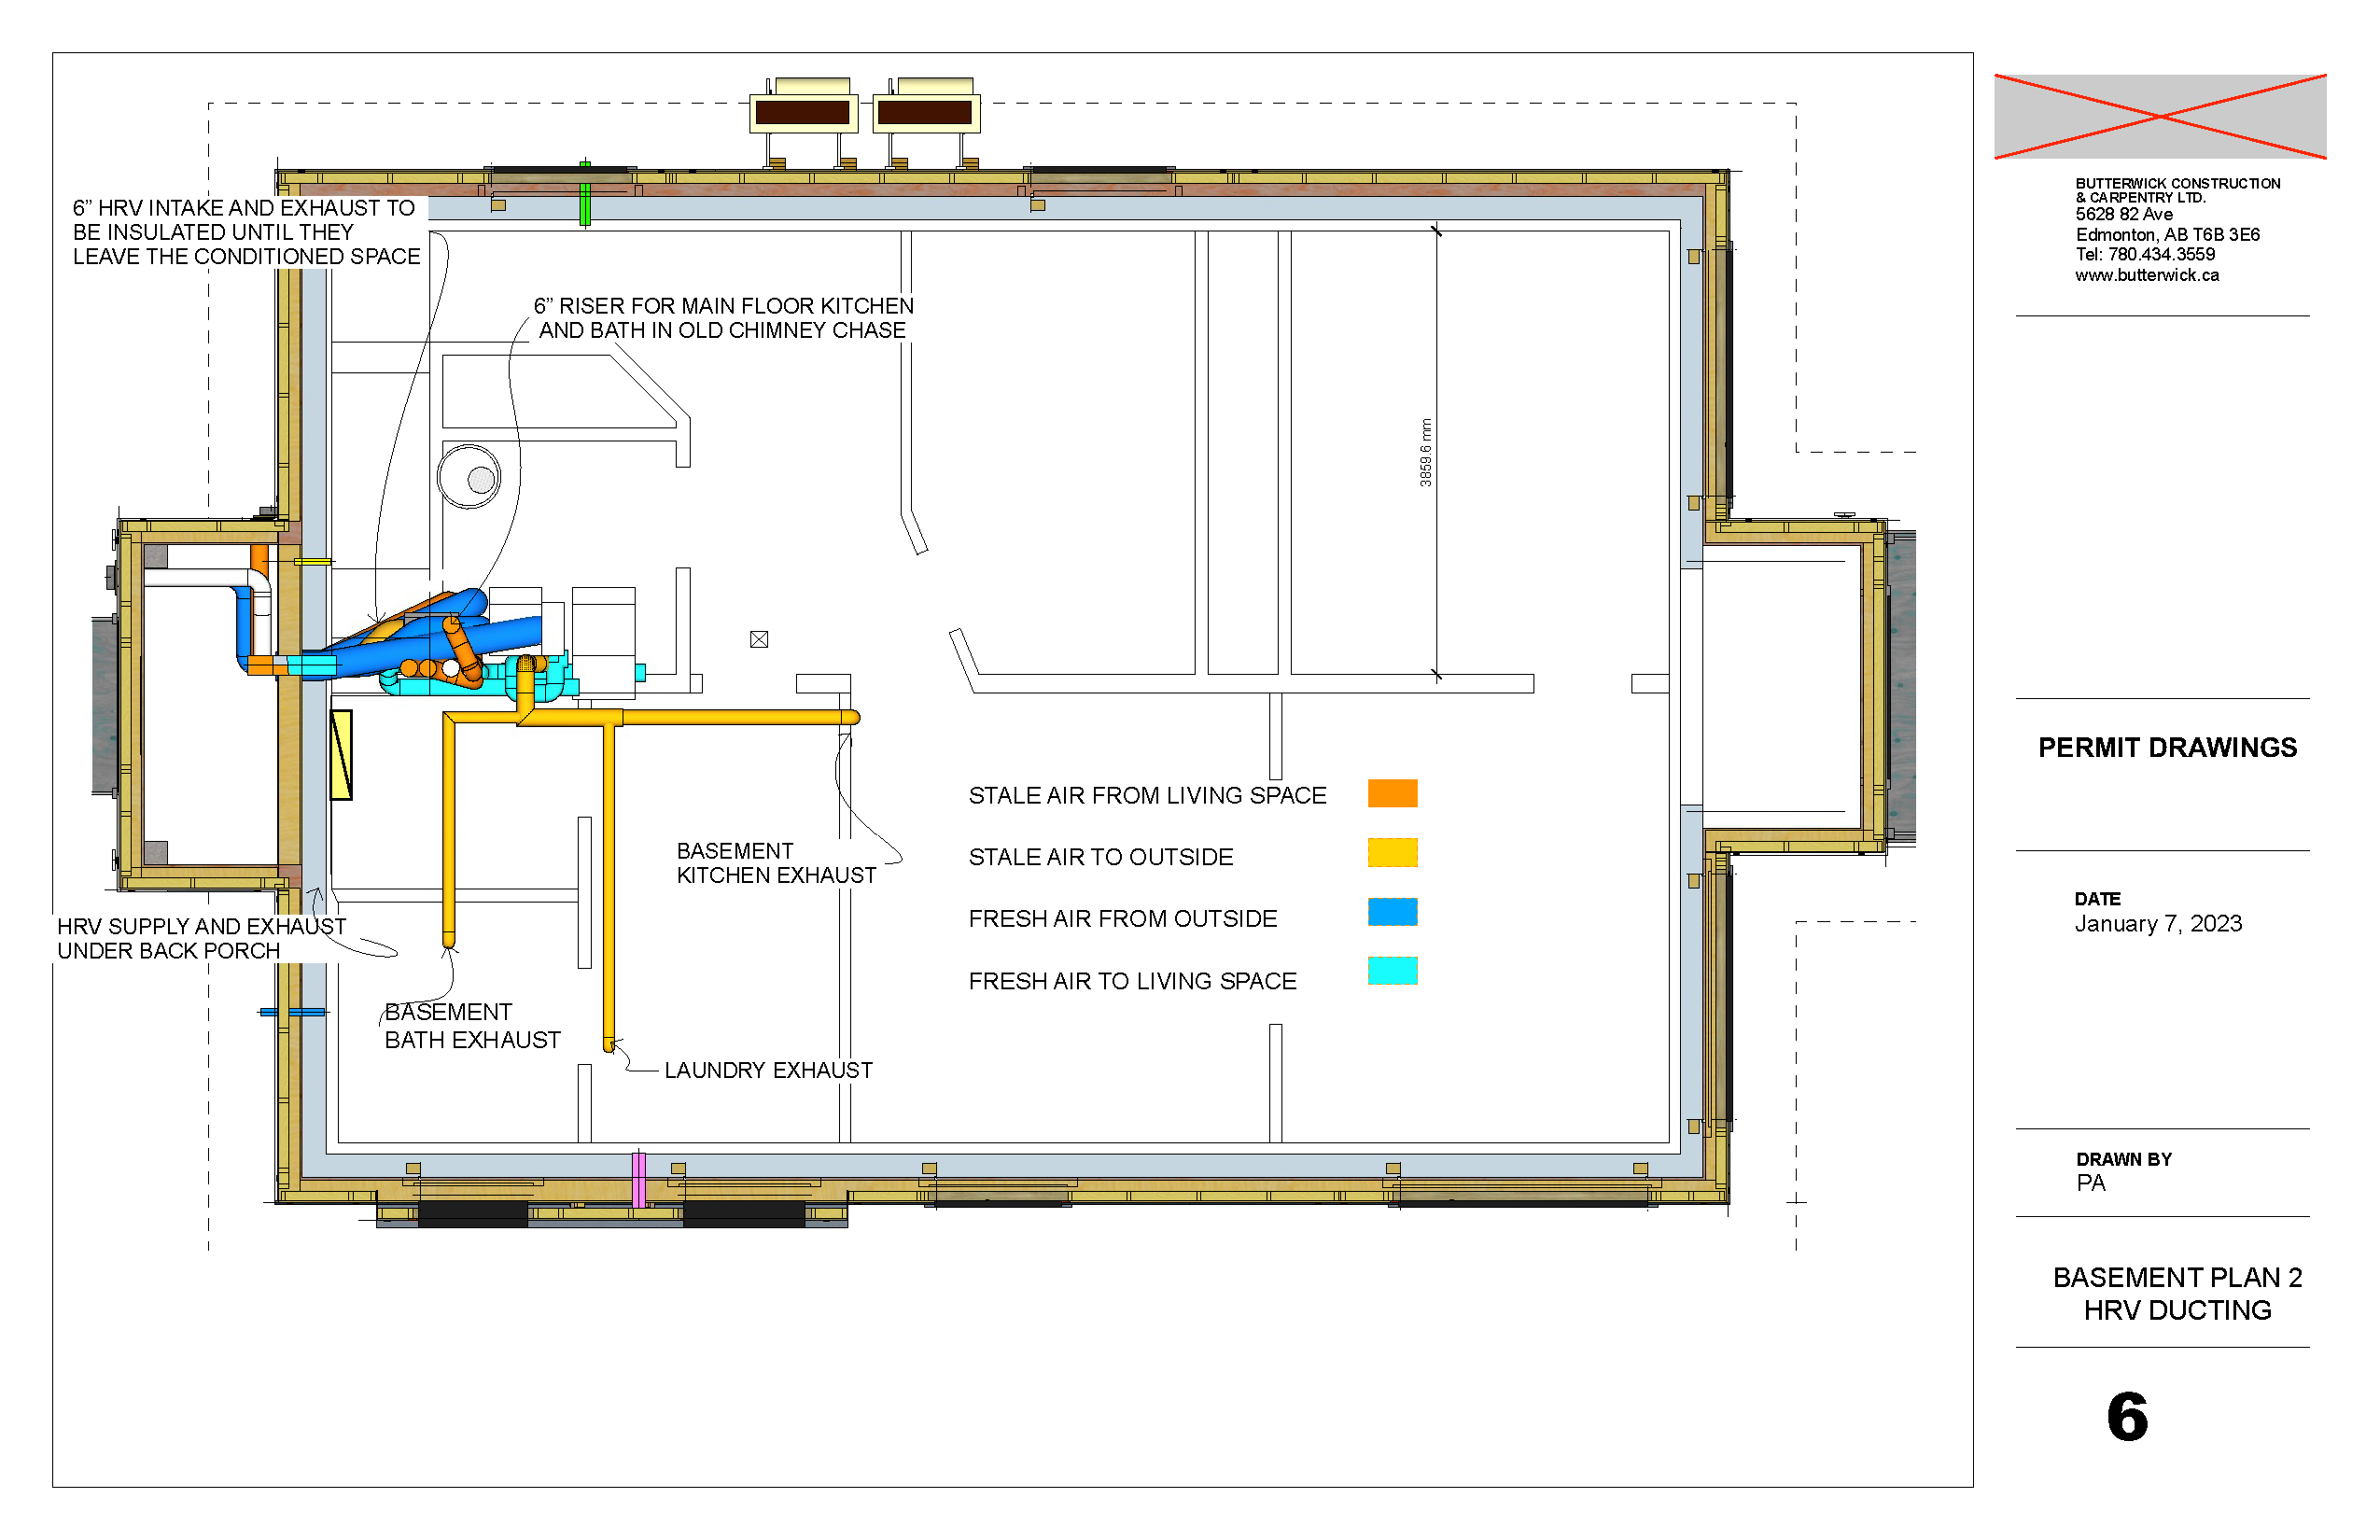
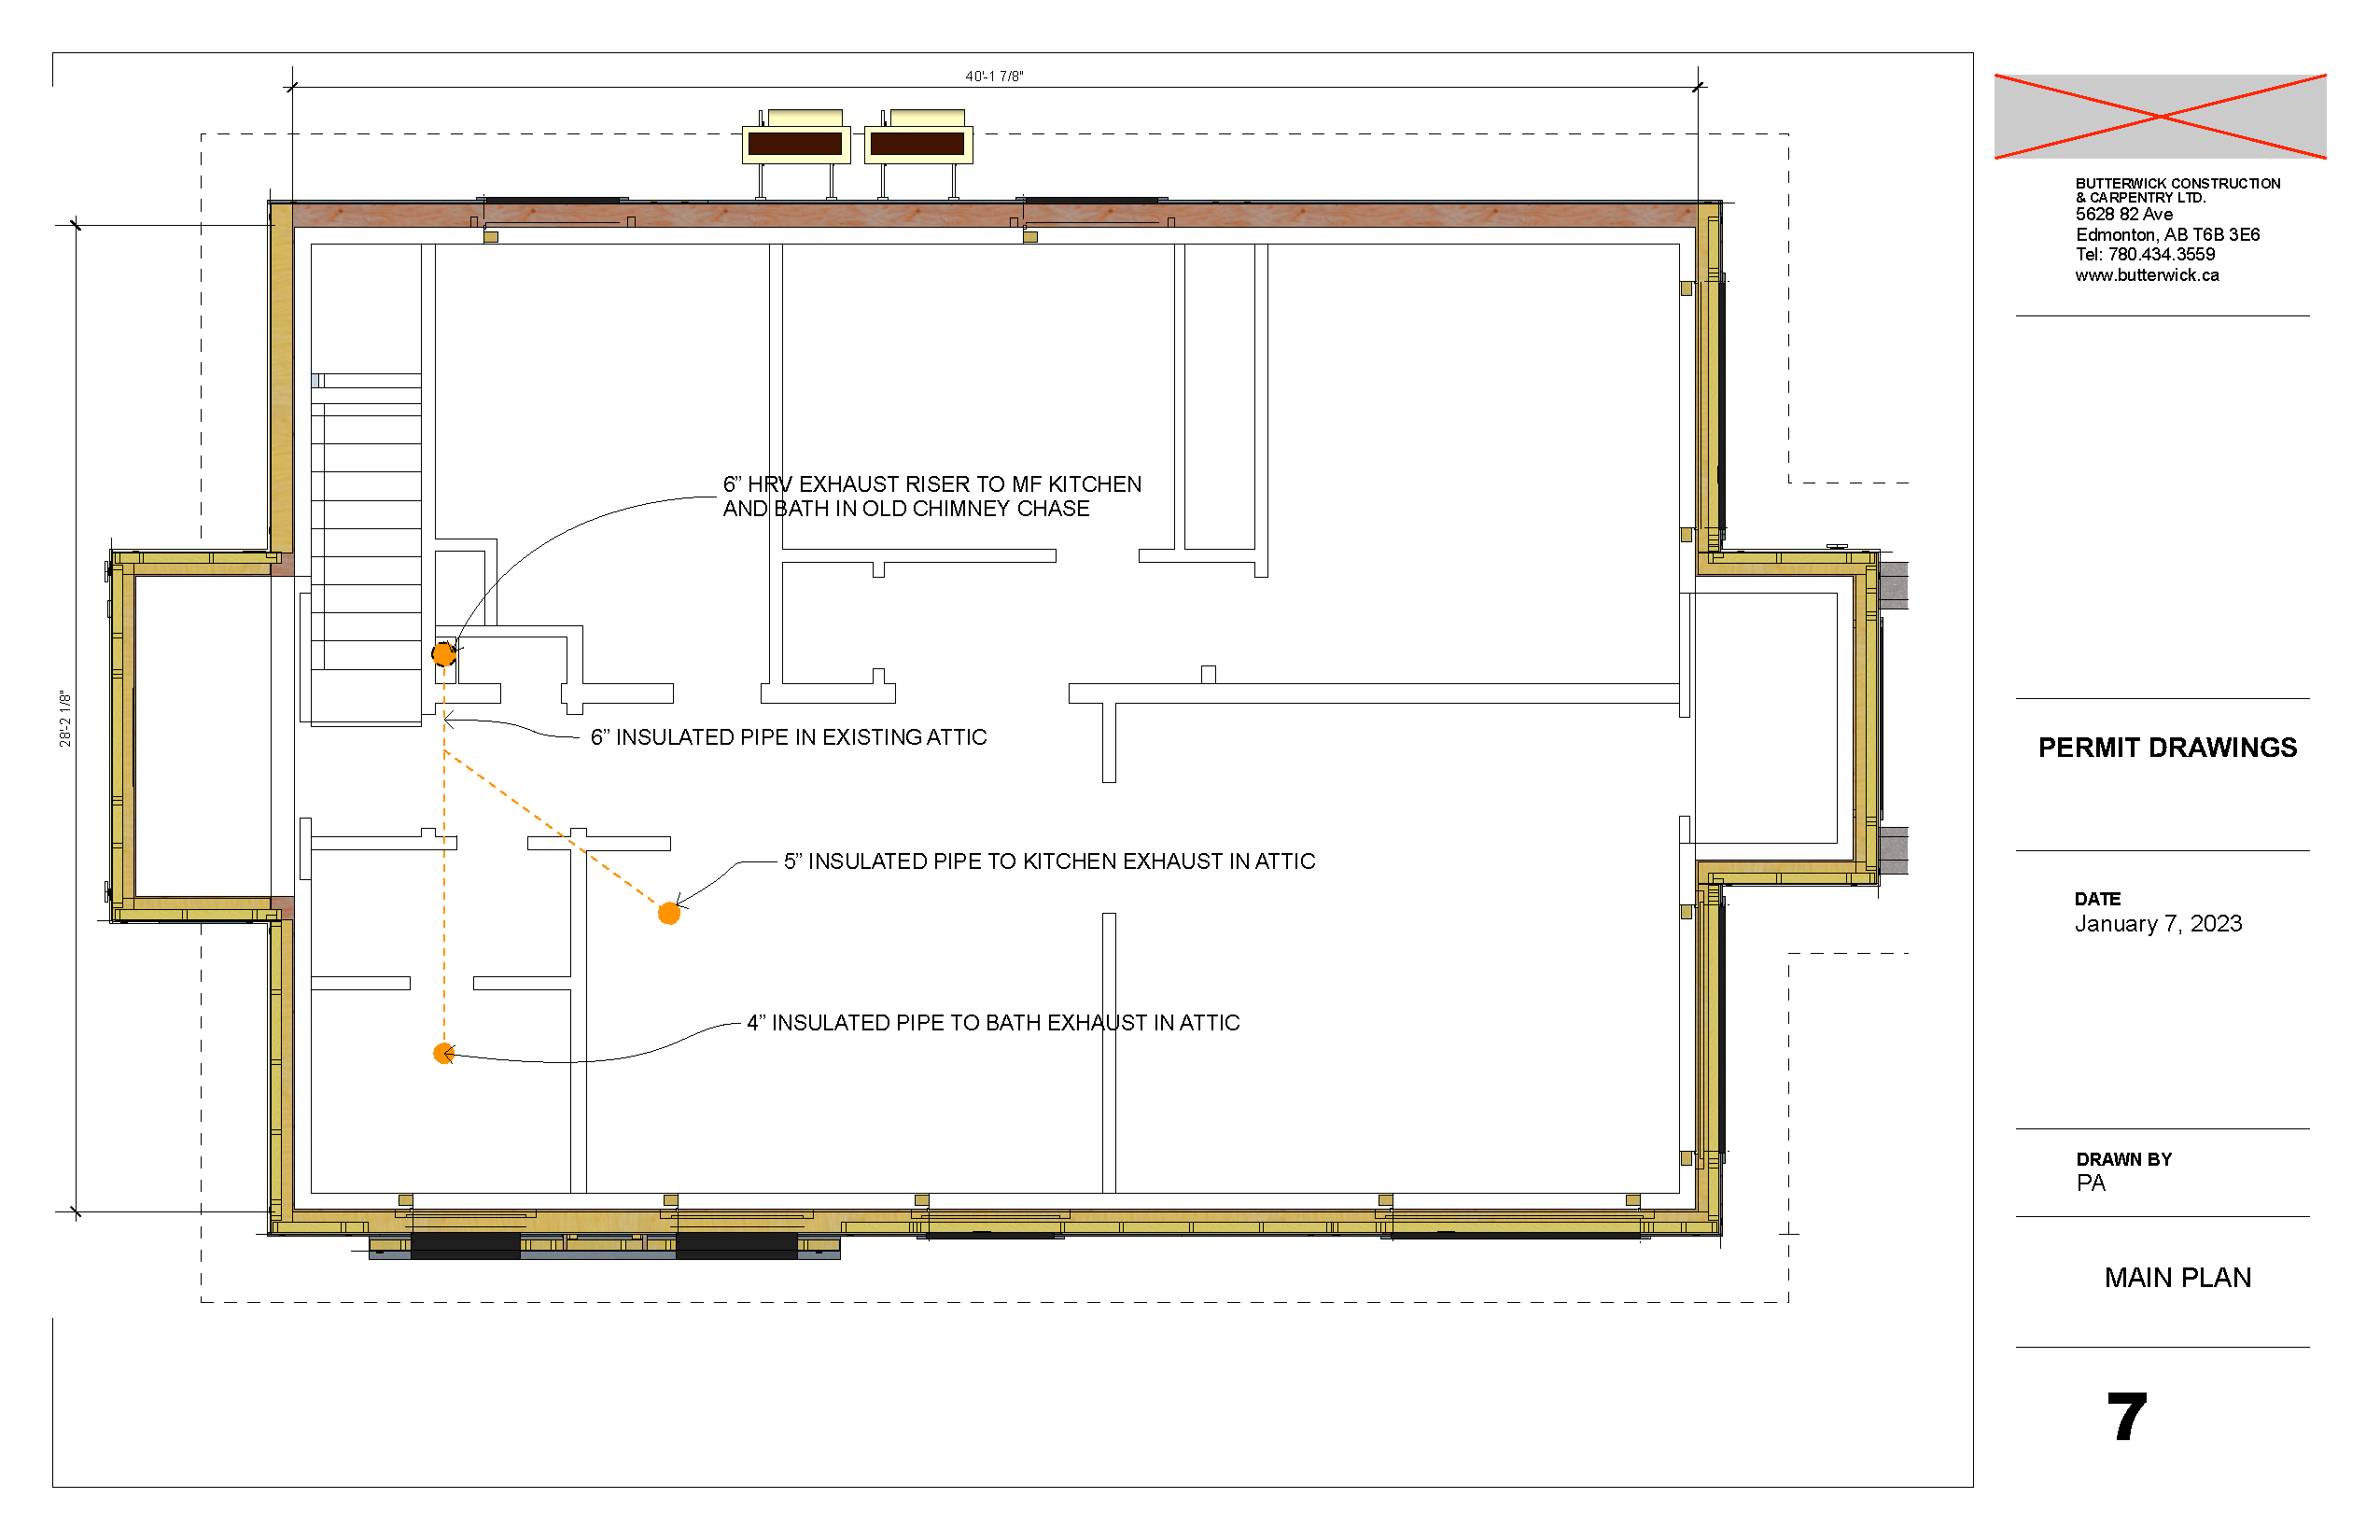
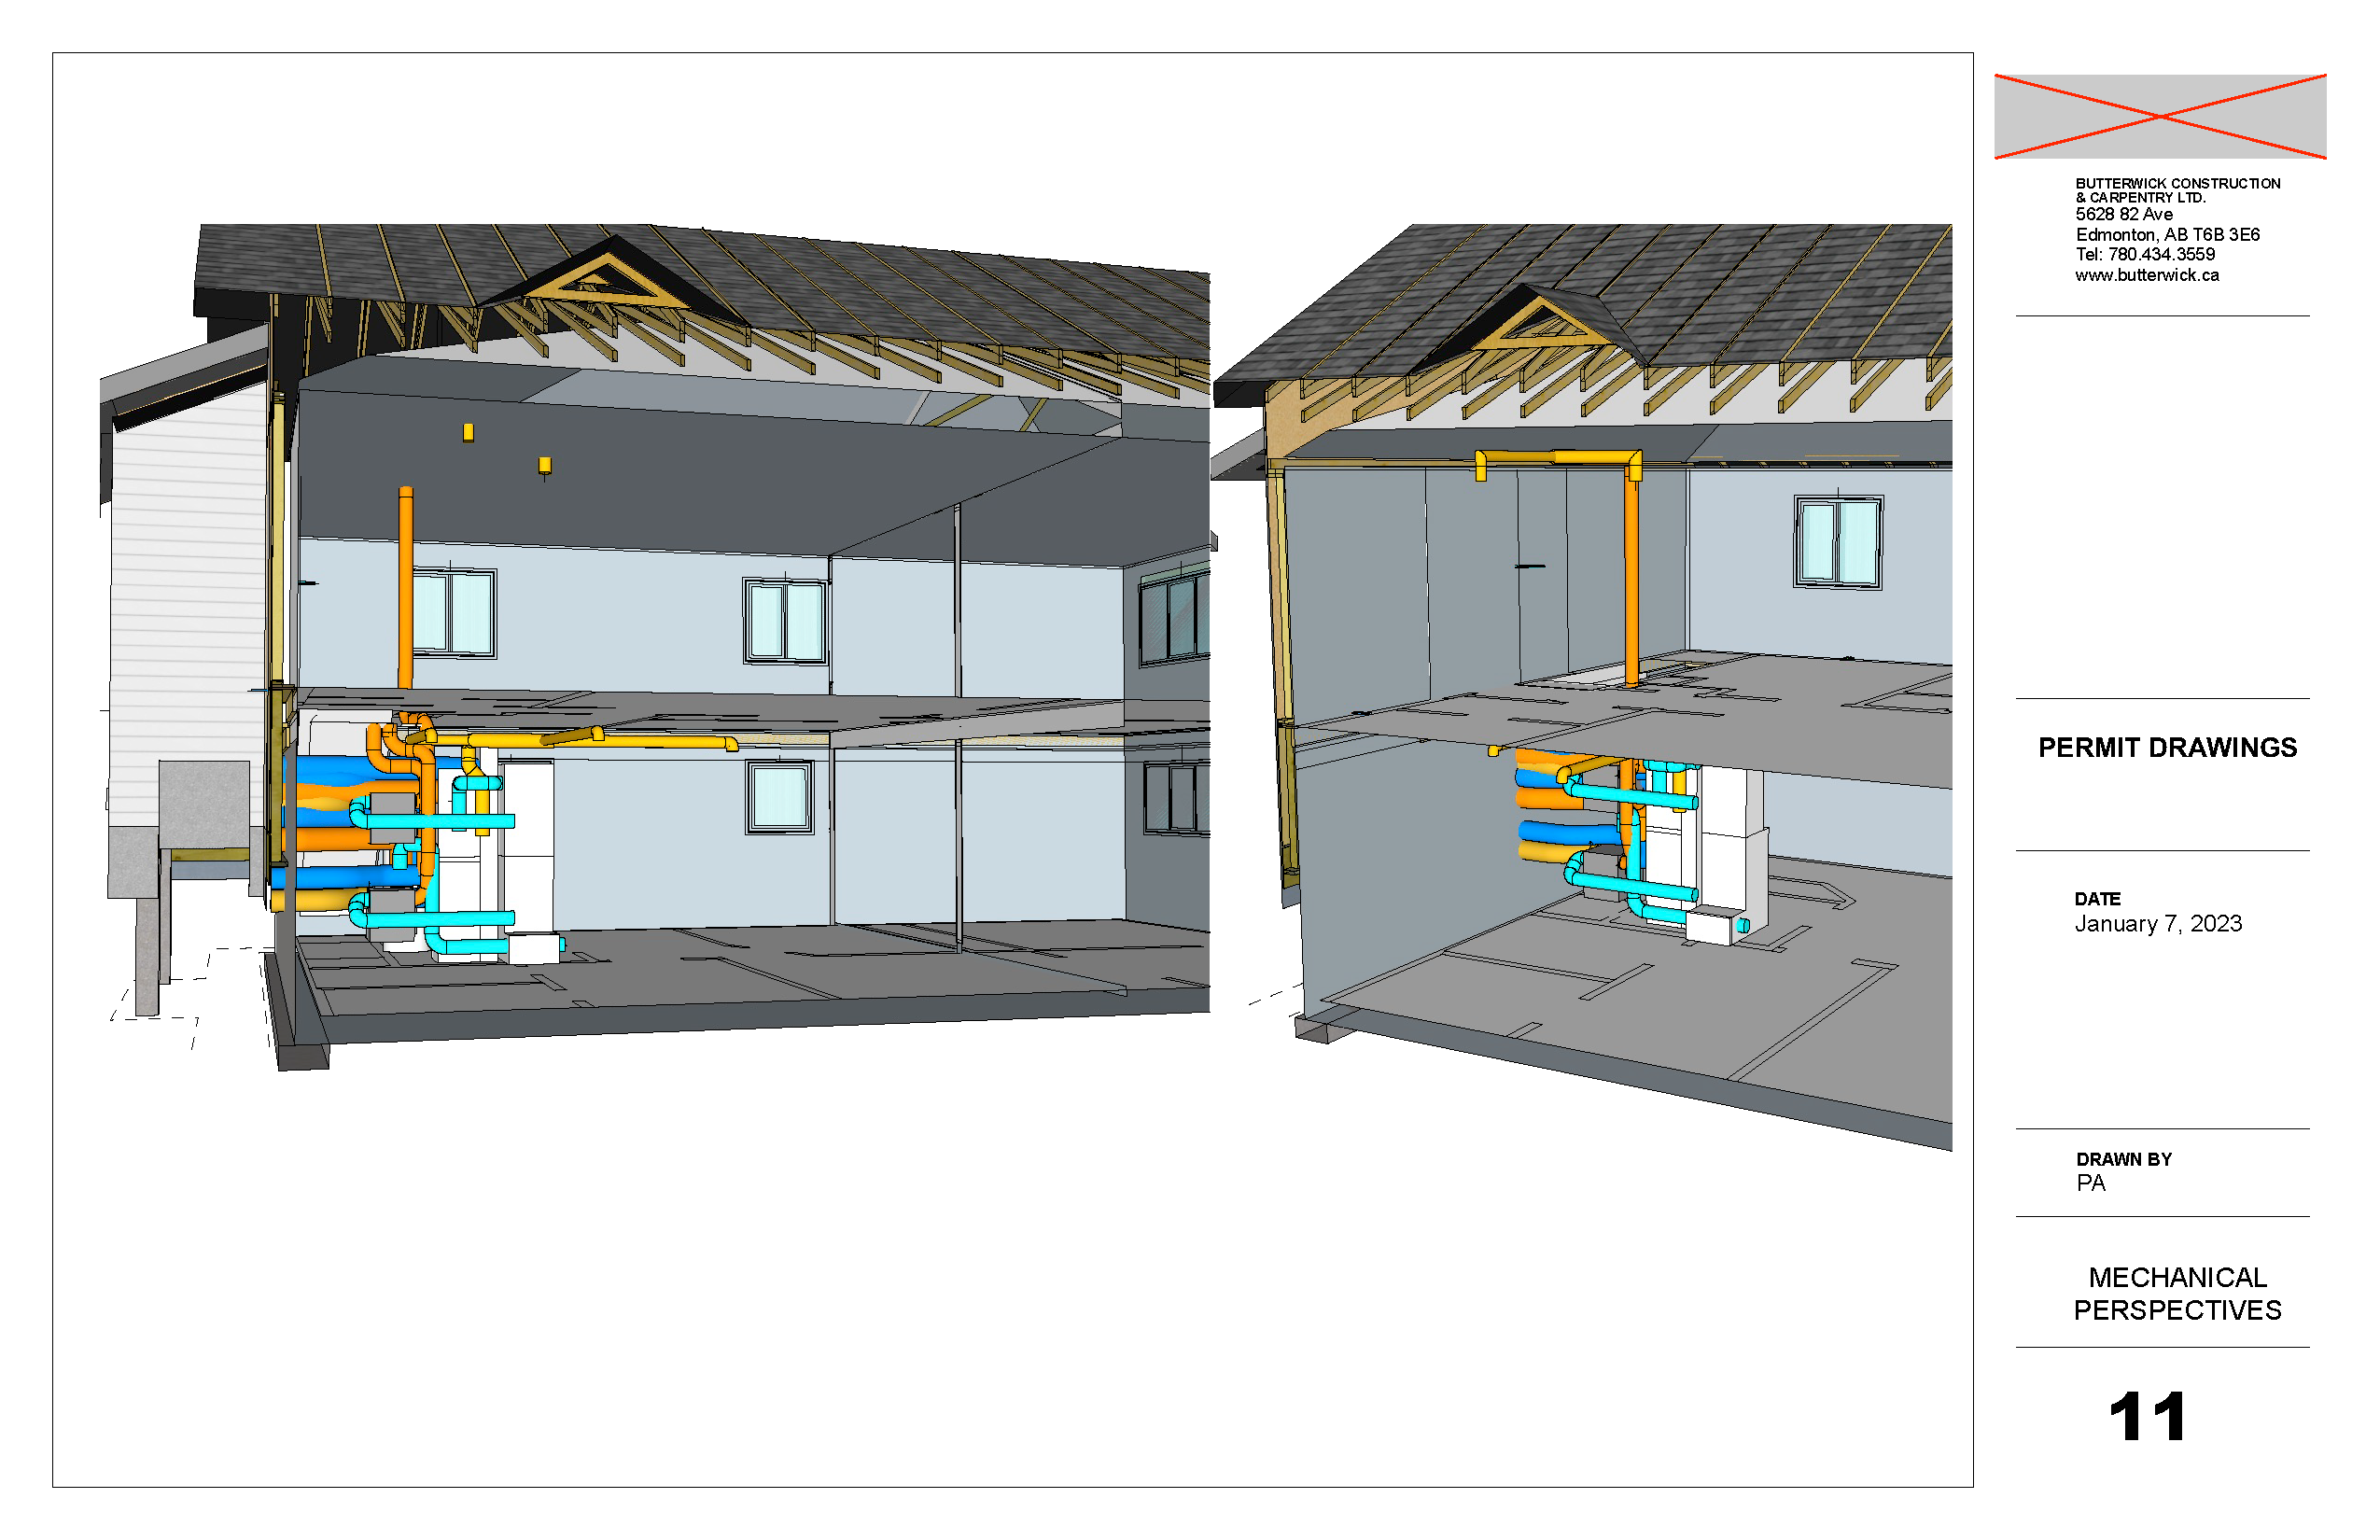
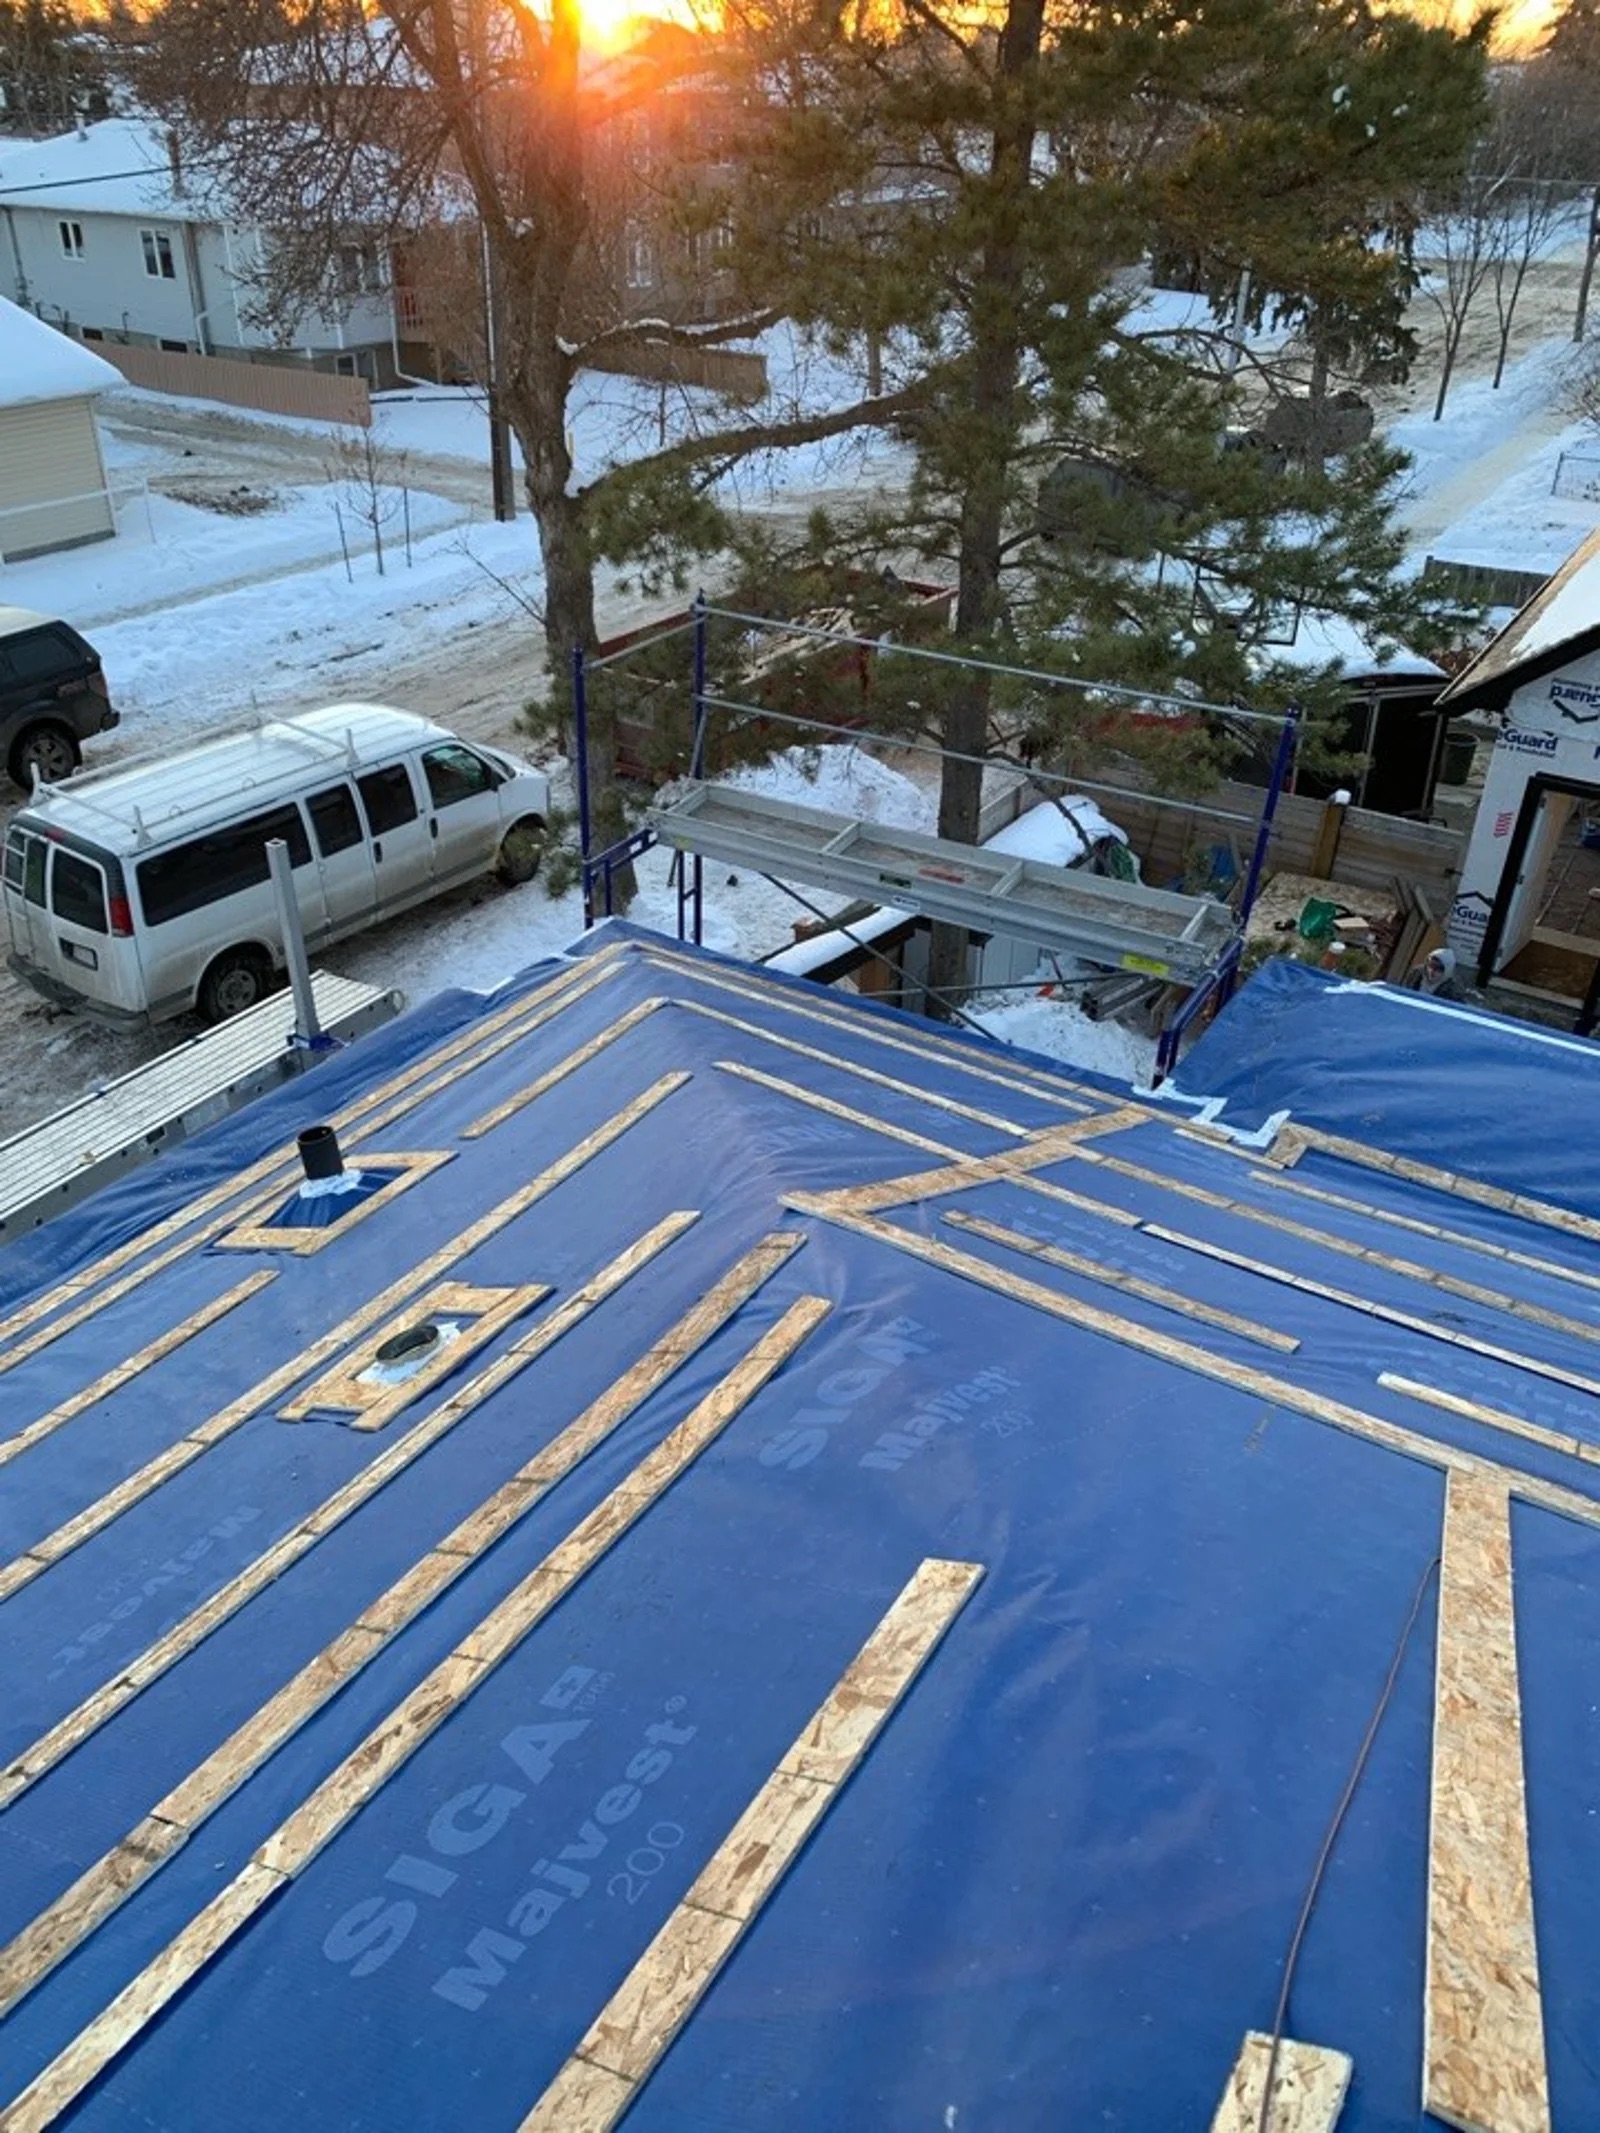
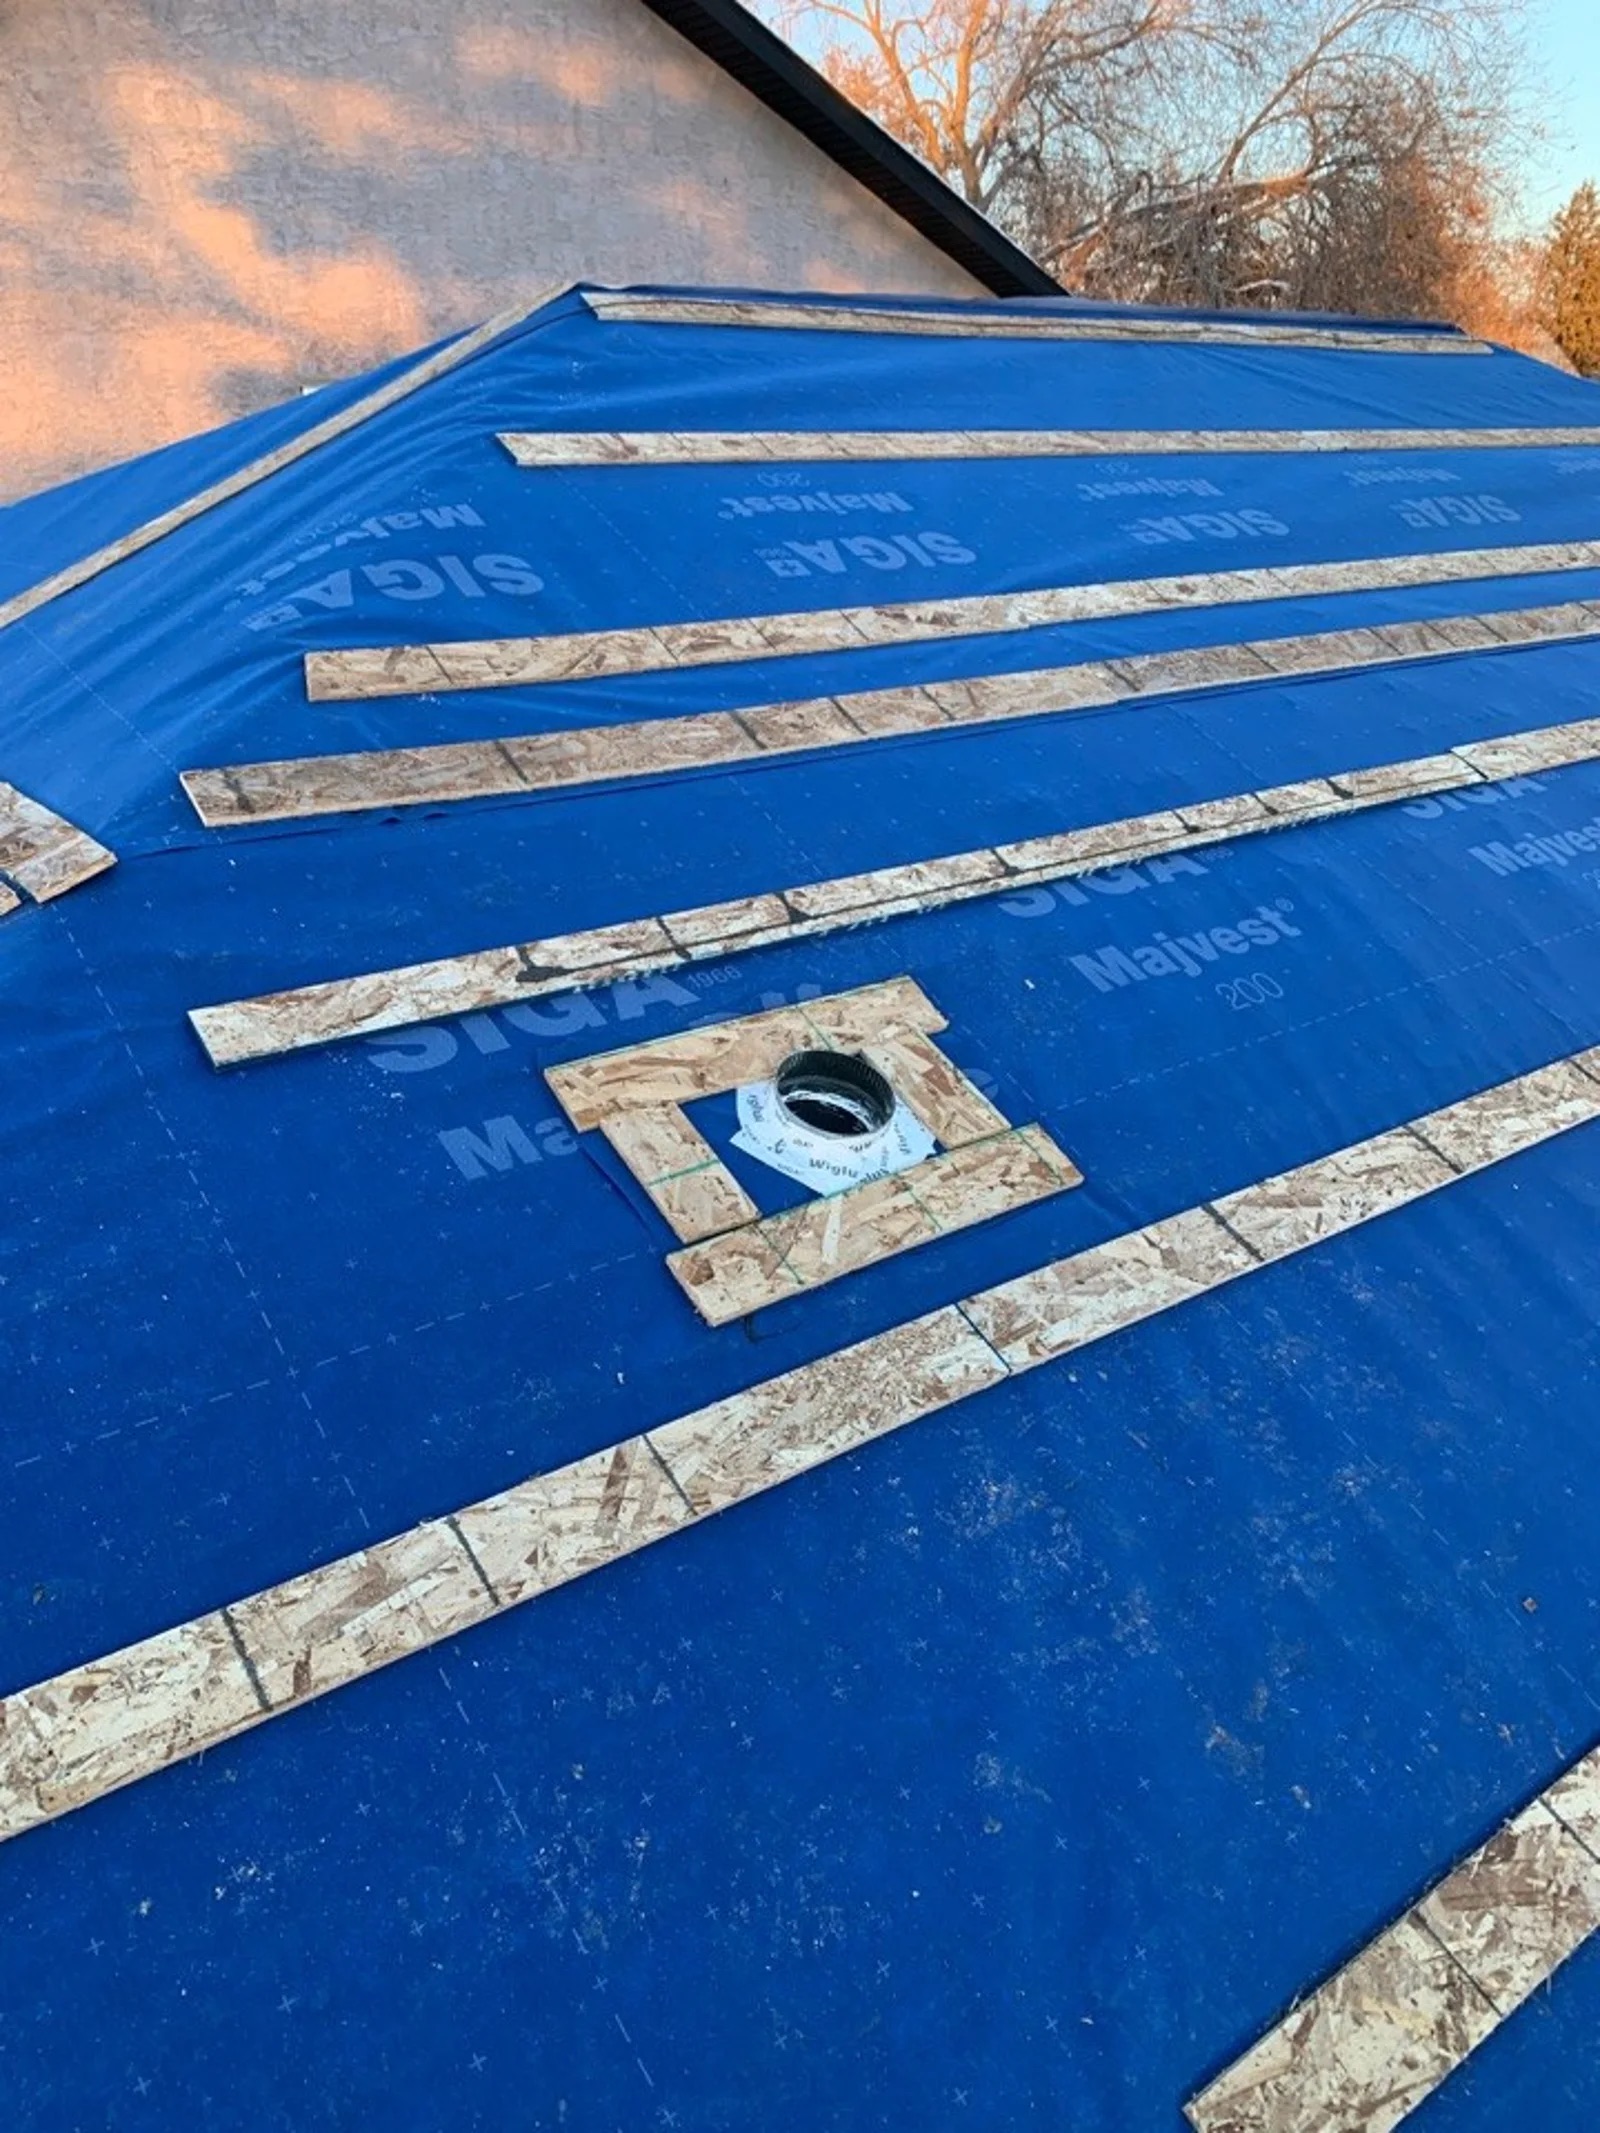
- Install the HRV Ducting in the attic via the old chimney chase to serve the main floor bathroom and kitchen.
- Install high-efficiency Heat Recovery Ventilators that provide a continuous supply of healthy fresh air.
- Replace the gas furnaces and hot water tanks with Air Source Heat Pumps and disconnect the gas line. (The home already had a legal basement suite with separate HVAC from the main floor).
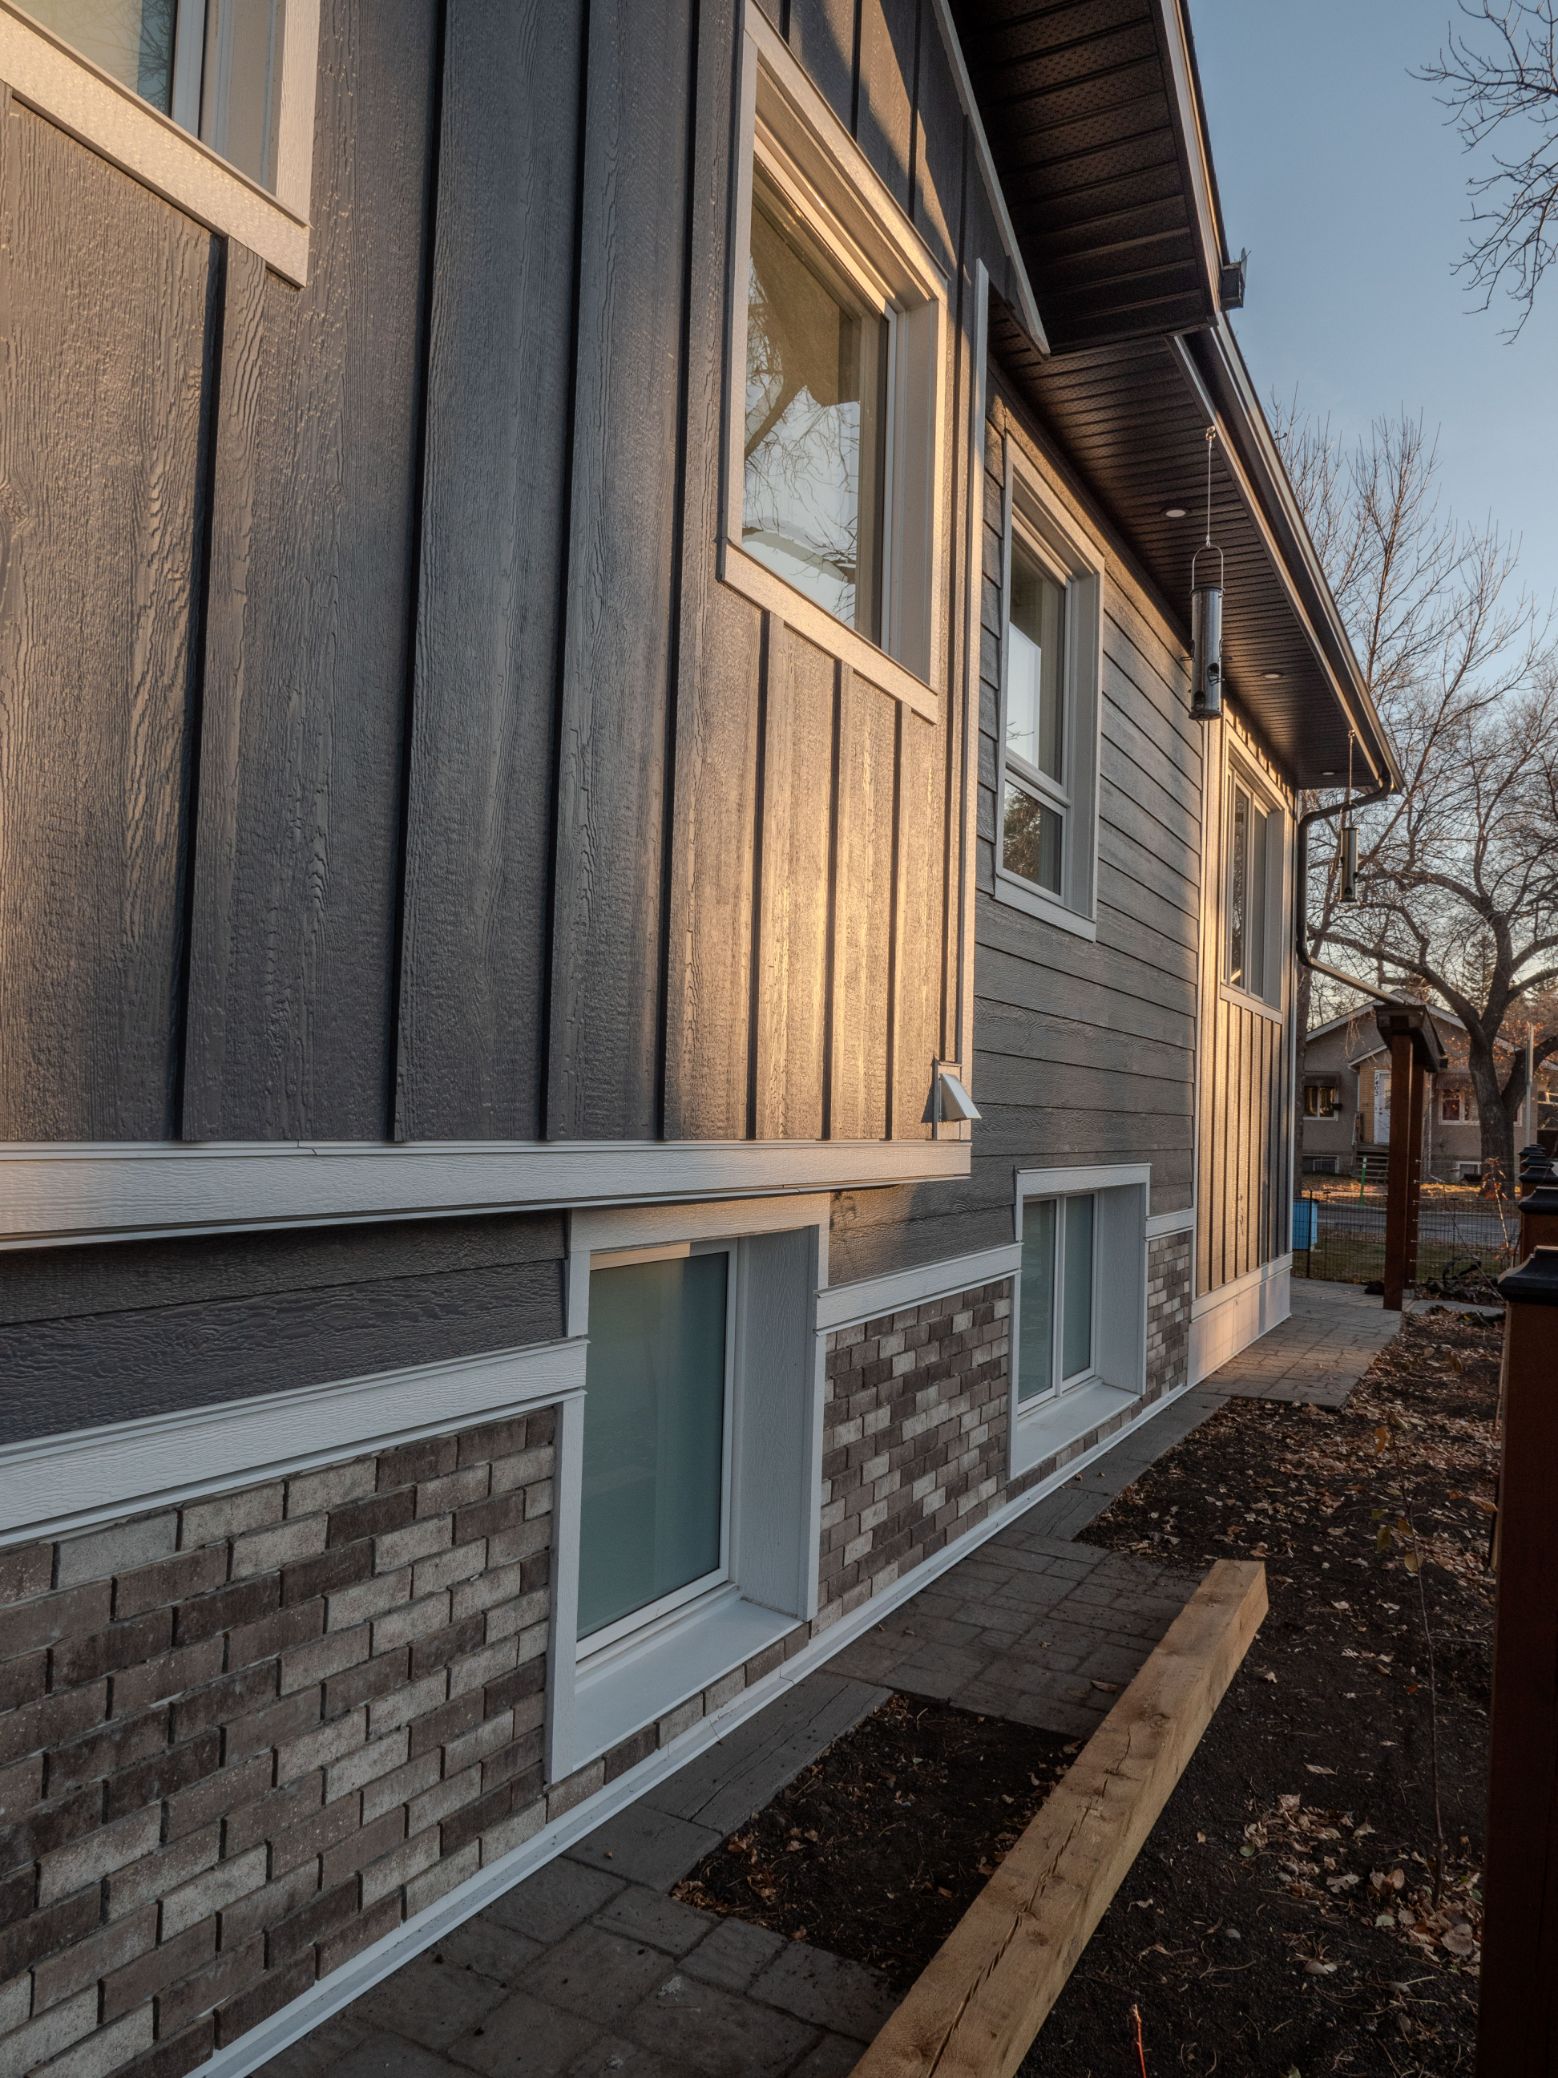
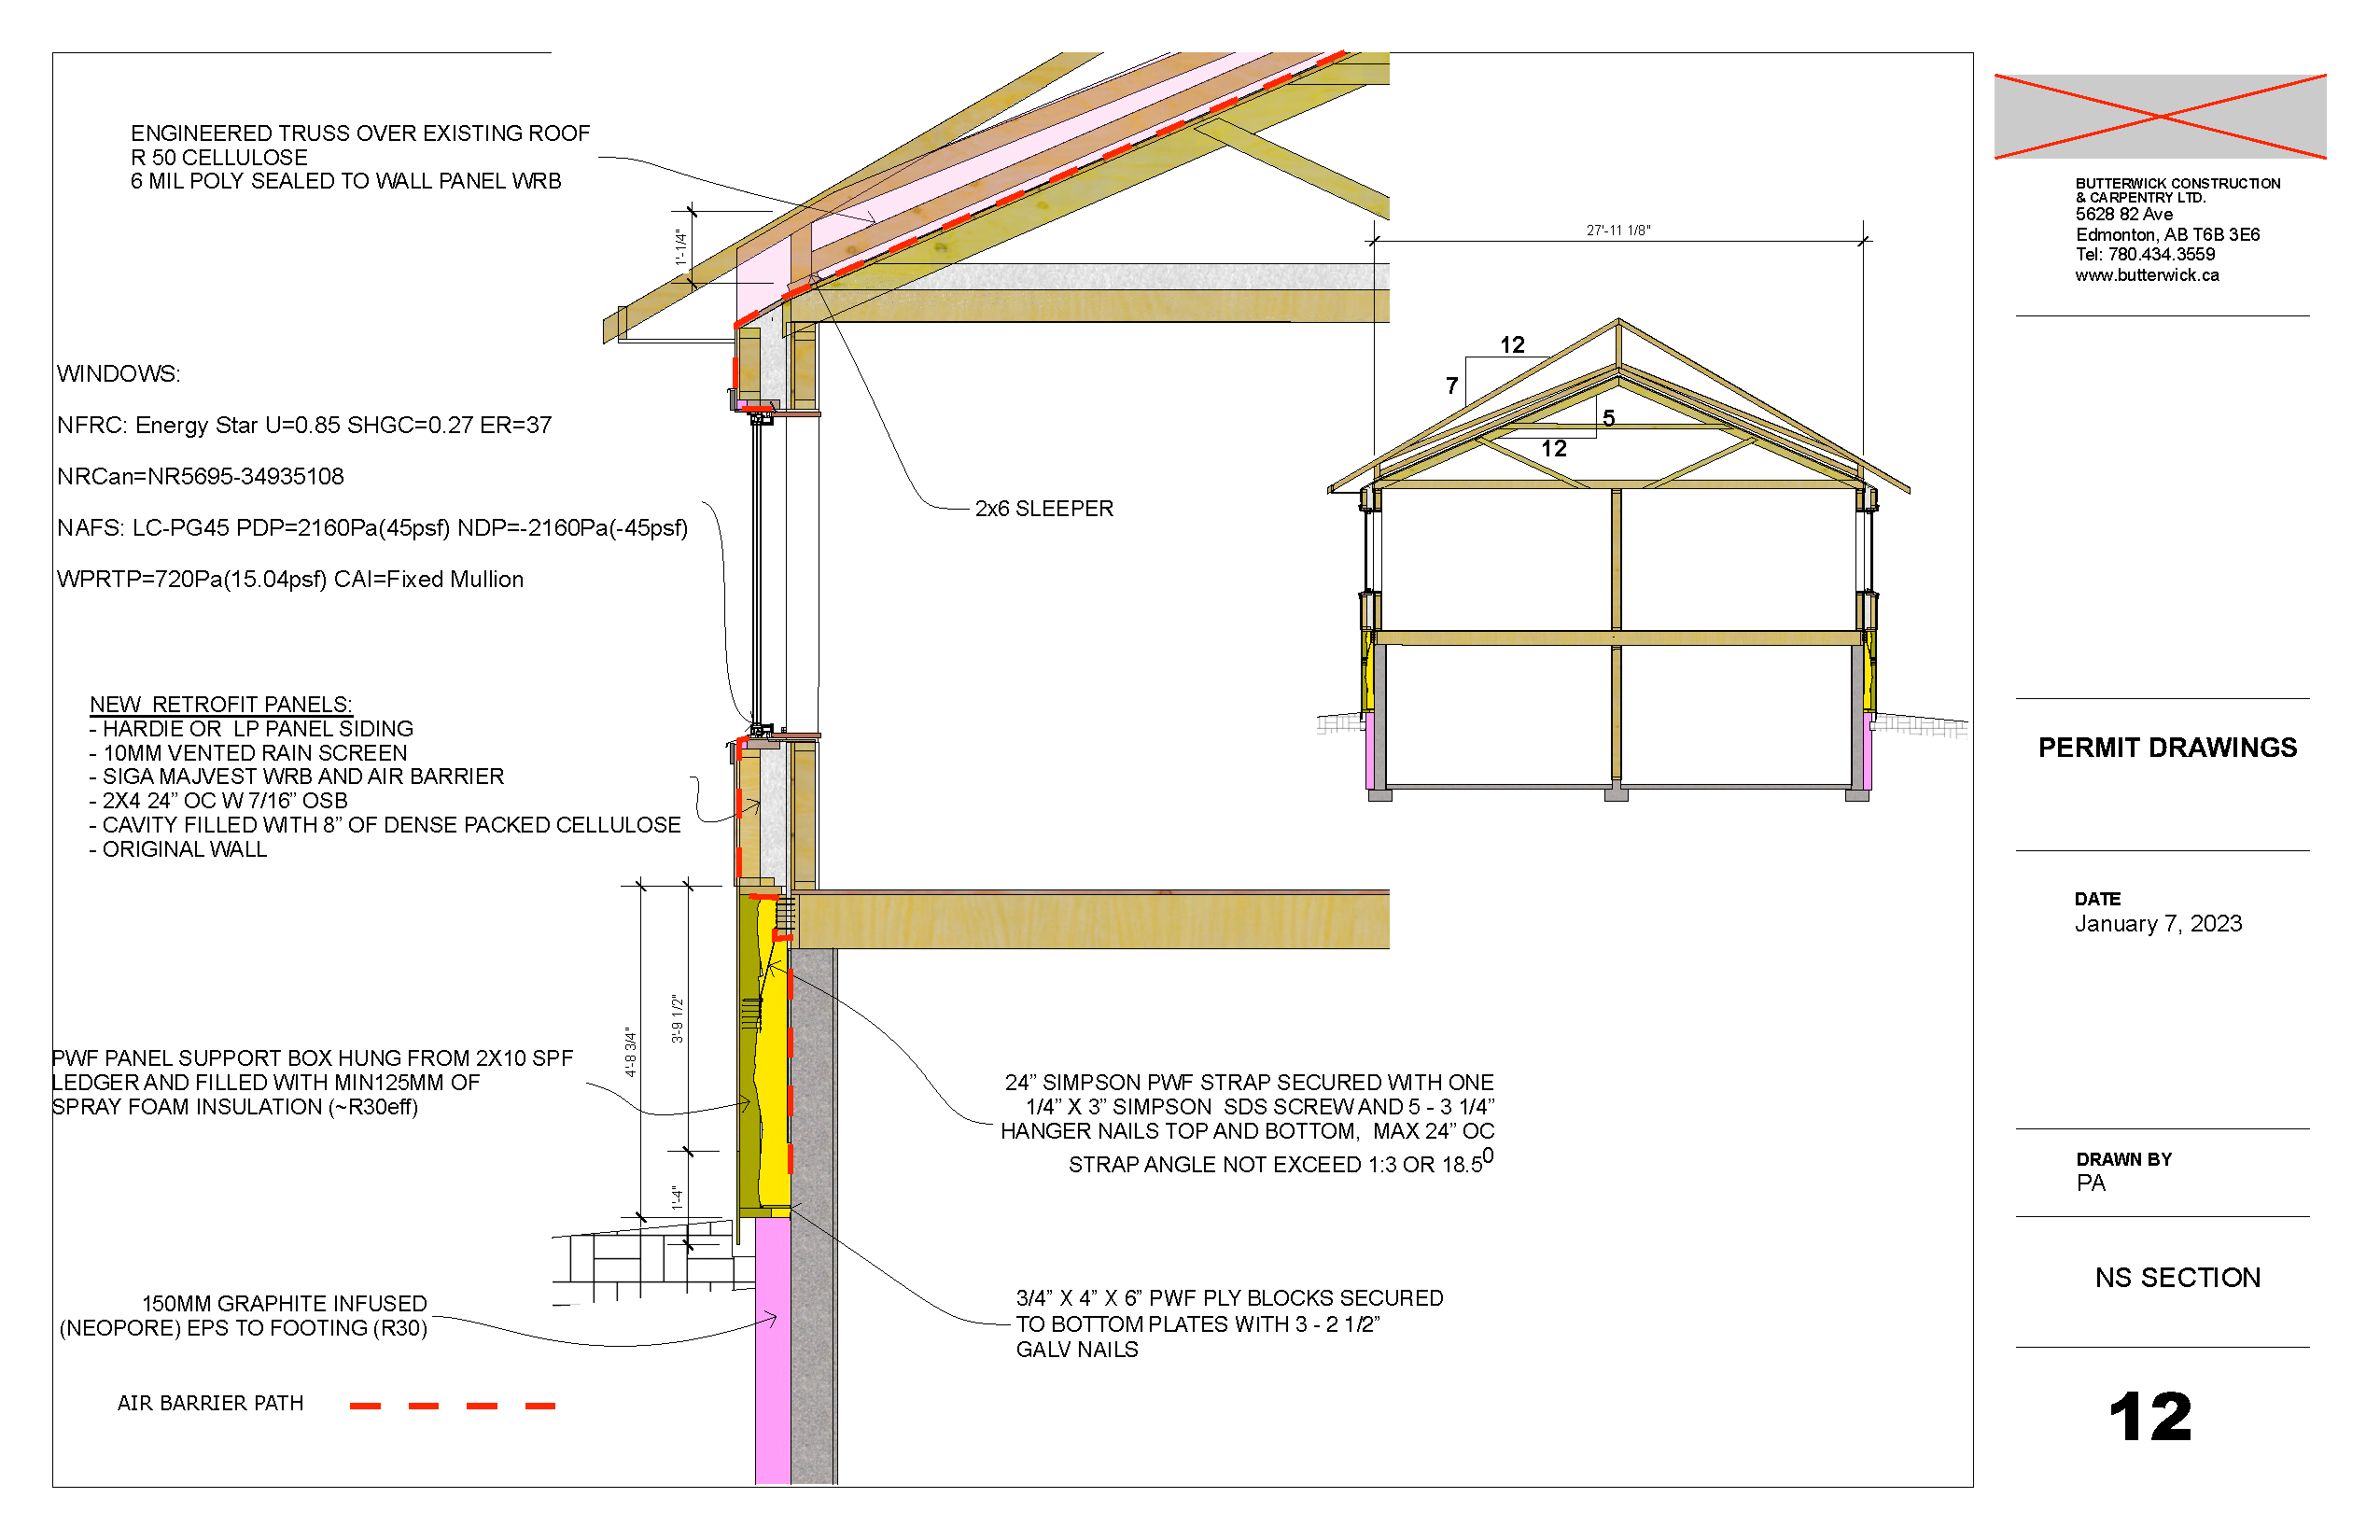
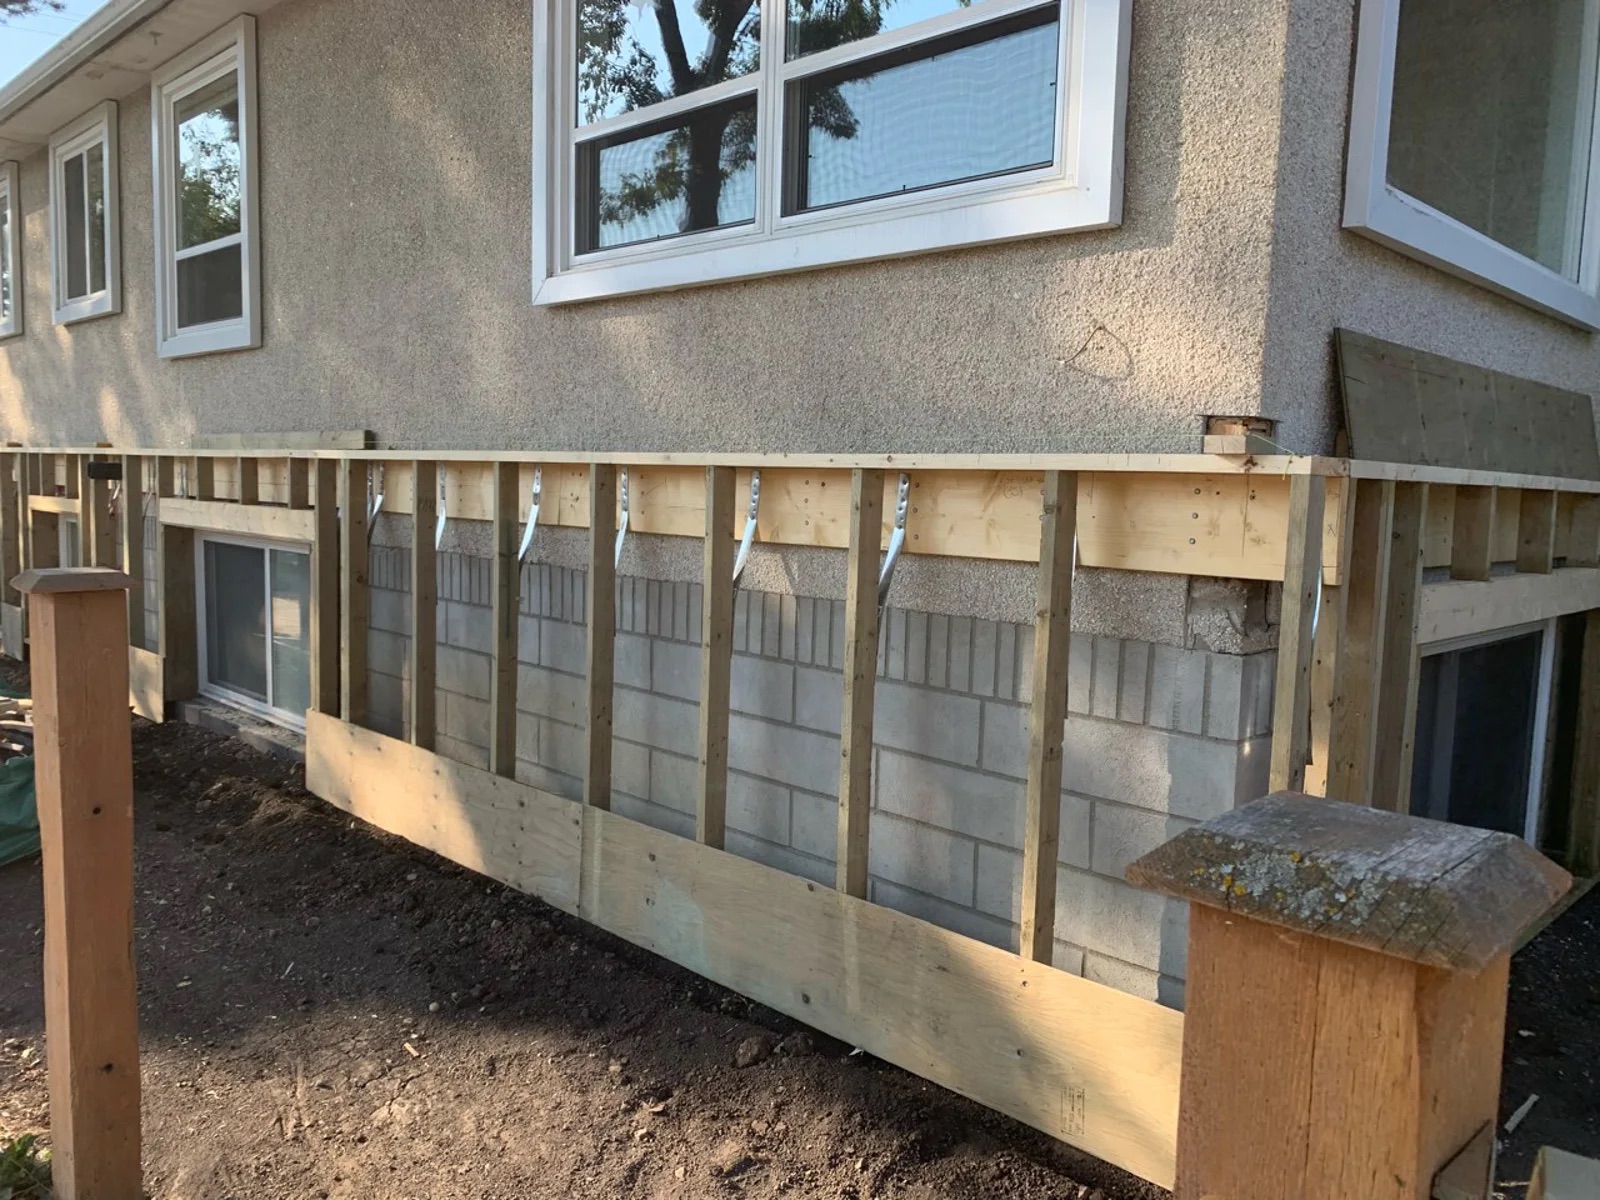
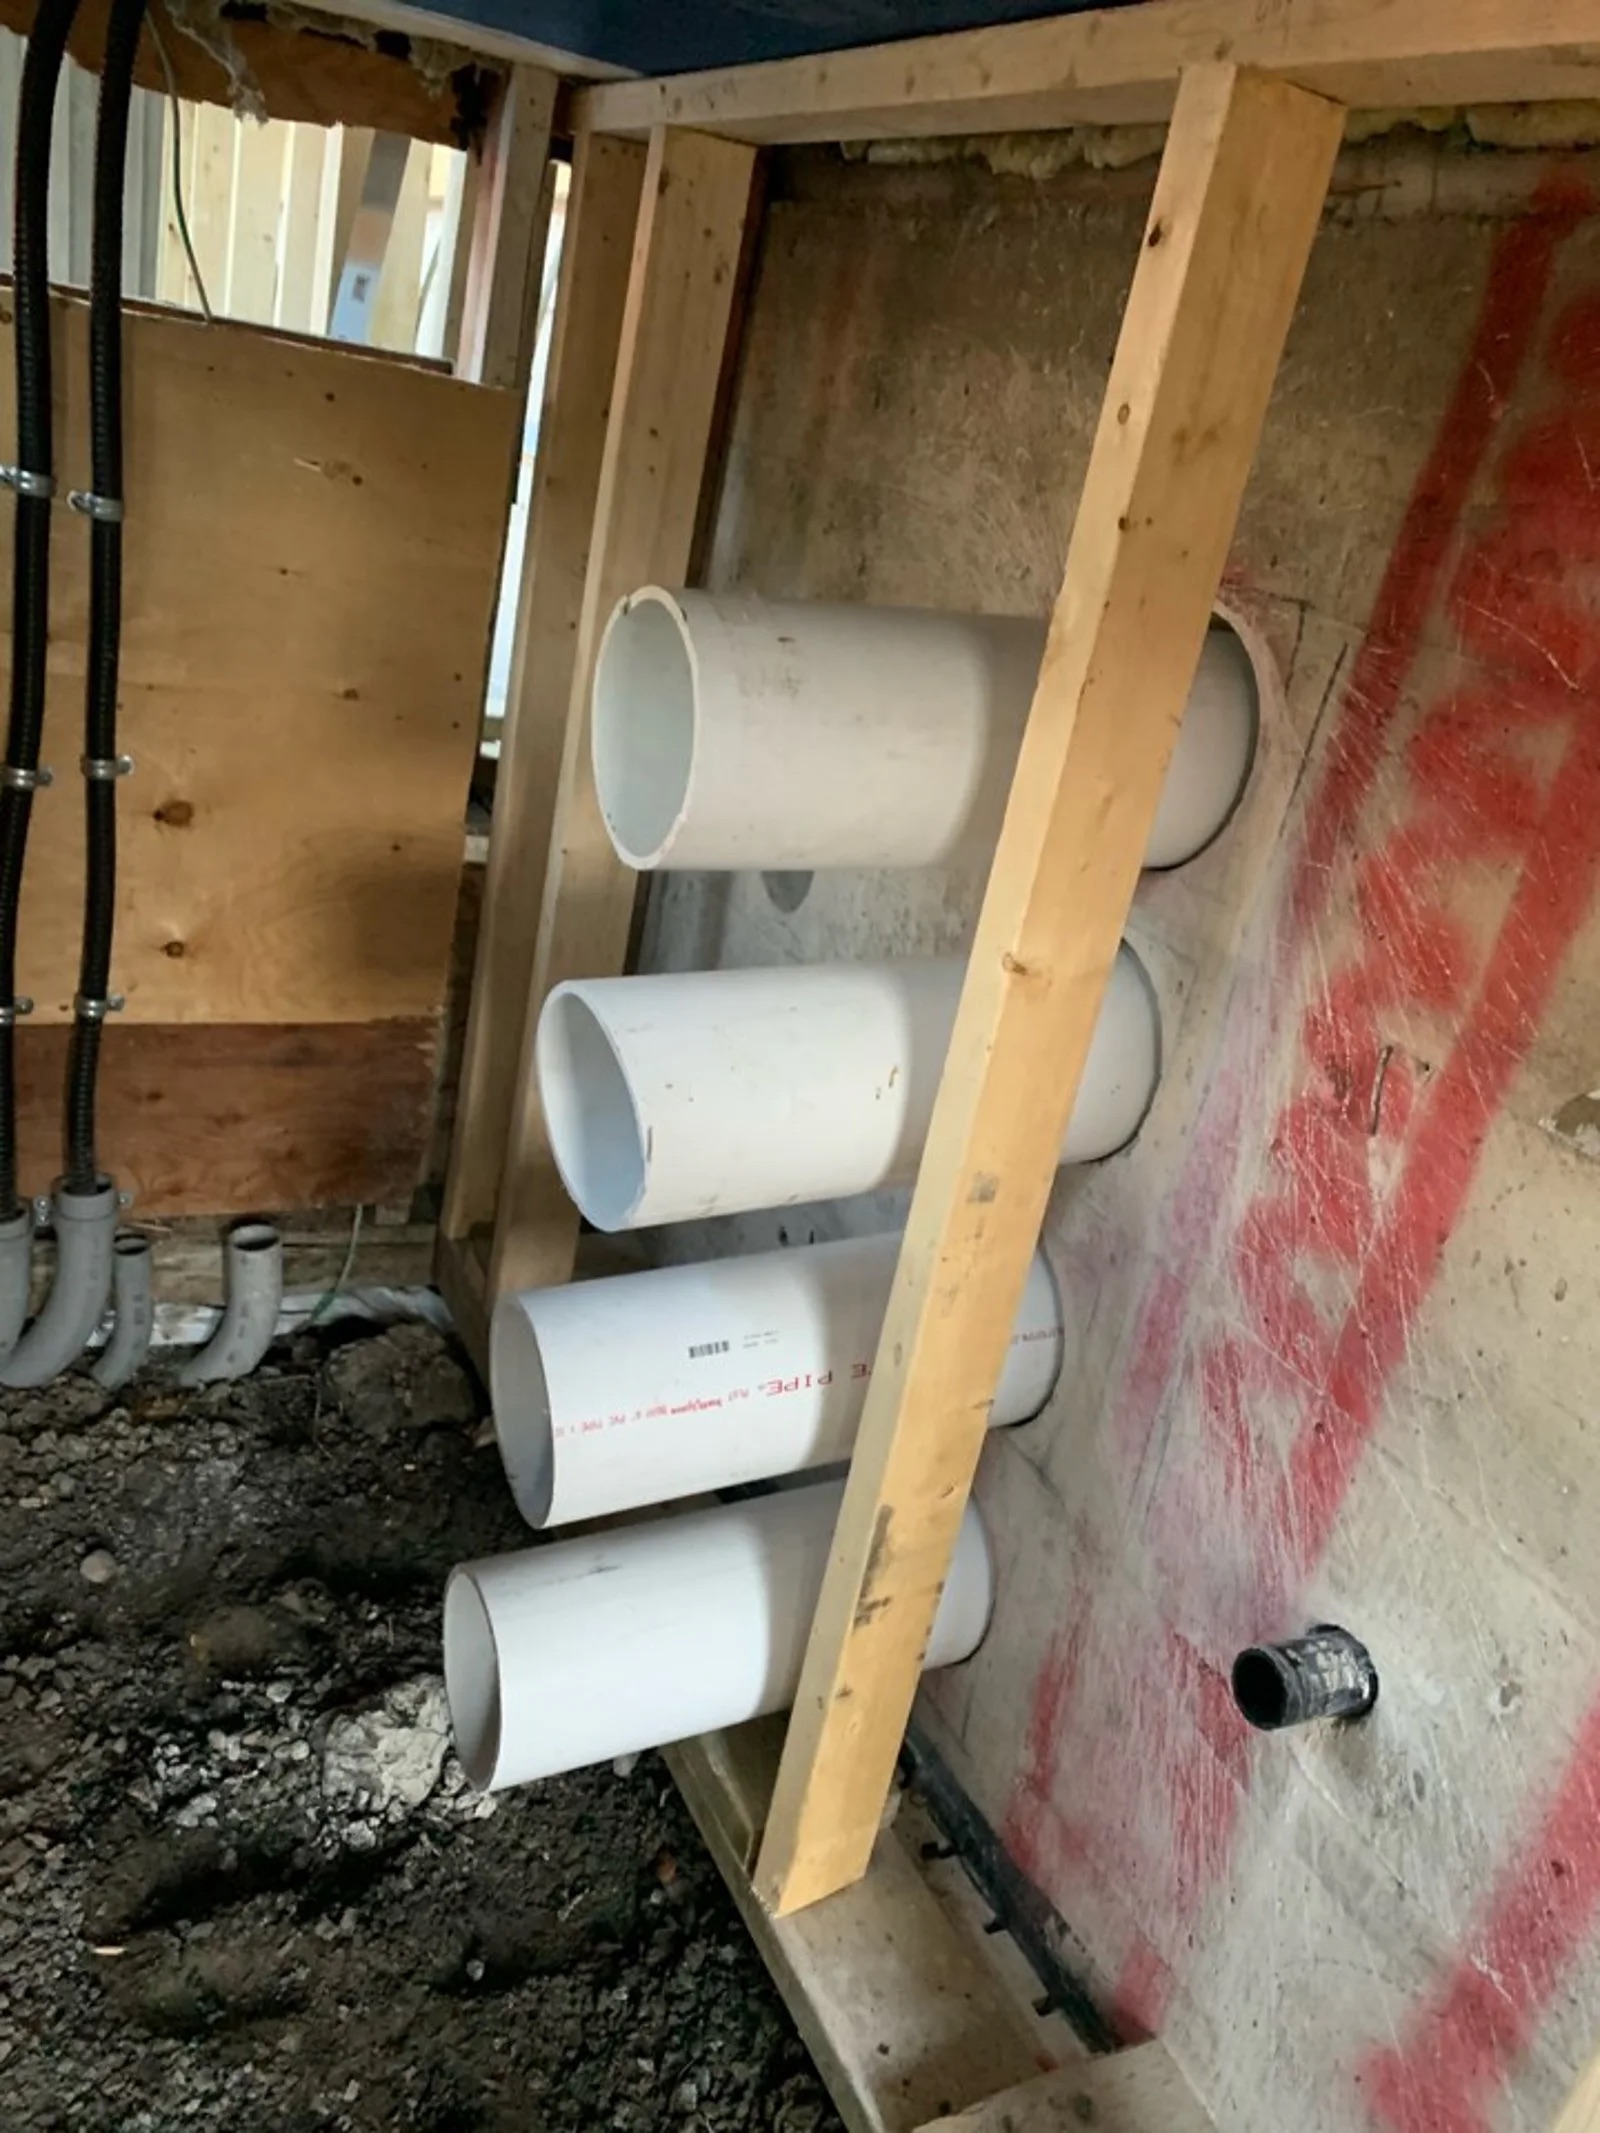
- Install a pressure-treated panel support box, called a boxbeam, with penetrations for new HRV, air source heat pump, and existing services. Insulate the boxbeam with two to three inches of low Global Warming Potential spray foam insulation that provides an air-barrier seal between the foundation and the WRB on the panels. Fill the remainder of the cavity with Roxul insulation (approximately R28).
- Loosen the existing windows.
- Install the tie-back blocks that the panels will be attached to.
- Demolish and remove the old concrete chimney. The cavity was used for running HRV ducting to the main floor bathroom and kitchen.
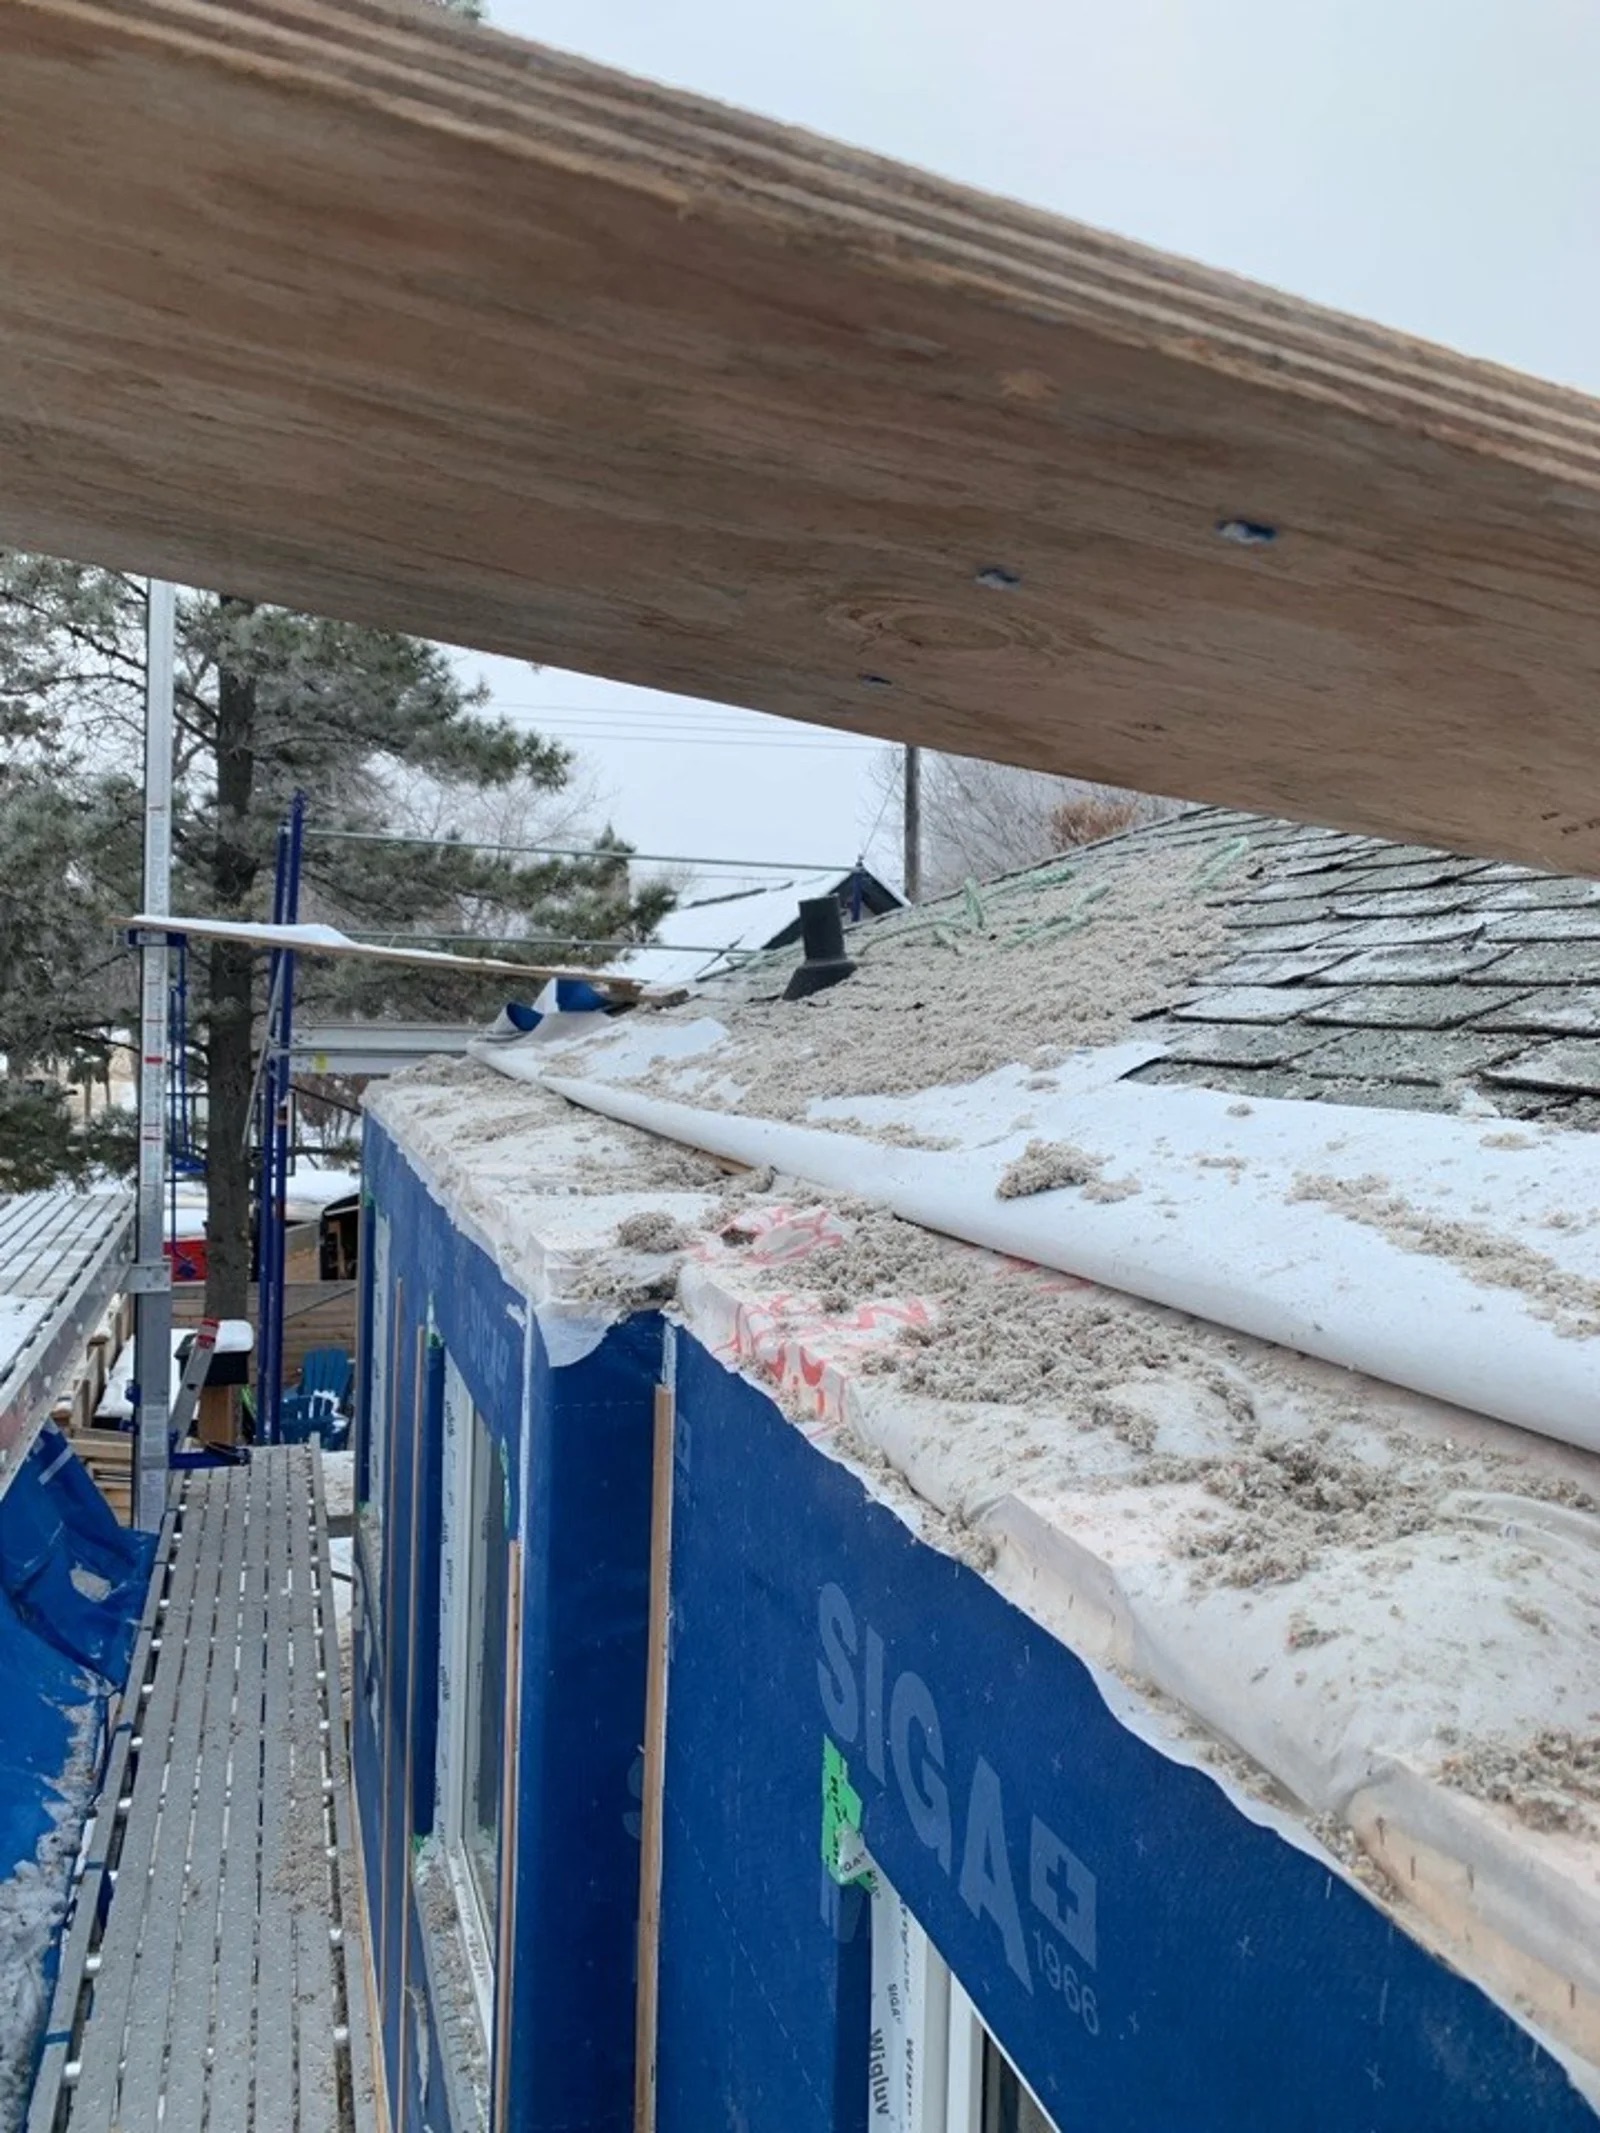
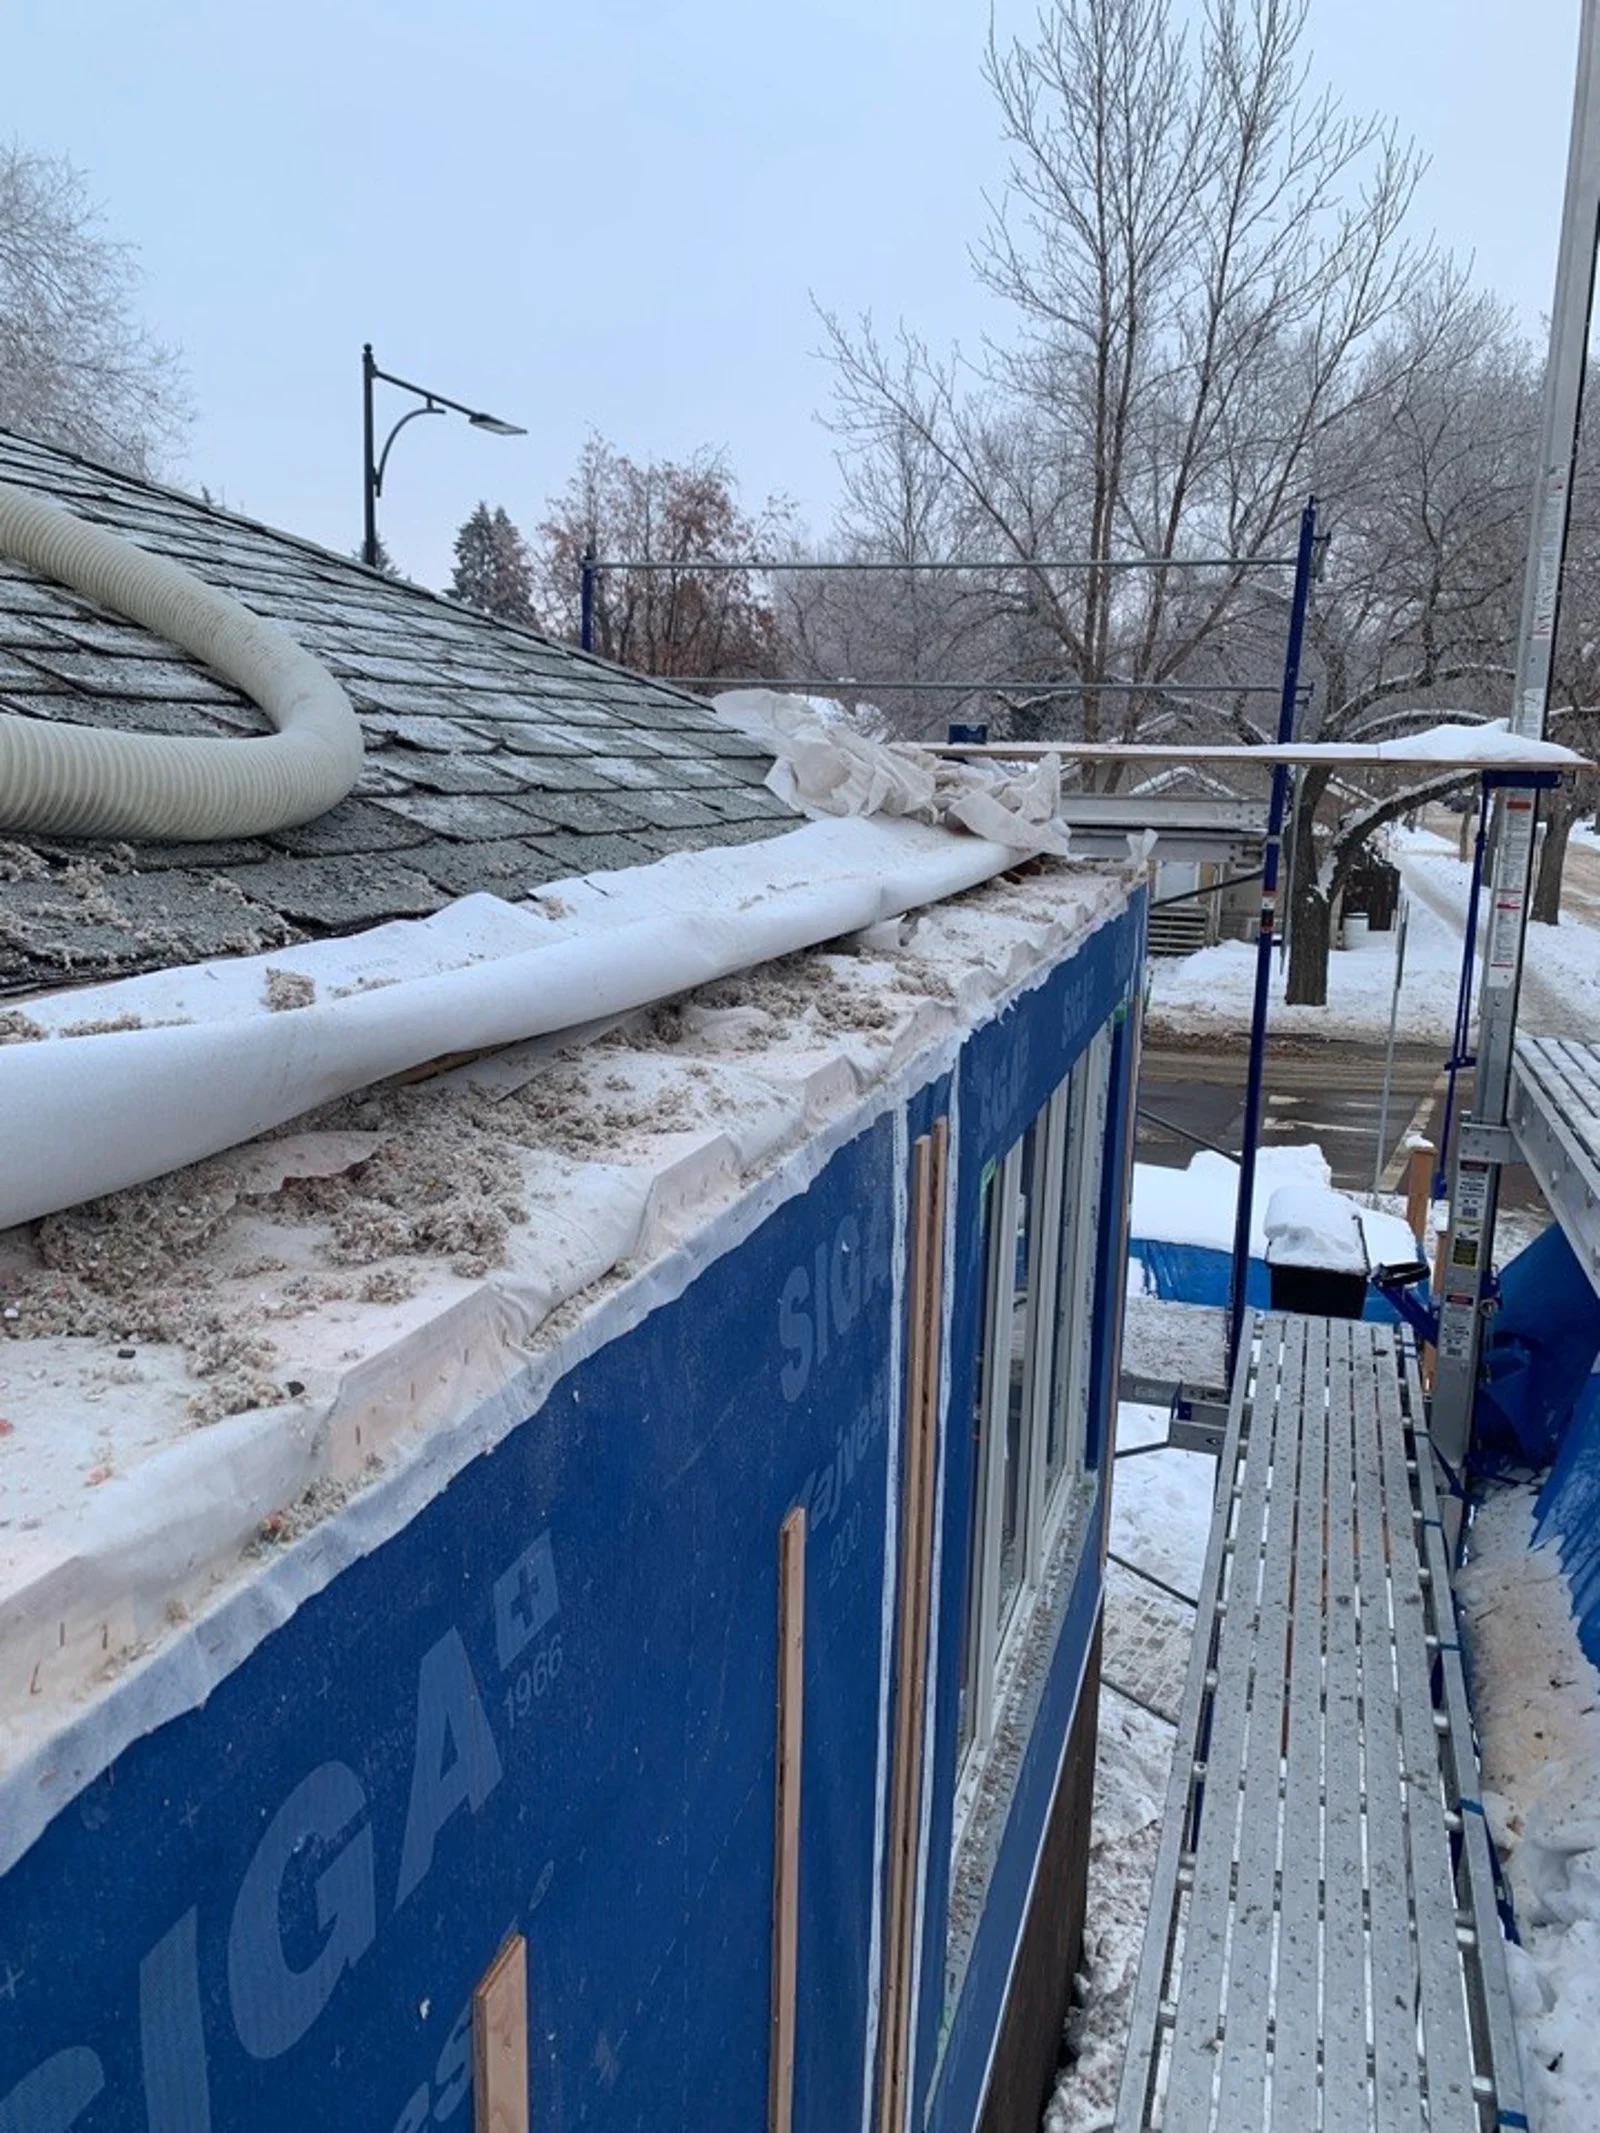
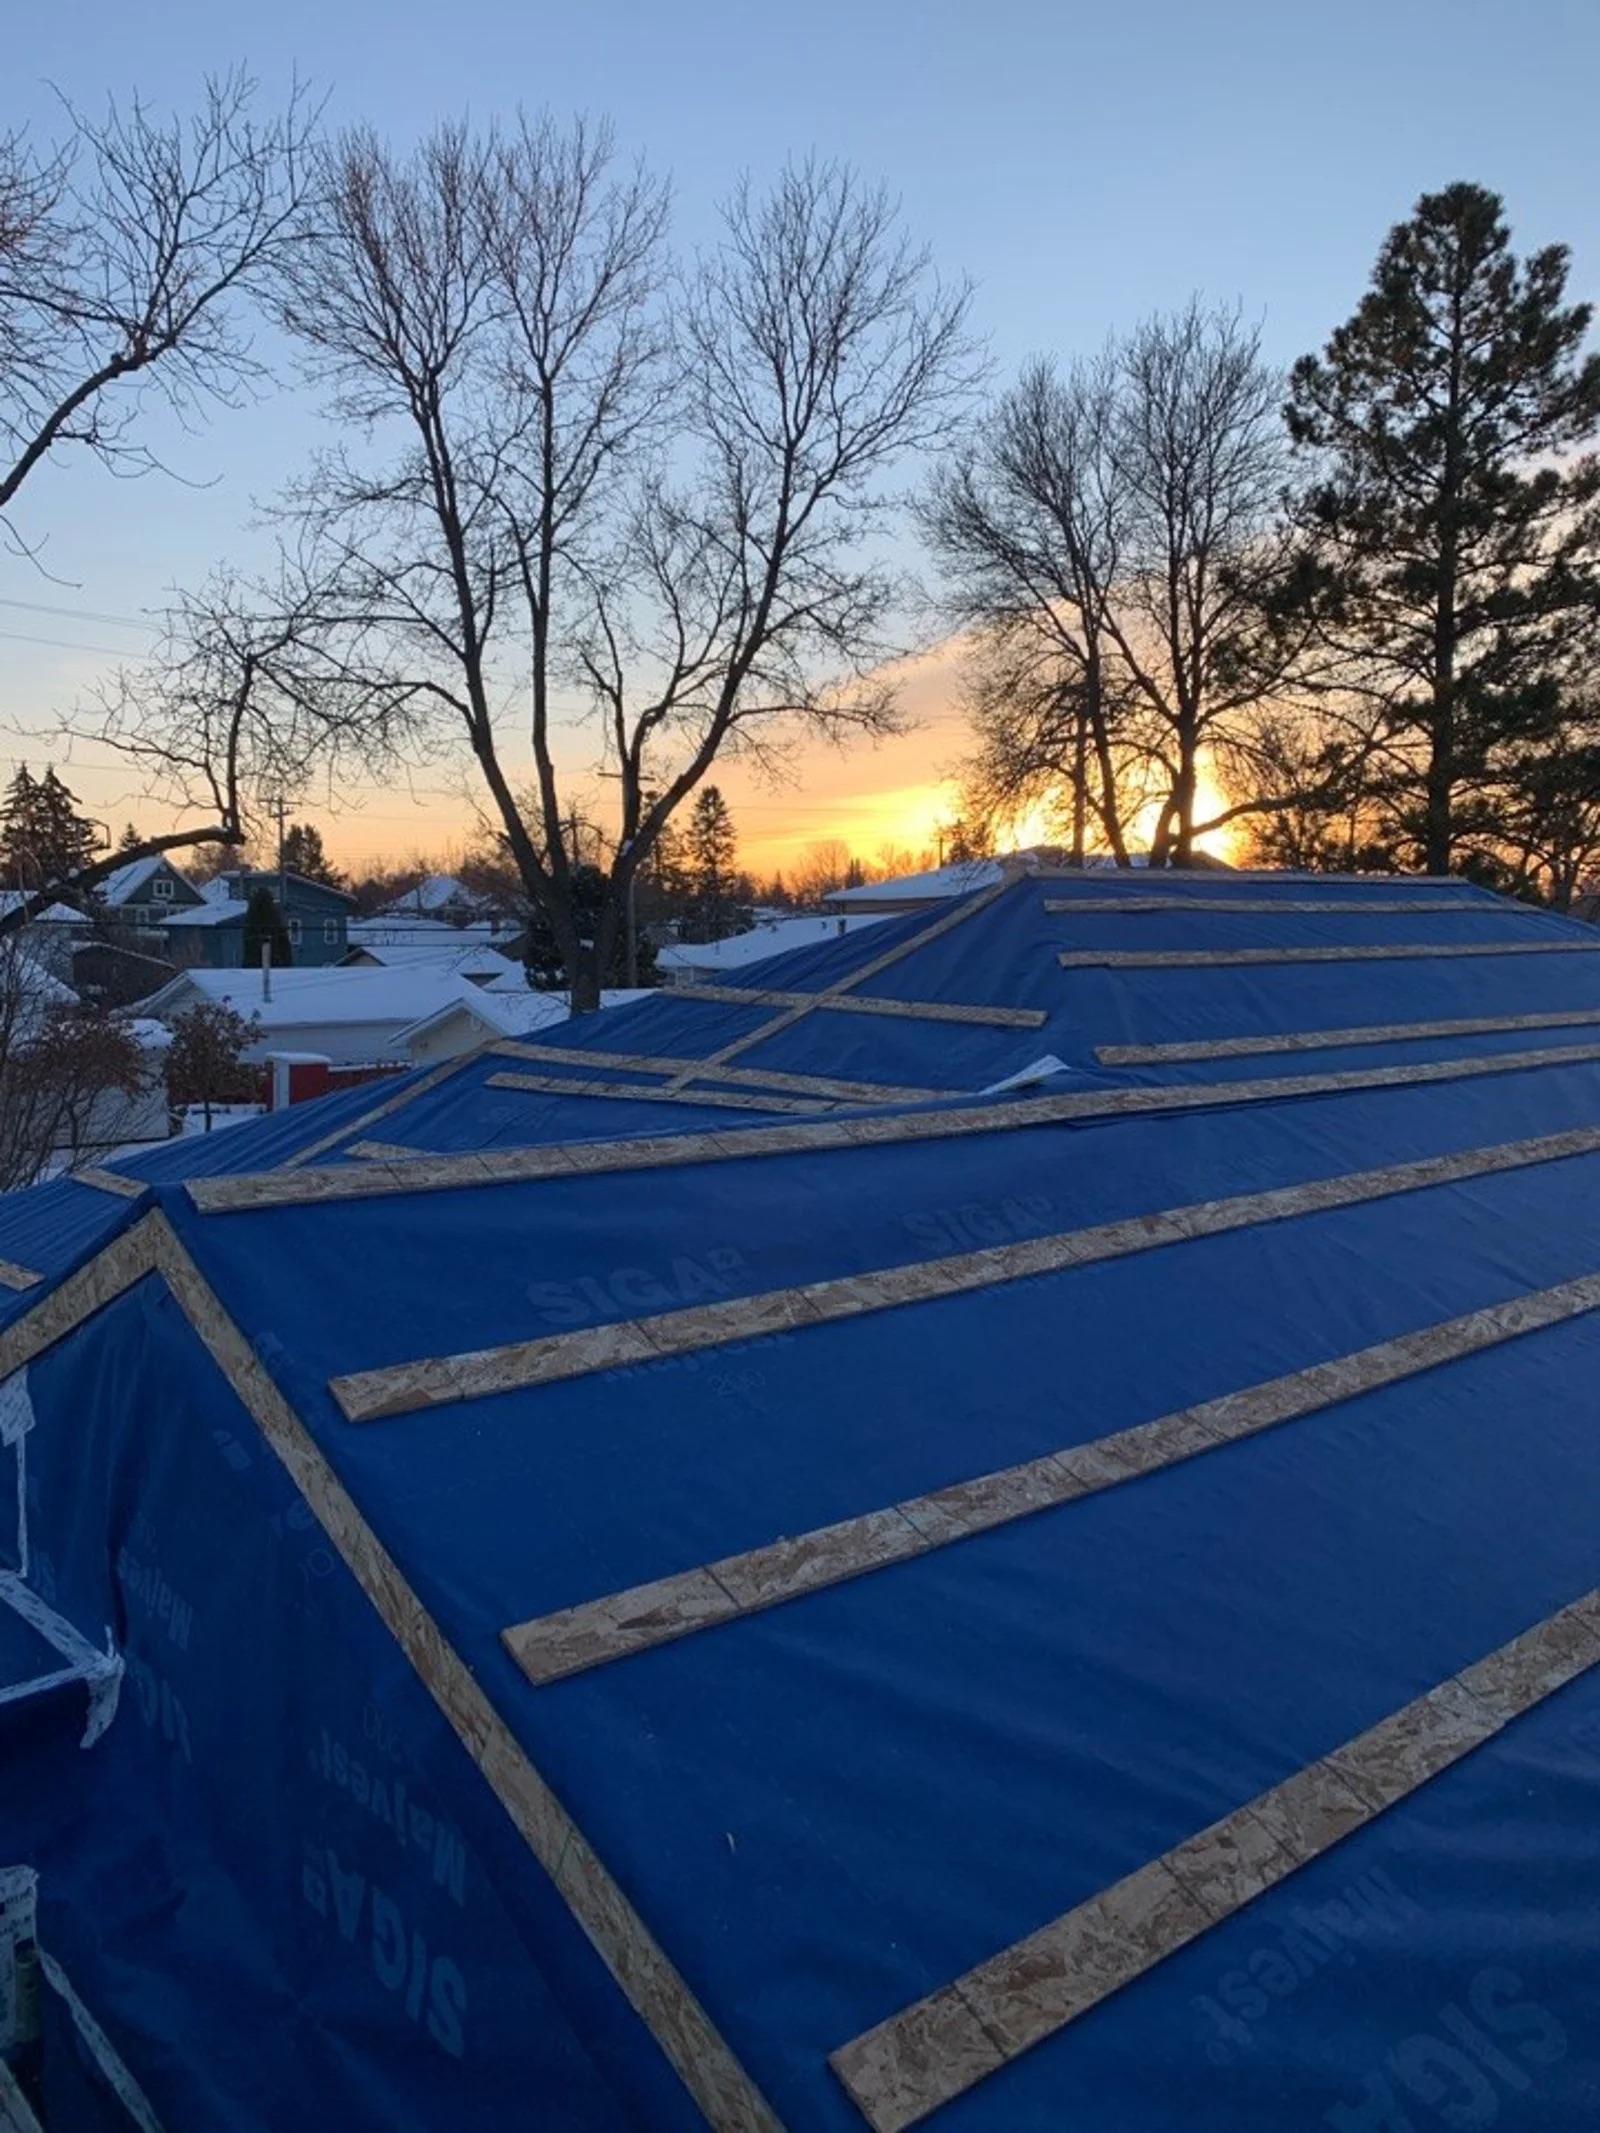
- Cut off the existing roof overhang and install a flap of WRB under the existing shingles to prevent precipitation from getting into the new wall cavity.
- Wrap the roof in a poly vapour barrier and seal it to the WRB flap.
When the panels were built and delivered, Butterwick crews worked with a crane operator to install them. All the panels were installed in less than a day and fit beautifully within the design tolerances. The new high-performance windows were factory-installed in the panels. Doing this in a controlled environment results in bullet-proof installation that enhances long-term durability.
Post-panel installation:
- Secure the panels using the pre-installed tie-back straps.
- Blow in cellulose insulation (R28) for new panels.
- Seal the WRB flap protecting the cavity behind the wall panels to the top of the wall panel.
- Seal the water-resistive barrier (WRB) from panel to panel and the panel support box.
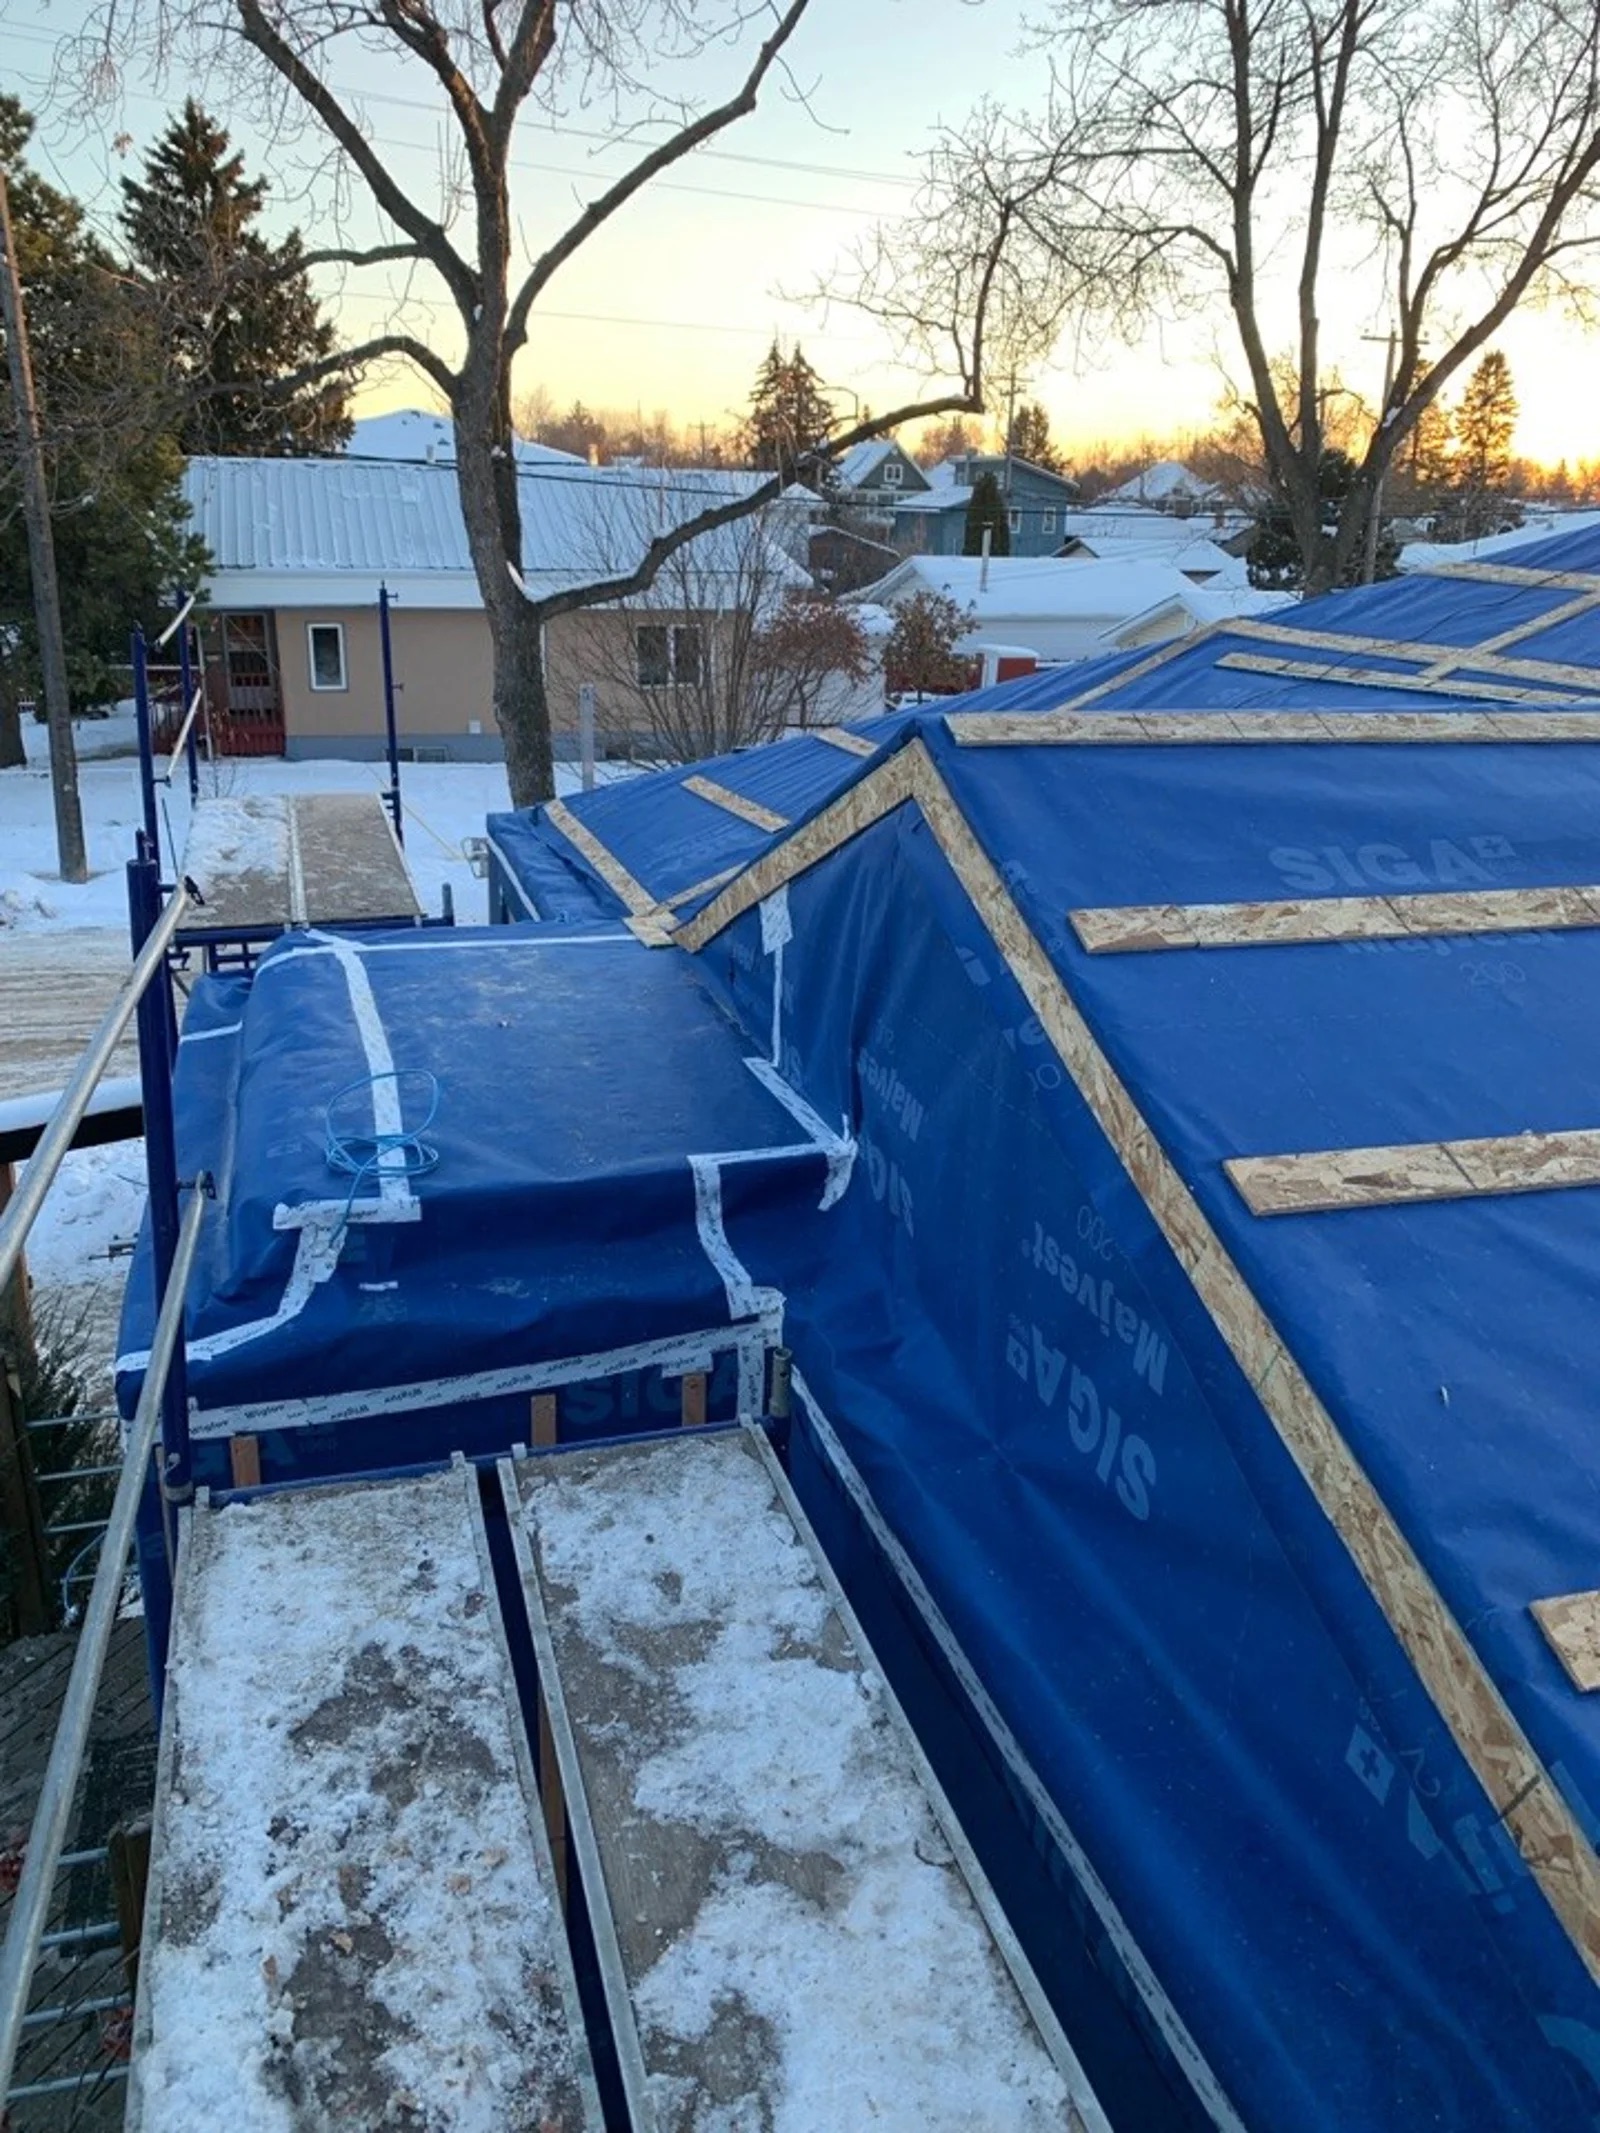
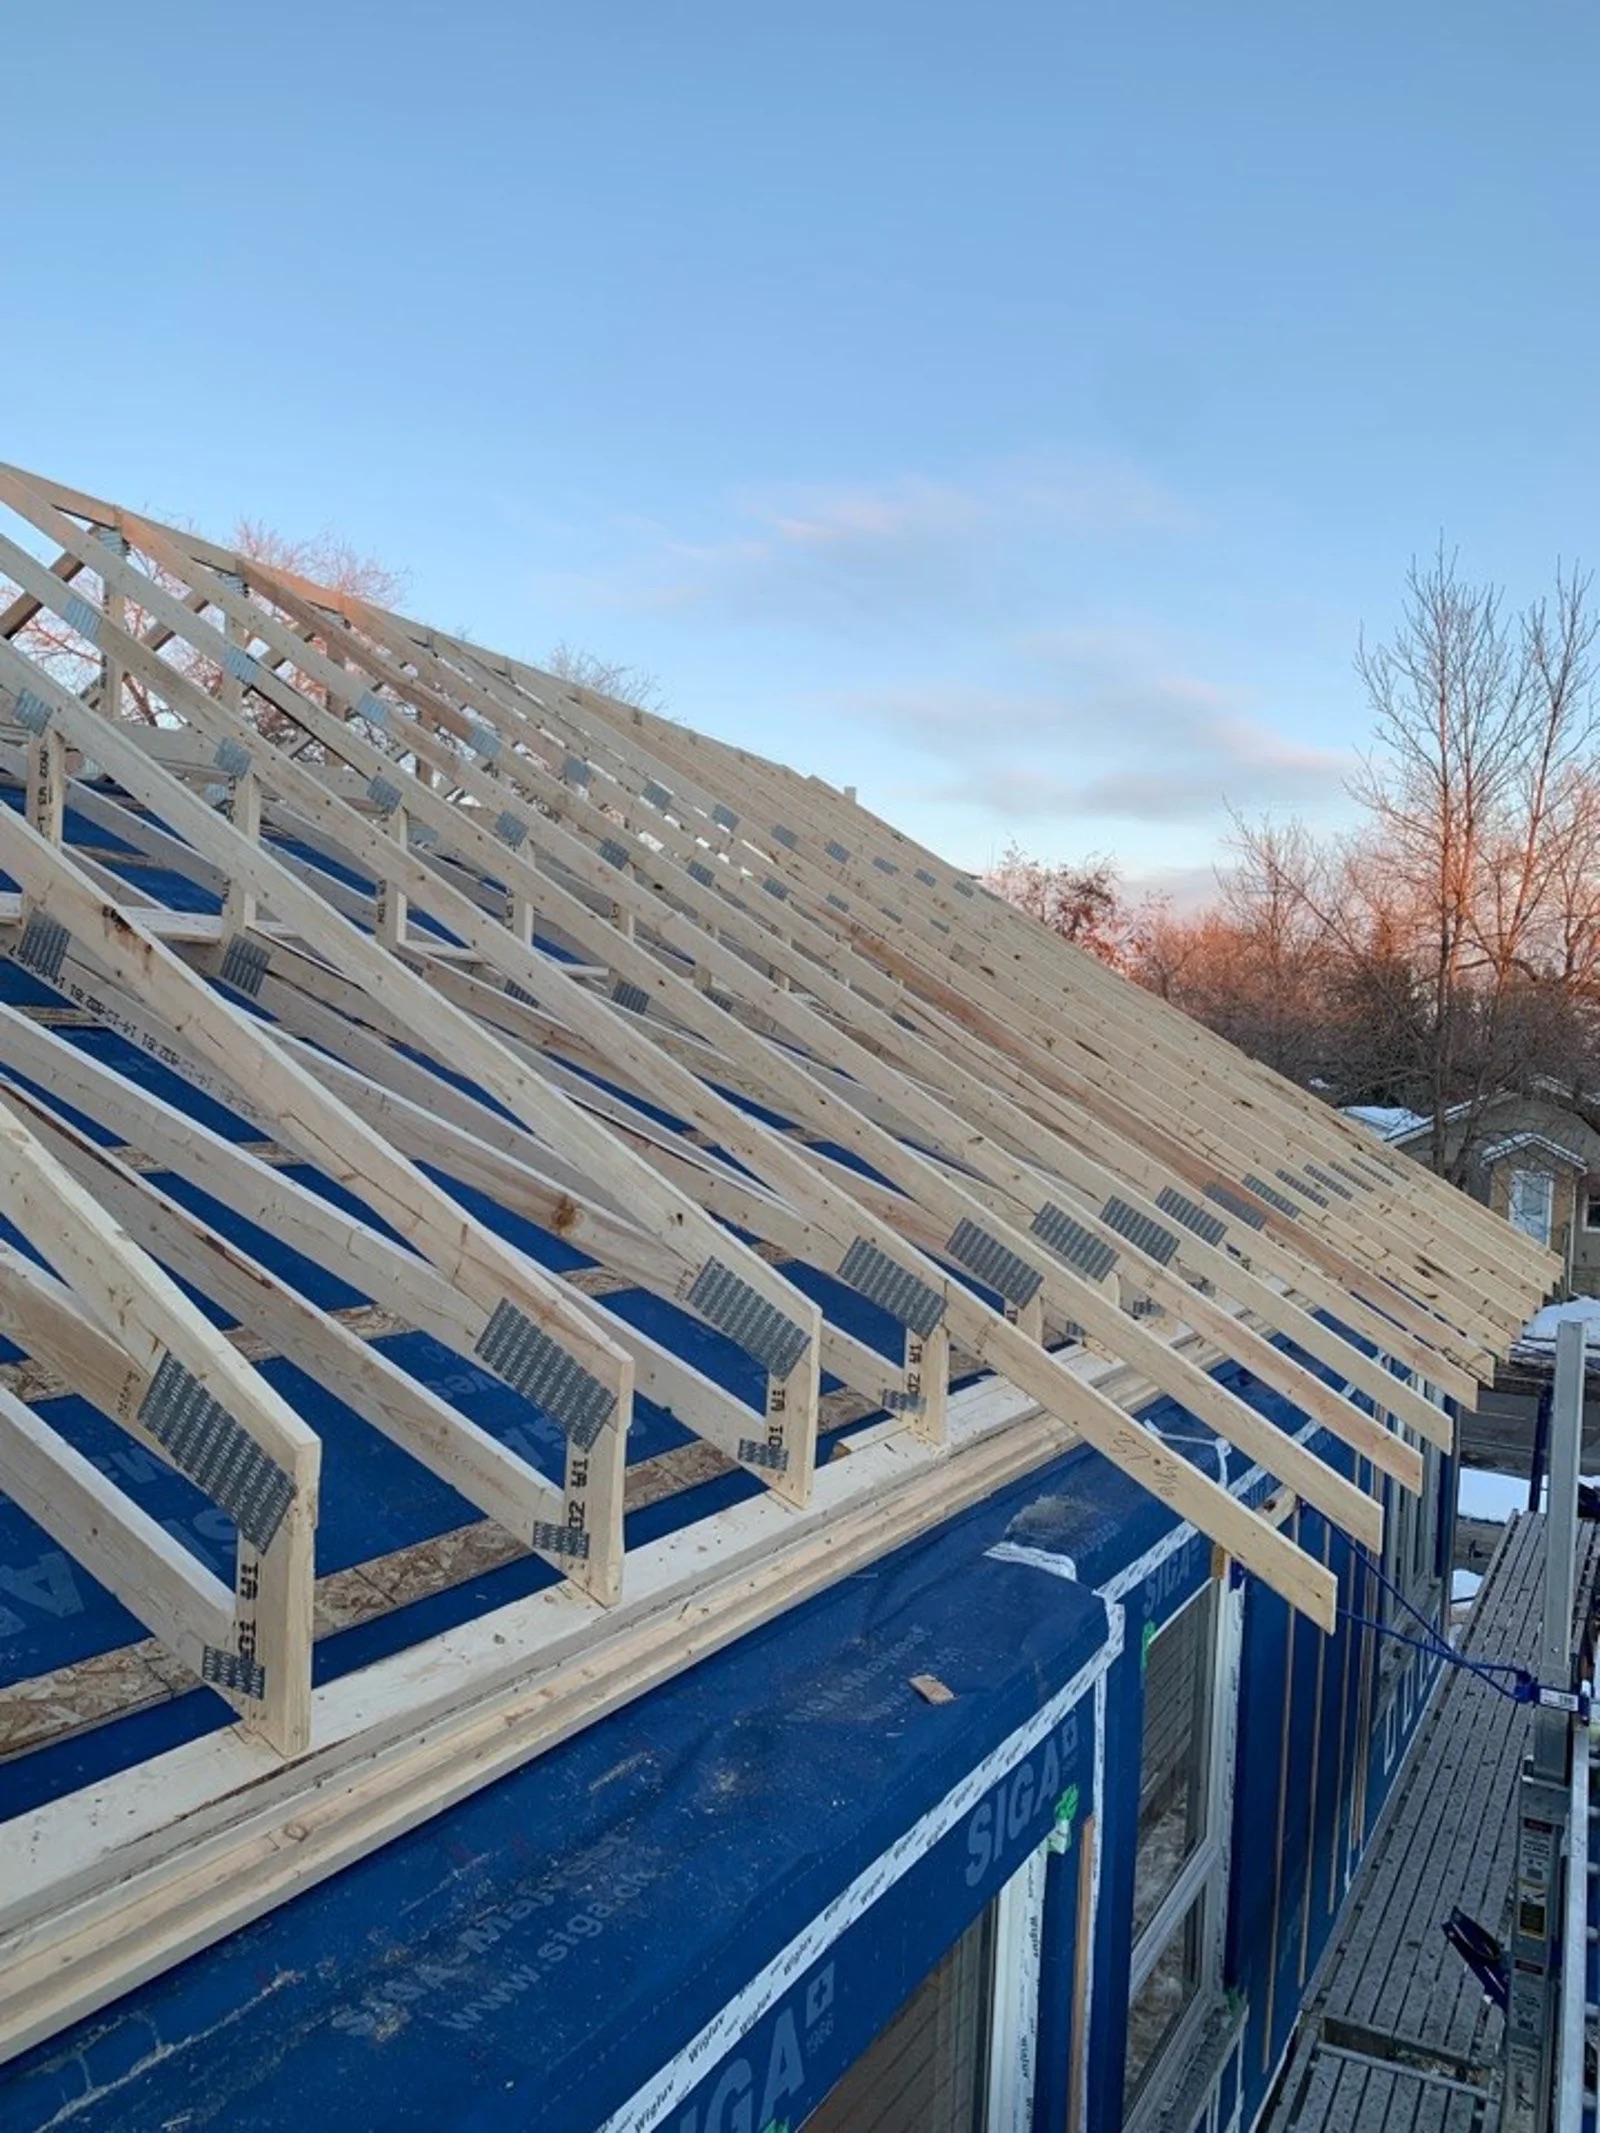
- Install a new truss roof over the existing roof.
- Blow in attic insulation before the roof is shingled (R50)
- Shingle the roof.
- Make a continuous air seal between the roof poly and the panels’ water-resistant barrier.
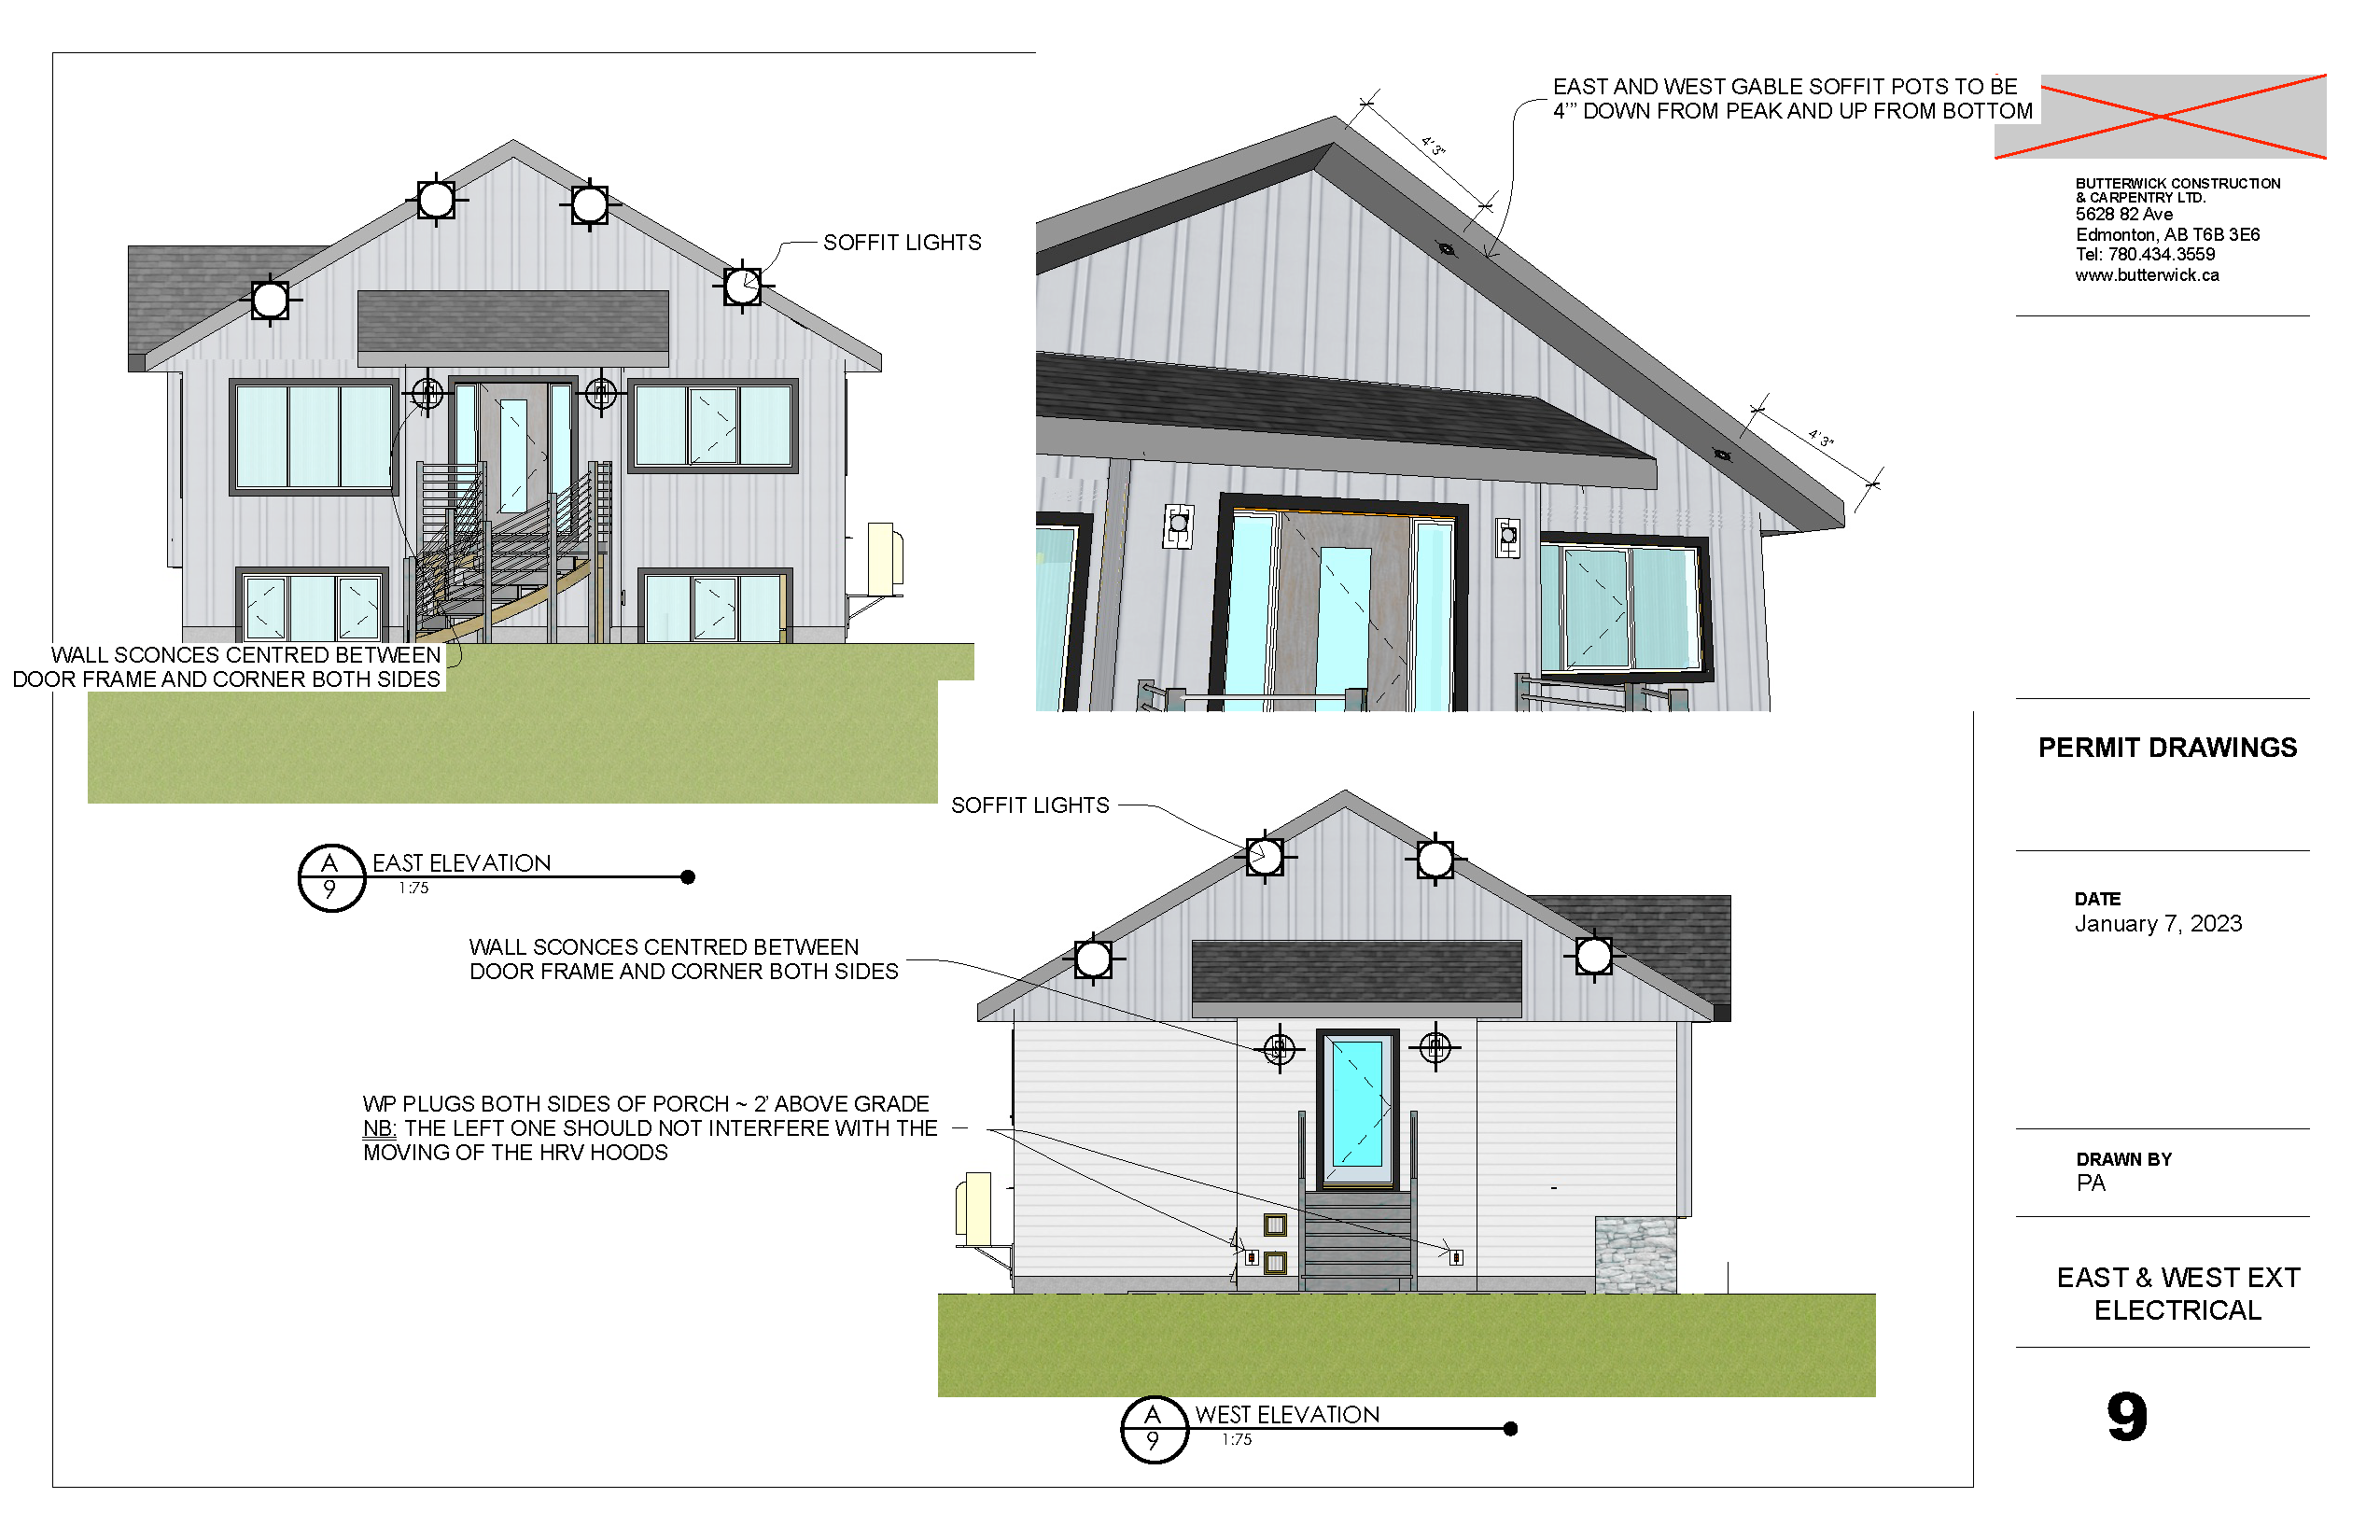
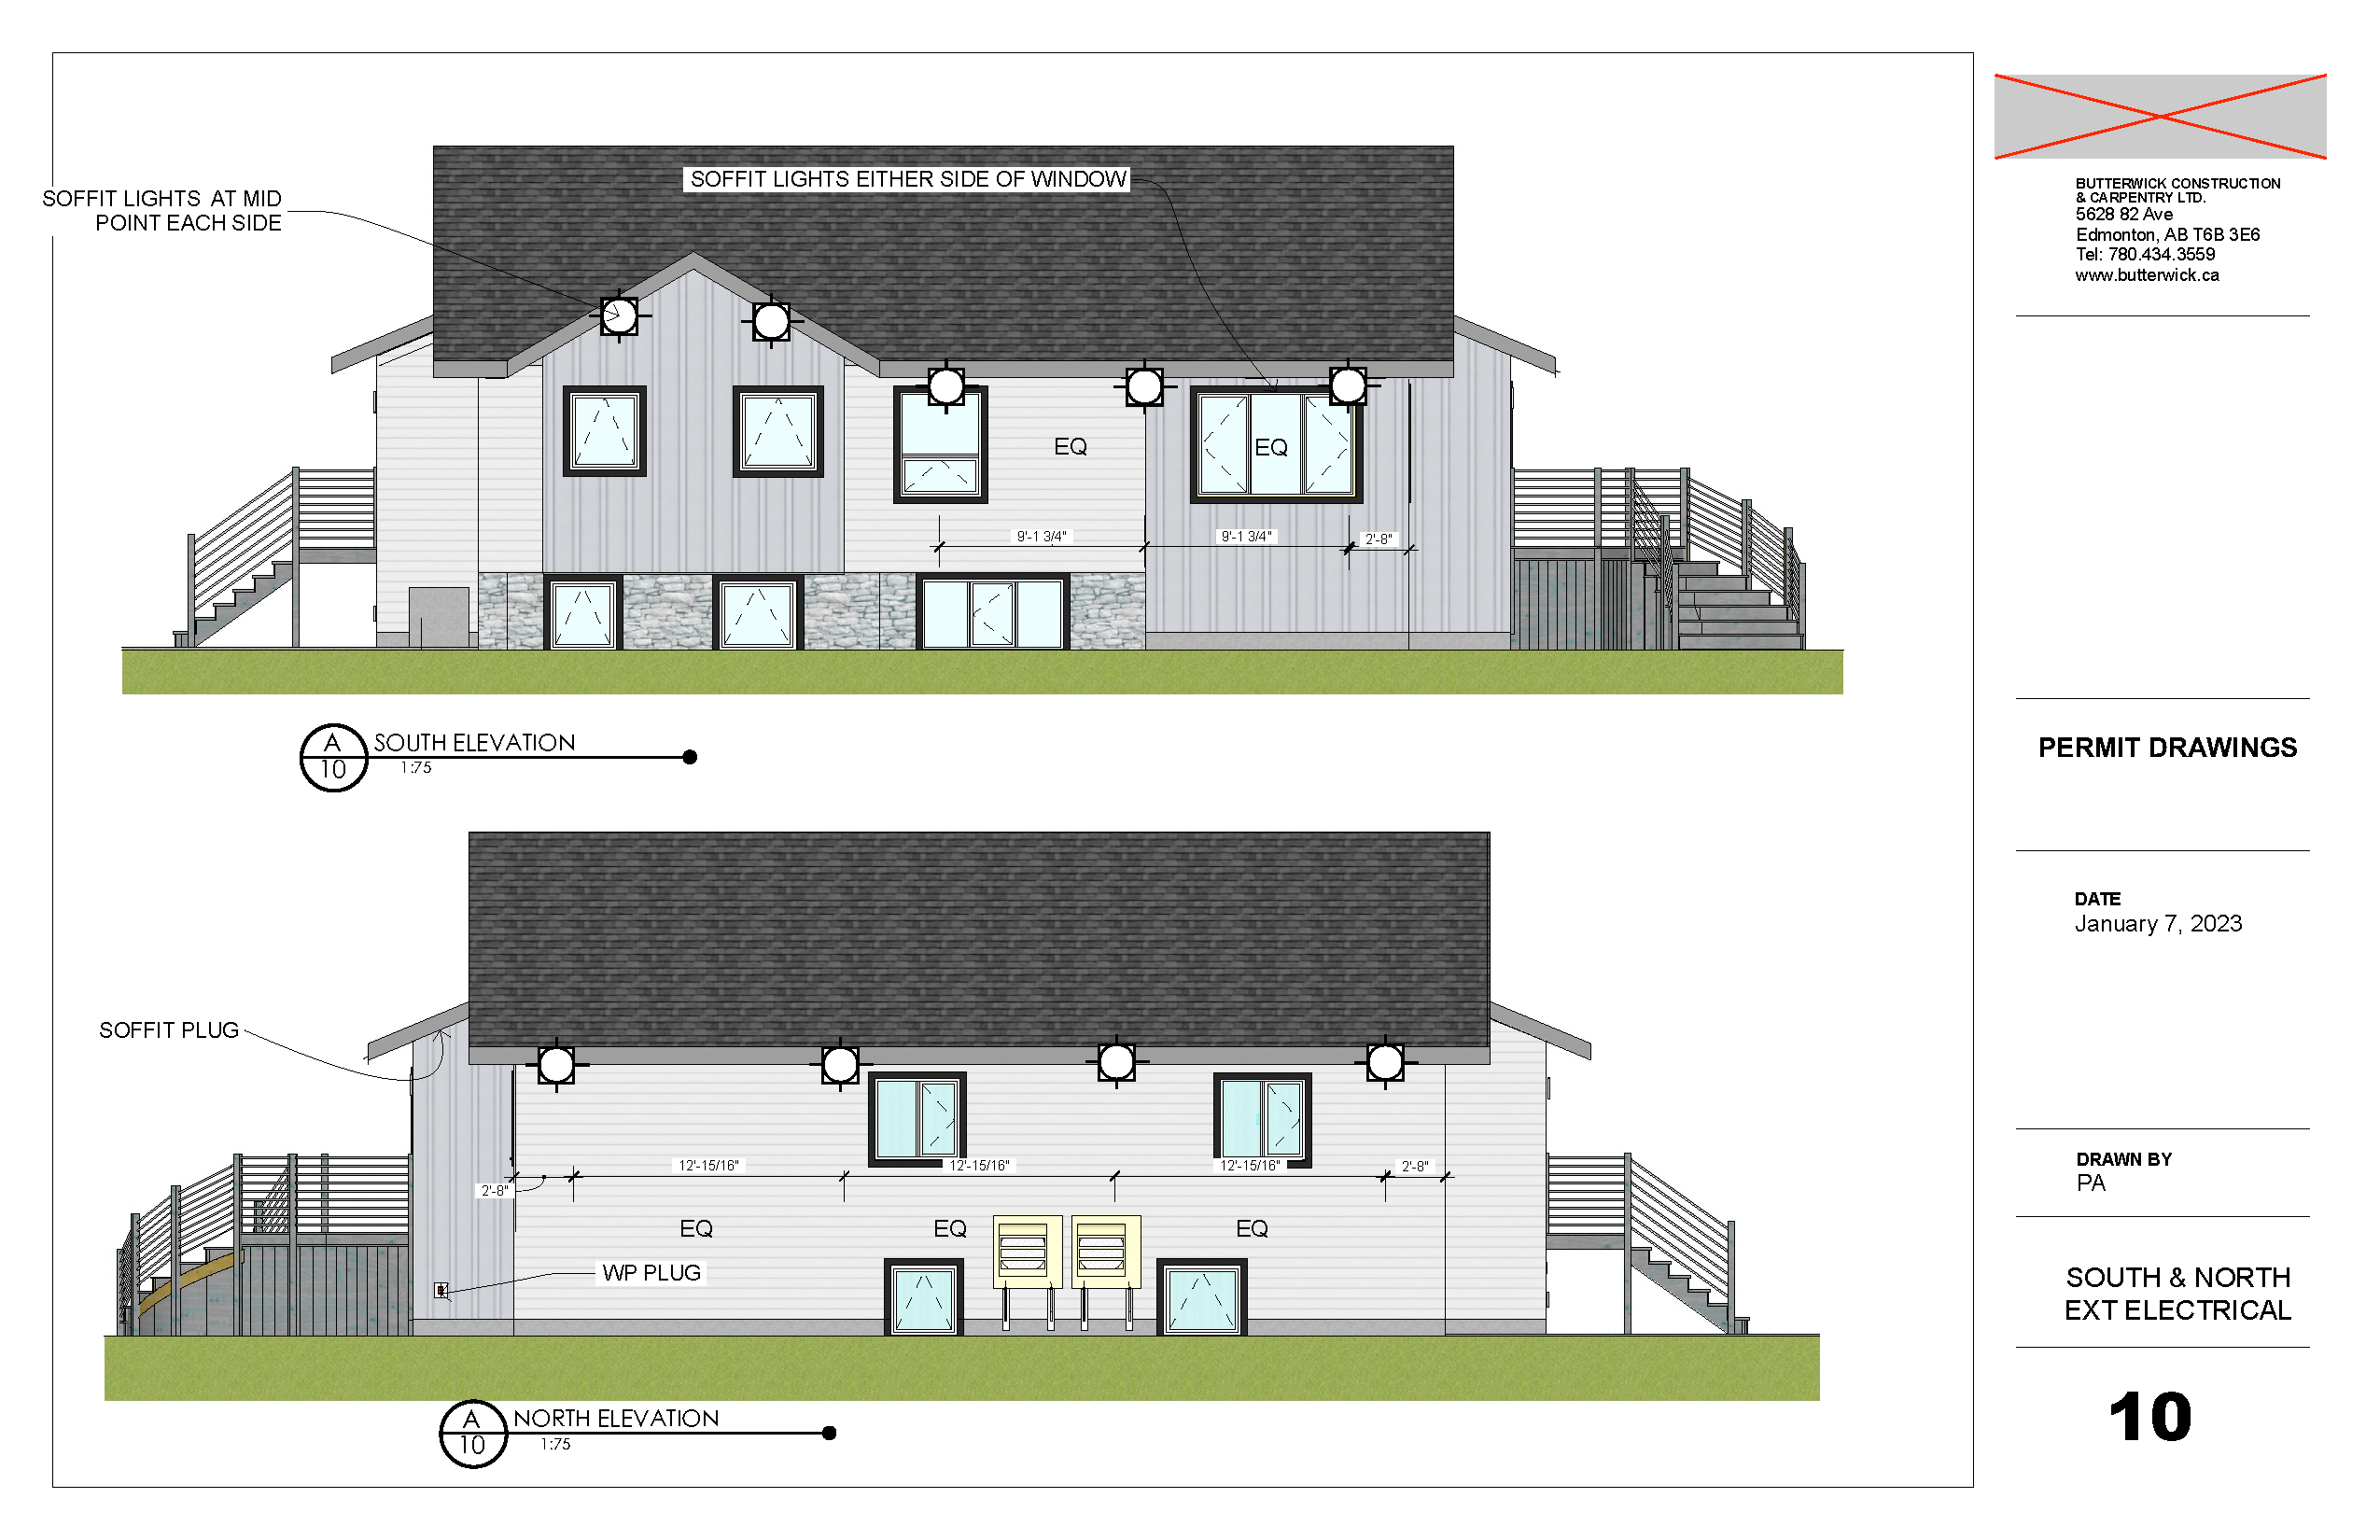
- Interior finishing around windows and doors
- Exterior finishing – new siding, facia and soffits
Funding Sources Funded in part for innovation by SSRIA
Getting to Net Zero
In the future, the owners plan to add solar to the house and garage, making the home emissions-free with enough capacity for an electric vehicle.
Lessons Learned
Challenges
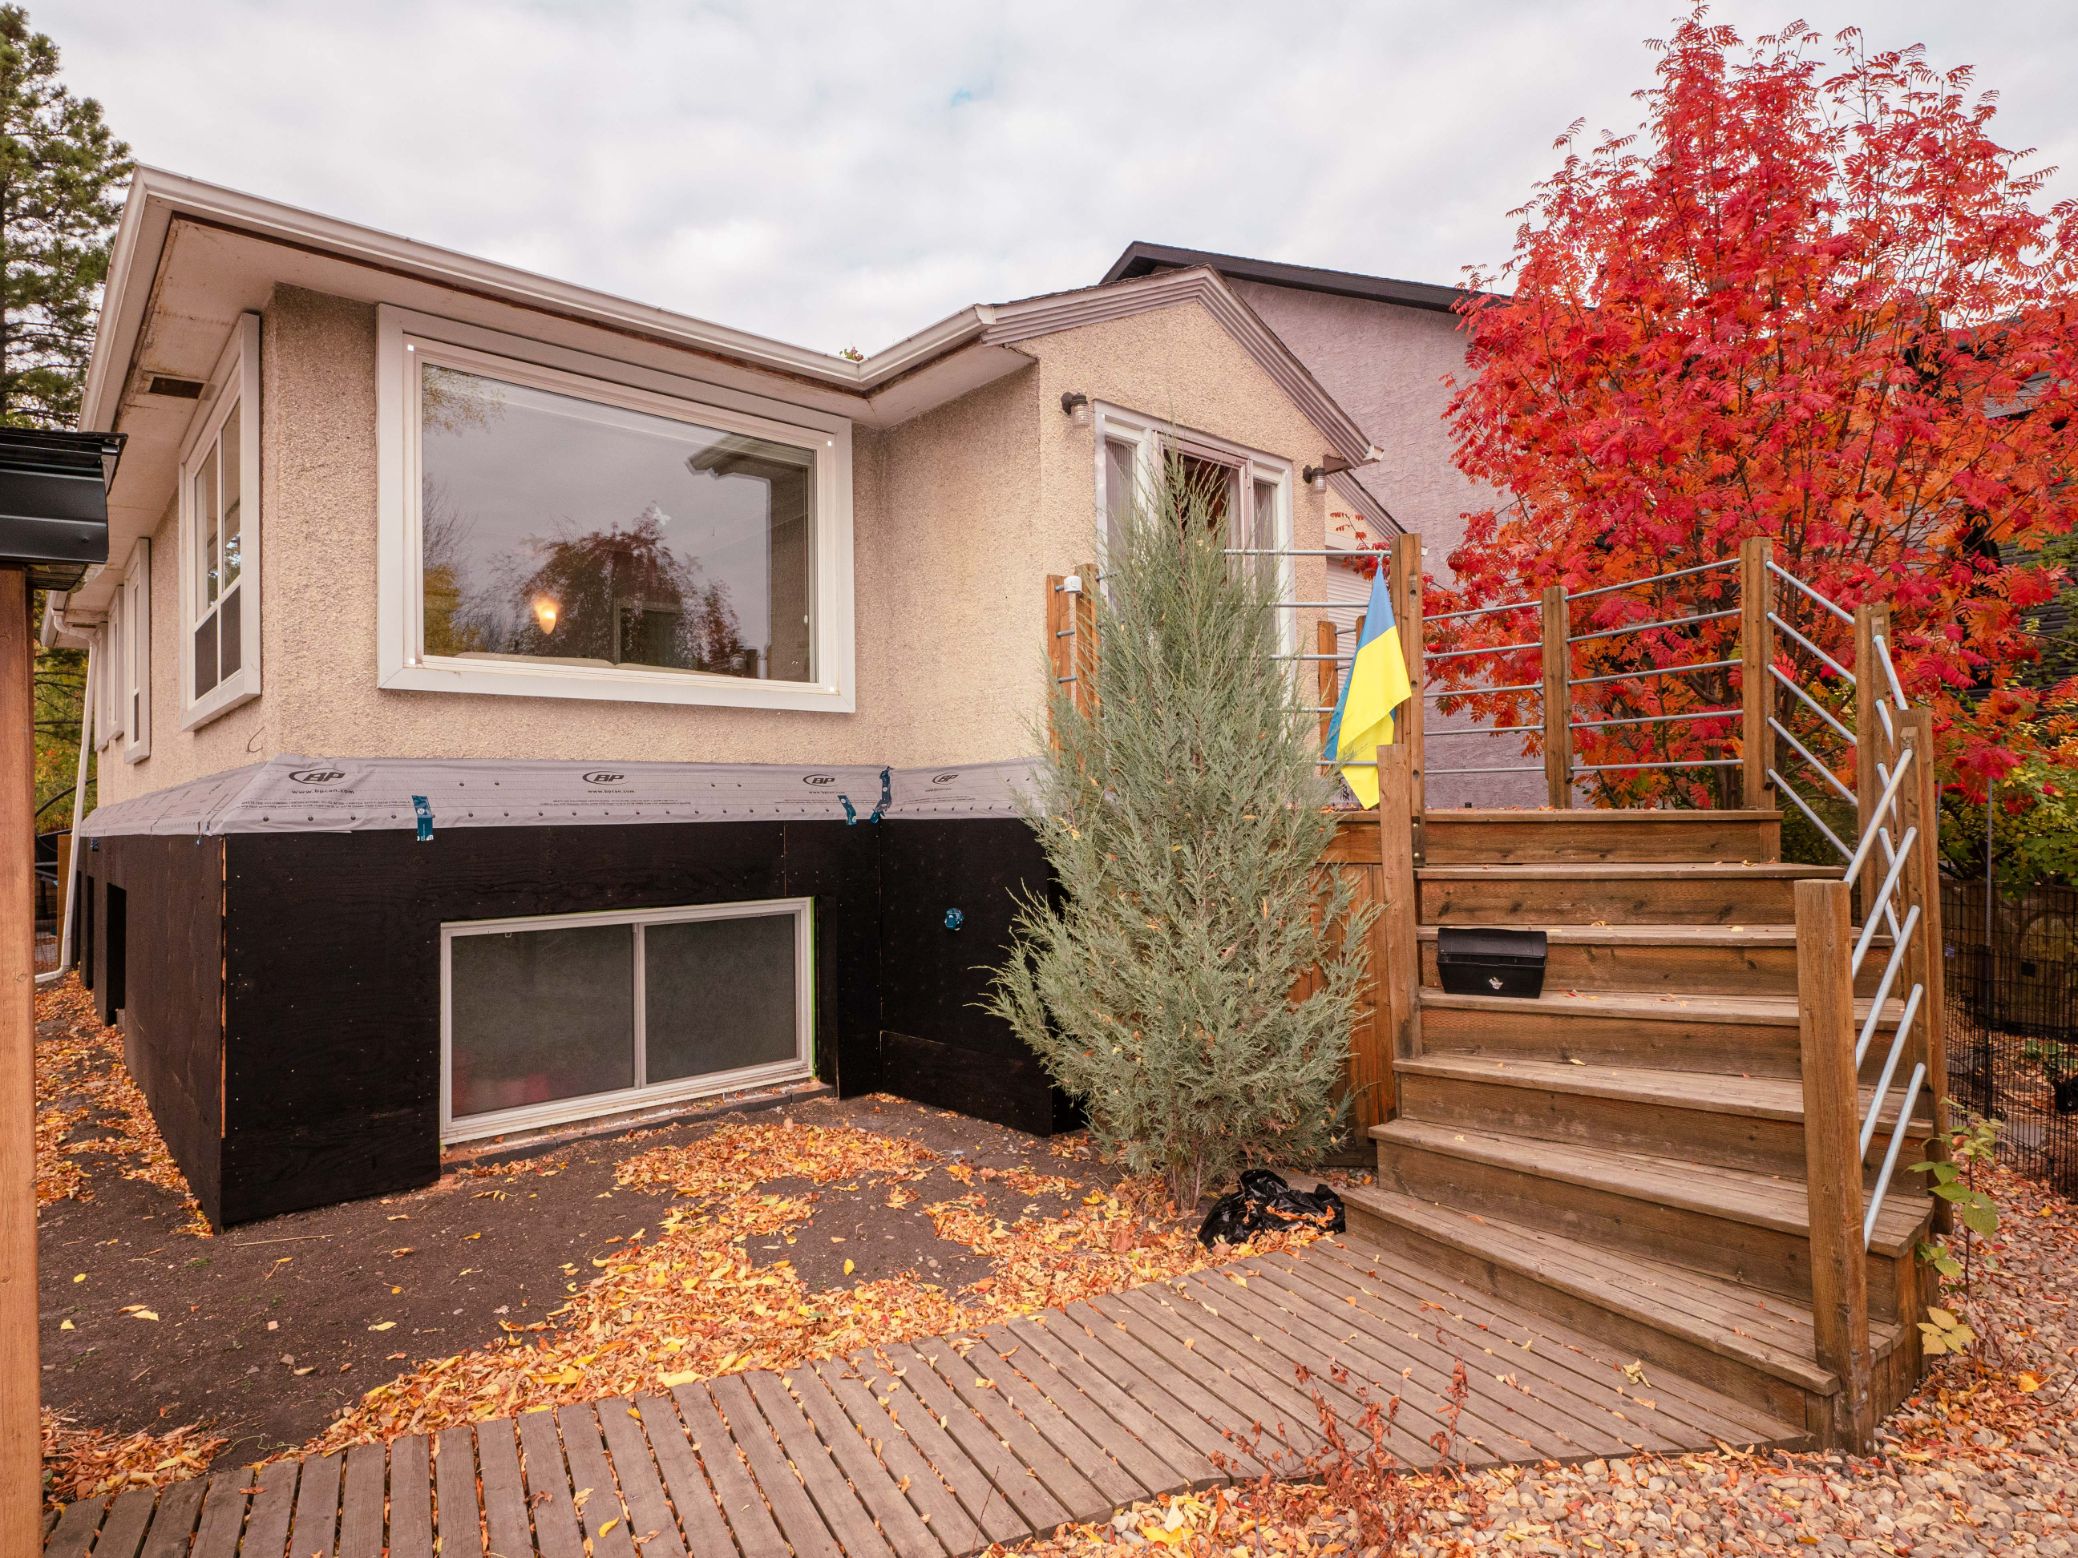
- Back porch: The home’s back porch rested on piers instead of the basement foundation and the family wanted to retain the storage space under the porch. Maintaining insulation and air tightness around and under the porch required some nifty detailing that can be seen in the drawings.
- Basement suite: Another aspect of the project was its fully-finished basement suite. While the family currently uses the whole house, they want the option to rent out the basement as a legal suite after their kids leave home. Accommodating the basement suite required additional planning to install two separate HVAC systems that comply with building code. It also meant finding paths for the intakes and exhausts for the two HRVs without making duct runs too long and windy.
- New roof: There were three considerations that led to the choice of a new scissor truss roof over the existing one. The existing roof overhang was too short to accommodate the increase in wall thickness resulting from the panels. The attic had vermiculite insulation that likely included small amounts of asbestos, meaning costly remediation would be needed before the attic could be air-sealed and reinsulated. The owners wanted to change the roofline for aesthetic reasons anyway. Given these factors, it made more sense to use scissor trusses to frame and insulate a new airtight roof right over the old one.
- Heat Pump installed before insulation complete: Because the original block chimney needed to be removed to accommodate the HRV ducting, the new heat pumps were installed before crews finished making the house airtight and fully insulated. Because this happened in the dead of winter, the owners spent a lot of money heating the home, which only had its original insulation and poor airtightness.
What went well
- Panel Installation: Like other panelised retrofits Butterwick Projects has done, the panels fit perfectly, proving the panelisation works. Watch a video of the panel fly in here.
- Insulating the basement: As the home needed new weeping tile anyway, installing the foundation insulation on the exterior was a piece of cake. The foundation was already excavated.
- Previous experience with panelization: As this project was the builder’s third panelized single-family-home retrofit, it benefited from the learnings of the first two.
Before & After
General |
Envelope |
Mechanical & Electrical |
Annual Energy Usage |
Carbon Emissions |
Technical Documents
Drawings or Details
Photos
During Construction

Post Retrofit